Home Blog Page 4

Top Financial Tools For Freelancers Spark Success

0

Managing money as a freelancer can feel confusing. You’re not the only one. Even successful freelancers need simple tools for invoicing, budgeting, keeping track of expenses, and filing taxes.

When you use the right tools, you can handle a changing income and lower your stress. In this guide, we cover five tool types that make money management easier. We explain what each tool does and how it fits your needs.

Your next step: Think about one area where you struggle, maybe tracking expenses, and try a tool designed for it this week.

Key Financial Tool Categories for Freelancers

When you sort your financial tools into clear groups, picking the right one becomes much easier. Knowing what each tool does can help you match it to a particular money challenge.

  • Accounting platforms: These tools let you invoice, snap receipts, and manage taxes all in one place.
  • Budgeting apps: They offer real-time alerts and flexible plans so you can stay on track even with unpredictable income.
  • Expense trackers: These automatically sort your spending and scan receipts, cutting down on manual work.
  • Invoice management systems: With professional templates and automated payment reminders, they make billing multiple clients simpler.
  • Tax filing solutions: They give you quarterly estimates and help calculate deductions, making tax deadlines less stressful.

These five tool groups tackle common freelance money issues. They keep your income and expenses organized, simplify billing for various clients, and ease the worry during tax season. Your next step is to review your current tools to see which category best meets your needs. This simple check can help you lower daily stress and manage your money in a smarter way.

In-Depth Comparison of Freelance Accounting Software

img-1.jpg

Freelancers need software that does the basics really well. Look for tools that are easy to navigate, create clear invoices, quickly scan receipts, and make tax reporting simple. It also helps if the software can work with other apps you use to cut down on manual work.

FreshBooks comes in different pricing plans that work for various budgets. Its design is straightforward, making client management simple. You can also use its API to connect other tools and choose from many invoice templates to get billing done faster. Keep in mind, if you need more advanced features, the price might go up.

QuickBooks Solopreneur shines with features like automated reminders that help you avoid late payments. It syncs with your bank to update transactions in real time, and its mileage tracking is very handy if you log business trips. These automation features can save you time, especially when handling several clients.

Wave is a smart choice for those just starting out because it charges no monthly fee. You get free invoicing and can directly link your data to Google Sheets, making integration a breeze. However, Wave doesn’t offer as many advanced reporting features as some paid programs, so it might not be enough as your business expands.

Software Pricing Key Features Best For
FreshBooks Multiple tiers API, templates, customizable invoices Freelancers needing a robust tool
QuickBooks Solopreneur Mid-range Automated reminders, bank sync, mileage tracking Freelancers handling frequent transactions
Wave Free Google Sheets integration, basic reporting Budget-conscious beginners

Your next step: Pick one tool that suits your needs, try its free trial or demo, and see how it can simplify your freelance accounting tasks.

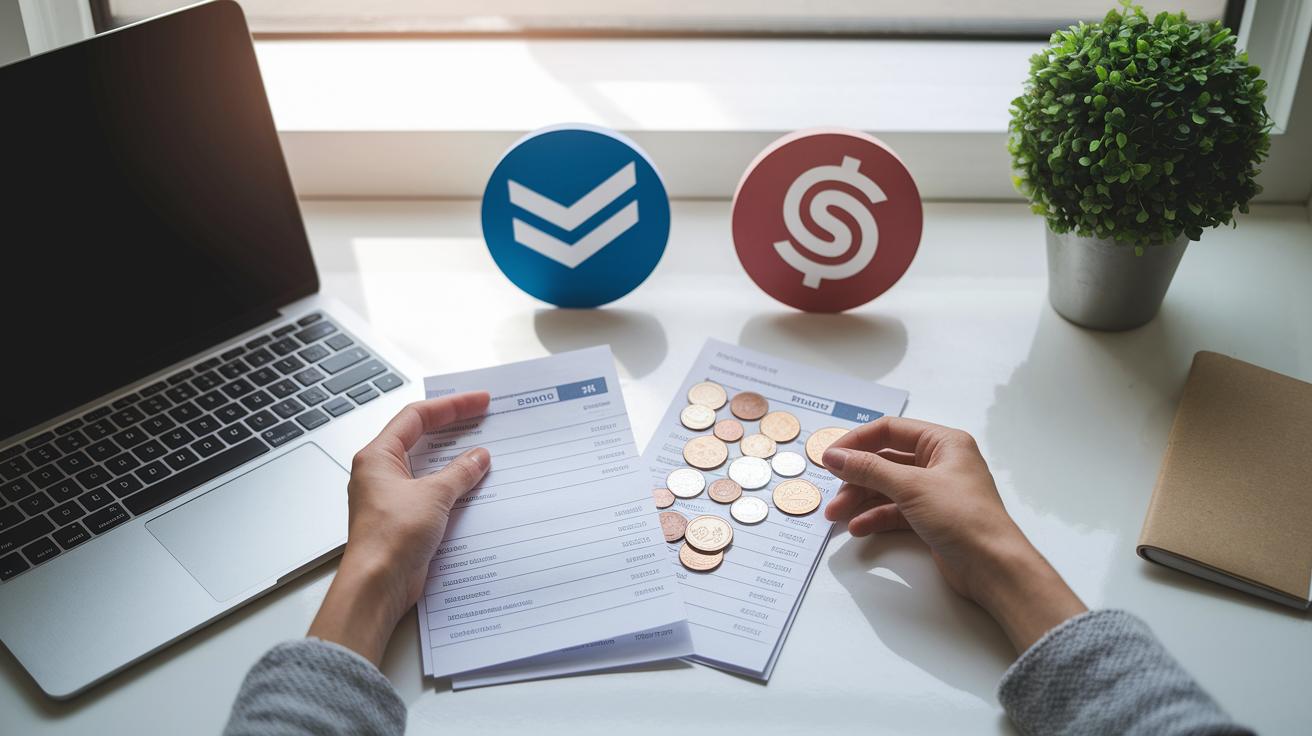
Best Invoicing and Payment Processing Systems for Freelancers

Freelancers need simple ways to send invoices and receive payments so cash flow stays steady. We’ve rounded up a few tools that help cut delays, work with many currencies, and make billing more straightforward.

  • QuickBooks: This tool offers easy-to-use templates and sends automatic payment reminders. It supports several currencies and comes with moderate fees. It’s a smart pick if you want to cut down on late payments.
  • Grey: This service lets you make low-fee transfers in over 20 major currencies. It settles payments quickly and keeps fees low, making it great for handling payments from around the globe.
  • Stripe: Ideal for those who need a custom solution, Stripe offers smooth, API-driven payment processing. It handles a wide range of currencies and comes with competitive fees. It fits well if you need deep integration with your own system.
  • PayPal: Known worldwide, PayPal sends real-time payment notifications and works with nearly every currency. Its fee structure is standard, which makes it a practical choice for freelancers working with international clients.

Your next step: Review these options and choose the one that fits your business needs today.

Expense Tracking and Receipt Management Tools for Freelancers

img-2.jpg

Manual expense tracking can slow you down. Writing every expense or storing paper receipts wastes time and can lead to errors. If your income is unpredictable, a digital tool can help you stay organized and cut down on mistakes.

Try Expensify if you want to save time. Snap a picture of your receipt and watch as the app captures details, sorts expenses, and even gets your reports ready for tax time, all in minutes.

Zoho Expense is another solid option, especially if you work with others. It lets multiple team members approve expenses, tracks mileage, and organizes your spending so you avoid duplicate entries or missed deductions.

If you use accounting software, consider Dext (Receipt Bank). Its tight integration quickly imports receipt data into your books, reducing manual input and making tax reconciliation smoother.

Your next step: Start digitizing your receipts as soon as you get them. Try one of these tools today to keep your records tidy and audit-ready.

Top Freelance Tax Filing and Estimation Software

Freelancers often struggle with managing quarterly tax payments and keeping track of every deduction. Missed deadlines or overlooked expenses can lead to fines or overpayments. Tax software with built-in reminders, mileage tracking, and deduction search tools can make your tax season a lot easier. This type of software reduces the time you spend on calculations so you can focus more on your clients. It works like a tax estimator to make sure your quarterly payments are correct and all deductions are captured.

Software Price Core Features Best For
QuickBooks Self-Employed Moderate Quarterly reminders, mileage tracking, expense categorization Freelancers looking for a comprehensive tax estimator
TurboTax Self-Employed Subscription-Based Industry-specific deduction finder, invoice tool integration Those needing a deduction calculator online with robust filing support
H&R Block Self-Employed Competitive Live CPA support, automatic deduction search, easy tax submission Freelancers who prefer professional guidance alongside DIY solutions

Choosing the right tool depends on how complex your finances are. DIY tax tools let you file on your own quickly and offer automated features that keep you on track. On the other hand, add-ons with live professional support give you an extra layer of reassurance when your income streams or deductions get complicated.

Your next step: review your finances and try one of these tools to see which fits your needs best.

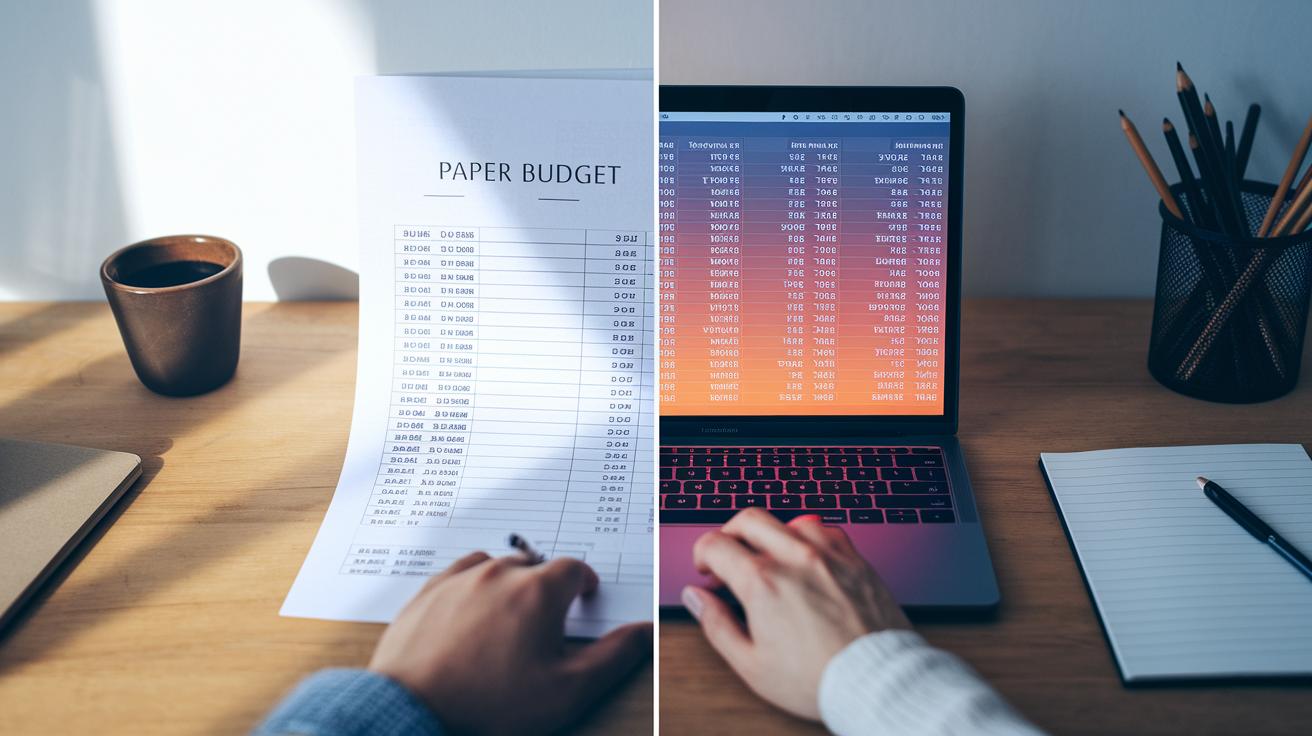
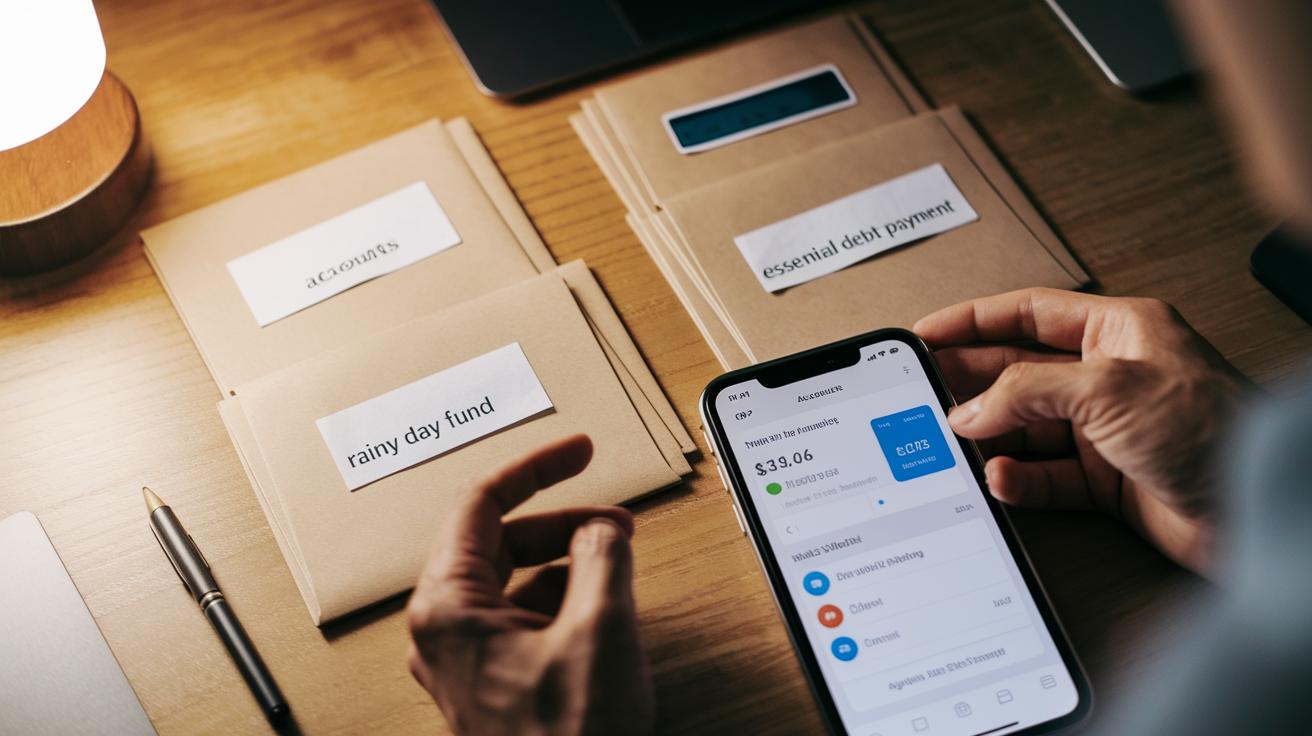
Smart Budgeting and Cash Flow Management Apps for Freelancers

img-3.jpg

Keep an eye on your cash flow to see how much money is coming in and going out. Real-time updates help you move from reacting to your money to planning ahead. With a customizable budget planner, you can match your spending plan to your actual income timetable. Try this: set up your budget today using a free template.

YNAB uses a rule-based system that gives every dollar a purpose. This works well when your income changes each month. You also get real-time alerts so you know immediately when funds are low. This approach is very close to what’s called zero-based budgeting, which means you plan for every dollar you have. Learn more about setting up a zero-based budget here: https://thefreshfinance.com?p=1371.

PocketSmith and Money Organizer help you forecast what lies ahead. PocketSmith can predict your finances up to 12 months in advance, so you can prepare for big bills or lean months. Money Organizer brings all your accounts into one view, making it easier to see where your income comes from. Combine these insights with an expense tracker to keep your finances in check.

Your Next Step: Pick one app and try it out today to see which one fits your freelance lifestyle best.

Automations and Integrations to Streamline Freelance Financial Tools

Linking your financial apps saves a lot of time by cutting down on manual work. When you connect tools for invoicing, receipt scanning, and budgeting, everyday tasks run on auto-pilot. This means your records update in real time, so you spend less time balancing books and more time growing your business.

Zapier for Connecting Financial Apps

Zapier is a no-code platform that links over 8,000 apps. It helps you sync invoices with your accounting software and upload receipts to cloud ledgers without any coding. The platform even offers AI tips to build smooth workflows. Plus, it protects your data with solid security measures while connecting to apps like ChatGPT, Microsoft Dynamics CRM, Teams, and Jira. This makes it easy for freelancers who aren’t tech experts to automate their systems, letting you focus on client work and business growth.

Alternative Platforms (IFTTT, Power Automate)

If you’re seeking a cost-effective option, try IFTTT or Power Automate. These platforms support many connectors and are easy to set up. They might not integrate as many apps as Zapier, but they work well for freelancers with simpler automation needs or tighter budgets.

Your next step: Review your current financial tools and pick one automated task to set up today. Try testing a platform that suits your budget and needs to see a real reduction in manual work.

Final Words

In the action, we broke down the world of freelance finance into clear tool categories. We reviewed accounting platforms, budgeting apps, expense trackers, invoice systems, and tax solutions. We compared features side-by-side and explored smart automations to cut manual work. Next, pick one category that fits your needs and try a tool that shows promise. Stay positive, take small steps, and soon you'll be mastering the top financial tools for freelancers.

FAQ

What are the top free financial tools for freelancers mentioned on Reddit?

The top free tools featured on Reddit include apps that manage invoicing, budgeting, and expense tracking. Freelancers often use Wave for accounting and YNAB for handling irregular income.

Which free budget apps work well on iPhone and for couples?

The best free budgeting apps for couples and iPhone users include Goodbudget and PocketGuard. They provide envelope-style tracking, real-time insights, and easy mobile updates to keep spending on track.

What budgeting apps are best suited for freelancers?

Budgeting apps for freelancers offer features to track irregular income, manage tax savings, and notify you of cash-flow changes. Tools like YNAB help plan every dollar and adjust to varying monthly earnings.

What is Goodbudget and how can it help with budgeting?

Goodbudget follows an envelope system by dividing money into spending categories. It makes it easy to plan and monitor your budget using a mobile-friendly interface.

How does YNAB benefit freelancers?

YNAB benefits freelancers by teaching you to assign every dollar a job. It helps manage variable income and ensures you cover essentials like taxes and savings throughout the month.

What does PocketGuard offer for managing finances?

PocketGuard provides real-time tracking of your spending, alerts when nearing limits, and a snapshot of available funds. It helps freelancers quickly identify overspending and maintain control.

How do QuickBooks, Spendee, and Monefy support freelancer finances?

QuickBooks streamlines invoicing and bookkeeping, while Spendee and Monefy offer clear visual budgeting tools. Together, they help freelancers track expenses, manage cash flow, and stay organized.

3 Best Debt Reduction Programs Boost Your Future

0

Ever wonder if your debt is stopping you from achieving a better future? Many people feel stuck with bills and repayment plans that seem too confusing.

We’ve simplified things by highlighting three top programs designed to lower your debt. In this post, we break down each option in plain language, explaining the costs, repayment timing, and how your credit might be affected.

Your next step: Pick one of these debt-cutting plans to explore further and see if it fits your financial goals.

Debt Reduction Programs: Expert Reviews & Comparisons

We review the top debt reduction programs to help you tackle your debt quickly and effectively. In our guide, you’ll find clear details about cost, timing, and how each option might affect your credit. We cover everything from consolidation loans and debt management plans to balance transfers, debt settlement, credit counseling, and even bankruptcy. This way, you can easily spot the solution that fits your needs.

Each option comes with its own benefits and challenges. Some plans lower fees and simplify your monthly payments, while others work better for protecting your credit score. We break down typical fees, repayment timelines, and credit effects to help you pick a plan that suits your situation. Use this snapshot to zero in on the program that helps you reduce debt and strengthen your financial future.

Program Type How It Works Typical Fees Credit Impact
Consolidation Loans Combine several debts into one loan Origination fees; 6–15% APR Minimal if paid on time
Debt Management Plans Counselors negotiate lower interest rates for you $25–$50 monthly fee Moderate impact
Debt Settlement Negotiate a reduced lump-sum payment 15–25% of the settled debt Generally negative
Balance Transfers Move your debt to a card with a low interest rate 3–5% transfer fee Temporary credit dip
Credit Counseling Get free advice and budgeting help Low or no fees Limited impact
Bankruptcy Legally discharge most debts High legal fees Severe impact

This guide is your first step toward a deeper look at each approach. Check out the detailed sections below for practical steps and see what outcome you can expect. Your next step: review your current debt and choose the program that best matches your financial goals.

Debt Consolidation Loans in Debt Reduction Programs

img-1.jpg

Debt consolidation means taking out one new loan to pay off several smaller debts. Instead of managing many due dates, you only have one payment every month. This approach works well if you have several credit card debts or small loans that might benefit from a lower interest rate. For example, try merging three credit accounts into one simple plan.

Consolidation loans usually have rates between 6% and 15% and may come with fees like origination or balance transfer costs. Lenders generally look for a decent credit score and steady income. If you’re paying high-interest rates on many debts, switching to a single low-rate loan might ease your money worries. Imagine replacing 18% and 20% rates with one loan at 10%, that can really make a difference.

Paying your consolidation loan on time can help boost your credit score by reducing missed payments. Most repayment plans span 3 to 7 years, giving you a steady way to lower your total debt over time.

If you have multiple bills due on different dates, consolidation could simplify your finances. Your next step: write down all your debts and check if moving them under one lower-rate loan fits your budget.

Debt Management Plans and Credit Counseling Solutions

How Debt Management Plans Work

Debt management plans help you take control of multiple debts by letting a trusted credit counseling agency review your money situation. They look at your income, debts, and everyday costs to create a single monthly payment plan. By talking with your creditors, they often secure lower interest rates and may even get fees waived. This means instead of juggling many bills, you make one simple payment each month that fits your budget.

Your next step: Consider reaching out to a reputable credit counseling agency to see if a debt management plan could simplify your payments.

Advantages of Certified Credit Counseling

Certified credit counseling offers more than just a repayment plan. Many nonprofit agencies give you free tools, hands-on budgeting help, and even educational workshops. Counselors break down tricky credit terms in plain language, so you can set goals that work for you. Charging only a modest fee of $25–$50 a month, they provide continuous support and clear advice throughout your debt journey.

Unlike DIY methods like the snowball or avalanche techniques, certified counseling brings professional negotiation and ongoing help to lower interest costs and keep your repayment plan on track. This friendly, guided approach saves you time and helps you avoid common mistakes on your road to financial stability.

Your next step: Try contacting a certified credit counselor today to get expert advice tailored to your situation.

Debt Settlement Strategies and Creditor Negotiation Insights

img-2.jpg

If you're close to default and can't keep up with your minimum payments, debt settlement might be a good option. It works best if you can save up enough money to offer as a one-time lump-sum payment. When calls from debt collectors pile up and late fees keep rising, settling your debt for less might help lower your total balance. Keep in mind that professionals might cut your bill by 30% to 50%, but they usually charge 15% to 25% of the settled amount, and your credit score may take a hit.

Try this:

  1. Reach out to your creditors right when your money troubles hit hard. This shows you're serious about fixing the situation.
  2. Write clear hardship letters that explain your money woes and make your case stronger.
  3. Keep copies of every communication, income record, and expense summary to back up your talks.
  4. Save up a lump sum that you can offer in one go to settle your debt.
  5. Follow up consistently with your creditors and note down their responses to keep the process on track.

On average, settling your debt might reduce what you owe by 30% to 50%. While using a professional service could secure a higher reduction, remember that fees might eat into your savings. Also, settled accounts can lower your credit score for years. Success really depends on whether your creditors are open to a deal and how well you document your situation. If you decide to negotiate on your own, be ready to persist and keep thorough records.

Service Type Avg. Fee Average Reduction
DIY Settlement $0 30%
Professional Settlement 15–25% of settled amount 40–50%

Debt Reduction with Balance Transfer Cards and DIY Repayment Methods

Balance transfer cards let you move a high-interest balance to a new card with 0% APR for 12 to 18 months. You’ll usually pay a fee of about 3% to 5% of the amount you transfer. That fee might seem like extra cost, but if you pay off your balance during the promotional period, the interest you save can more than cover it.

Comparing Snowball and Avalanche Methods

The snowball method means tackling your smallest debts first. Once those are paid off, you gain extra money to cover larger balances. This approach gives you quick wins that keep you motivated and moving forward.

The avalanche method focuses on debt with the highest interest rates. By putting extra cash toward these balances, you reduce the overall interest faster. It might take a bit longer to see progress, but sticking with this plan saves more money over time.

Create your repayment plan by writing down all your debts, their due dates, and the required payments. Check your progress at the end of each month and adjust your budget when needed. This clear plan helps keep your credit on track while guiding you toward long-term success.

Your next step: List out your debts today with their due dates and payment amounts, then review your progress every month to ensure you’re hitting your targets.

3 best debt reduction programs Boost Your Future

img-3.jpg

Government programs can help you manage debt without extra fees. For instance, Public Service Loan Forgiveness (PSLF) lets federal and eligible nonprofit employees have the rest of their student loans forgiven after making qualifying payments. This option can ease your long-term debt, making repayments more affordable.

Nonprofit agencies also offer valuable assistance. They provide free credit counseling, mortgage relief, and practical workshops that cover topics like saving for a down-payment or preparing for a return to work. These groups work with you to review your income and guide you on budgeting. Their advice is personalized and free of extra fees.

Before you apply for help, check the eligibility rules. Most programs ask for proof of income, details about your loans, and confirmation of where you live. Gather your documents and speak with a representative to ensure you meet the requirements. Try this: spend a few minutes organizing your paperwork and set up a call with a program advisor to take the next step toward a stronger financial future.

Choosing the Right Debt Reduction Program for Your Profile

Begin by taking a clear look at your money picture. Check your credit score, your monthly income, and your regular expenses. Think about how fast you need to pay off your debt and how much fees you are willing to pay. This helps you find a program that offers both short-term help and long-term freedom.

Next, spend time comparing different providers. Look for clear certifications and read what others have said in reviews. Make sure you understand the fees so there are no hidden surprises. By lining up these details, you can pick a program that offers real help with your debt.

When you have a few programs in mind, compare what you pay up front versus how much you might save in the long run. A do-it-yourself option might be cheaper if you stick to a strict budget, while extra professional help might be worth a little more if it gets you out of debt sooner.

Follow this simple four-step plan:

  1. Review your debts and how much cash you have coming in.
  2. Compare fees between similar programs to see which offers the best deal.
  3. Check provider credentials and read reviews to be sure you can trust them.
  4. Choose the option that fits your money goals and makes you feel secure.

Your next step: Sit down with your financial details and start comparing your choices today.

Final Words

In the action, we broke down debt consolidation loans, management plans, settlements, balance transfer options, and government aid. We compared fees, credit impacts, and ideal candidate profiles while offering simple, repeatable steps. Each section provided clear insights and immediate steps so you can decide which path fits your situation.

Keep using these insights to evaluate the best debt reduction programs and set up a steady course toward improved financial health. Small, practical steps will pave the way for lasting progress.

FAQ

Q: What are some of the best debt reduction programs discussed on Reddit?

A: Discussions on Reddit often highlight both debt consolidation and management plans as top choices, with many users sharing firsthand experiences and advice on effective programs.

Q: What free government debt relief programs are available and how do credit card debt relief government programs work?

A: Free government programs typically offer credit counseling and student loan forgiveness, while credit card relief services help with budgeting and negotiating lower interest or fee reductions.

Q: What are the worst debt relief companies?

A: Some companies receive low ratings due to hidden fees and unsatisfactory customer support. Checking consumer reviews and BBB ratings helps you avoid unreliable providers.

Q: Which debt reduction programs receive high marks in California?

A: In California, many users favor local credit counseling, debt consolidation loans, and nonprofit services that offer budgeting workshops and personalized financial advice.

Q: What do National Debt Relief reviews reveal about their services?

A: Reviews of National Debt Relief show mixed feedback, with praise for their negotiation services and some comments on settlement delays and credit impacts.

Q: What are some of the best debt consolidation programs and companies?

A: The best debt consolidation programs offer competitive APR rates, low fees, and clear terms, helping merge multiple debts into a single manageable monthly payment.

Q: What is the most legitimate debt relief program?

A: Legitimacy is marked by transparent fees, verified credentials, and strong consumer reviews. Research trusted ratings like BBB and independent testimonials before choosing a program.

Q: How can I pay off $30,000 in debt in 2 years?

A: Paying off $30,000 in 2 years calls for a strict budget, choosing a consolidation or management plan, and setting up a fixed repayment schedule to steadily chip away at the debt.

Q: Is it worth going through a debt relief program?

A: Debt relief programs can help simplify payments and lower interest rates but work best when the plan matches your financial profile and long-term budget management strategy.

Q: What is the best method to reduce debt?

A: The optimal method varies individually; many benefit from a mix of consolidation loans, effective budgeting, and credit counseling based on income, obligations, and fee tolerance.

Q: Which companies are recognized as the BBB best and Forbes best debt relief companies?

A: Top companies featured by the BBB and Forbes combine transparent fee structures and robust customer reviews, making them reliable options for professional debt relief services.

Q: What are debt relief loans and how do they work?

A: Debt relief loans consolidate multiple debts into one new loan with a defined interest rate and monthly payment, simplifying your cash flow and potentially reducing overall costs.

Q: Which are the best debt relief companies in the USA?

A: Leading debt relief companies in the USA are noted for fair pricing, effective negotiation, and positive reviews; comparing ratings and testimonials helps you choose the right provider.

3 Low Cost Investment Funds: Inspiring Returns

0

Ever wonder if high fees are eating into your returns? Low cost funds let you invest smartly by tracking major market indexes without expensive research costs. They charge lower fees, so more of your money stays in your pocket, letting it grow over time. Even a small fee difference can lead to big savings. In this post, we look at three low cost investment funds with solid returns that could help you build steady wealth. Your next step: review these options and see which one fits your plan.

3 low cost investment funds: Inspiring Returns

Low cost investment funds can help you grow your money without high fees. They follow market benchmarks like the S&P 500 or the Total U.S. Stock Market. These options come as ETFs or mutual funds that simply copy a set list of stocks instead of using expensive research teams.

As of 2023, the fees for these funds are very low. Stock index mutual funds usually charge about 0.05%, which is roughly $5 for every $10,000 you invest. ETFs have a fee around 0.15%, or $15 per $10,000 invested. Even small fee differences can add up over time.

These funds also spread out your risk by including stocks from various markets like the Nasdaq-100, Russell 2000, and Dow Jones Industrial Average. This mix gives you a balance of stability and growth from different parts of the market.

Try this next step: Research a few low cost funds that match your financial goals and compare their fees. This simple start could be a great way to build wealth gradually.

Comparing Low Cost Investment Funds: Mutual Funds vs ETFs

img-1.jpg

Cost Effective Mutual Funds

Low-cost mutual funds follow index strategies and trade once a day when prices are set after the market closes. This means you buy shares at the price determined at the end of trading. Some funds ask for a minimum investment of $1,000 or more, but options like the Fidelity ZERO Large Cap Index let you start with no minimum and no fees. These funds usually charge around 0.05% in fees. For example, if you invest $10,000, you might pay about $5 a year. That small fee can add up over decades. Also, mutual funds sometimes give out capital gains each year, which can affect your overall returns.

Cost Efficient ETFs

ETFs work a bit differently. They trade like stocks during market hours, so their prices change throughout the day. Their average fee is around 0.15%, roughly $15 per $10,000 invested. Although these fees are a bit higher, ETFs are often more tax-efficient because of a method that limits capital gains distributions. Popular ETFs like the Vanguard S&P 500 ETF (VOO) and SPDR S&P 500 ETF Trust (SPY) hold billions in assets. They offer liquidity and flexibility for active traders. You can also buy just one share, which makes ETFs a good option if you’re looking to start small or trade during the day. Just be aware of the bid-ask spreads, which are part of trading stocks.

Try this: Compare the fees and trading styles of a fund like Fidelity ZERO with an ETF like VOO to find the option that fits your investment style and long-term goals.

Expense Ratios and Management Fees of Low Cost Investment Funds

Even small fee changes can make a big difference over time. Imagine two investors each starting with $10,000 in funds that average a 7% return. One fund charges a fee of 0.05% while the other charges 0.15%. After 30 years, the lower-fee fund might grow that investment to about $75,000, whereas the higher-fee fund could end up around $72,600. That extra $2,400 shows how fees cut into the power of compounding.

Historical data backs this up. Funds with lower fees often perform better because less money is taken out each year. When more money stays invested, you can spread your risk across different asset classes, which helps protect your portfolio through various economic changes.

Expense Ratio Effective Return 30-Year Outcome (approx.)
0.05% 6.95% $75,000
0.15% 6.85% $72,600

Try this: Compare your current fee setup using your own numbers against these examples. This simple step can help you decide if a change in funds might boost your long-term returns.

Performance and Returns of Low Cost Investment Funds

img-2.jpg

Low-cost index funds spread your dollars across thousands of companies, cutting down the risk of a big loss if one company falters. For instance, the Vanguard Total Stock Market ETF covers the entire U.S. market, and the iShares Core S&P Total US Stock Market ETF gives you access to roughly 2,500 companies. Because these funds invest in stocks of all sizes, large, medium, and small, you see steadier gains compared to buying single stocks.

A smart strategy is to reinvest your dividends without delay. When you use each dividend check to buy more shares, you let your money grow over time. One simple example: a steady reinvestment plan turned a small portfolio into a strong nest egg over 20 years. This set-it-and-forget-it method keeps your money active without being slowed down by high fees.

Remember, while funds that cover a wide market tend to perform steadily, some funds that focus on just one area might struggle if that sector has a rough patch. For instance, a tech fund could drop if the tech industry has a downturn. On the other hand, using a fund like the Schwab U.S. Broad Market ETF spreads out the risk by lowering the impact of one stock's performance.

  • Broad market exposure across various segments
  • Steady reinvestment of dividends to fuel growth
  • More focused funds may need extra care during market dips

Try this: Take a look at your current fund mix and check that it matches your long-term growth plans and the level of risk you're comfortable with.

Selecting the Best Low Cost Investment Funds for Your Portfolio

Your choice of funds should match your goals and timeline. For example, if you plan to save for a down payment in two years, look for funds that change in value slowly and allow easy access to your money.

Start by deciding what you’re investing for, how long you plan to invest, and how much risk you can take. Write down a goal like “I’m saving for retirement in 30 years” or “I need money for an upcoming expense.” This helps you pick funds that really fit your needs.

Next, choose funds with features that help you reach your goal. If you’re building for retirement, pick funds that reinvest dividends and cover a wide range of companies. If you’re saving for a short-term need, choose funds with low fees and stable prices.

Try this quick checklist:

Step Action
1 Define your goal, timeline, and how much risk you can handle
2 Find fund features that match your goal (like growth, stability, or quick cash access)
3 Compare fees, minimum investments, and other key details
4 Check how diversified the fund is by reviewing its asset mix and size
5 Assess tax efficiency, including dividend options and redemption methods

For example, you might say, “I’m saving for a home, so I need a fund that stays stable rather than chasing quick gains.” Or, “I’m looking for funds with fees under 0.2% to keep costs low over time.”

This method helps you choose a fund that fits your financial strategy. Try these steps now to ensure your investment choices work for you.

Final Words

In the action, we broke down the basics of low cost investment funds. We explored how expense ratios, diversification, and index tracking shape performance. We also compared mutual funds versus ETFs, highlighting real-world examples and practical steps for choosing funds.

Next, use a clear checklist to research and select funds that match your goals. By keeping fees low and embracing a disciplined strategy, you can steadily build wealth and improve your financial control. Keep moving forward with confidence.

FAQ

What is a low cost investment fund?

The term low cost investment fund refers to a fund that uses a passive index-tracking strategy to keep fees very low. It focuses on matching market benchmarks while minimizing expense ratios.

How do low cost index funds work, such as those tracking the S&P 500?

The low cost index funds work by tracking a market index like the S&P 500. They automatically adjust to match the index composition, reducing active management and cost, and offering broad diversification.

How do I buy low-cost index funds and what are some top examples?

The process to buy low-cost index funds includes researching funds based on expense ratios, minimum investment, and index tracked. Top examples include Vanguard Total Stock Market Index Fund Admiral Shares and Fidelity ZERO Total Market Index Fund.

Which are the best low cost mutual funds and ETFs?

The best low cost mutual funds and ETFs mix low fees with solid market tracking. Examples include Fidelity’s ZERO funds and Vanguard’s ETFs, both known for low expense ratios and ease of investing.

What are examples of low-cost funds from Fidelity and Vanguard?

The examples from Fidelity include ZERO Total Market, Fidelity Small Cap Index, Fidelity 500 Index, Fidelity U.S. Bond Index, and ZERO International funds. From Vanguard, the Total Stock Market Index Fund Admiral Shares stands out.

What if I invest $1,000 a month for 5 years?

Investing $1,000 a month for 5 years in a low cost fund builds a diversified set of holdings and benefits from compound interest; low fees help keep more of your gains working for your long-term growth.

How can I turn $5,000 into $1 million?

Turning $5,000 into $1 million is an aggressive goal that requires consistent investing, strong market growth over decades, and the advantage of low fees to allow compound interest to work in your favor.

Which low cost ETF could offer high returns?

Some low cost ETFs that track major market indices have shown strong historical returns. These ETFs combine low expense ratios with broad market exposure, but performance will vary with market conditions.

Smart Savings Strategies: For A Brighter Future

0

Ever feel like your money just vanishes? When bills pile up, it can seem like you're always one step behind. A smart savings plan can help you fight back. Even setting aside a small amount every time can build a safety net for daily expenses and surprises.

Here's a quick win: start by choosing one small, fixed amount to save each week. Then watch as that small habit grows into a buffer for tough days.

In this post, we break down simple steps to help you save more and stress less. Try these tips and take control of your cash for a more secure future.

Achieving Financial Health with Smart Savings Strategies

Building a solid savings plan lays the foundation for smart money management. When you set up a simple system to track your cash, you get ready for everyday costs and unexpected expenses. In short, a clear savings routine helps you reach your financial goals and feel more in control.

Here are six smart ways to save money:

  • Open a basic savings account and always pay yourself first.
  • Save a little bit regularly, even if it’s a small amount.
  • Create an emergency fund to cover surprise expenses.
  • Update your savings plan as your goals or life changes.
  • Look into money market accounts for higher interest, even if they limit withdrawals.
  • Keep a long-term view so your savings grow and support your future goals.

Try this: Set up your savings account and schedule a regular transfer from each paycheck. Even small amounts add up over time, helping to protect you during tough times. An emergency fund is a safety net that stops sudden bills from throwing off your plan. As your life changes, adjust your savings tactics to keep up with your needs. With this approach, your money becomes a powerful tool for building a stronger, more secure future.

Structuring Smart Savings Strategies with SMART Goals

img-1.jpg

The SMART framework turns general saving ideas into clear, practical steps. It shows you exactly what to do by setting specific, measurable, achievable, realistic, and time-bound goals. Instead of a vague goal like "save more," try this: "save $300 every month so you have $3,600 by next year." This makes it easy to see what you need to do, track your progress, and know when you've reached your target.

A good start is to use your income and expenses to set a simple budget before you save. For example, check out our guide on how to create a zero based budget (https://thefreshfinance.com?p=1388). This tool helps you see where your money goes so you can decide how much to set aside each month.

Here’s your quick next step: write down your own SMART savings goal. Use this mini-checklist to get started:

  1. Pick a specific amount to save and name why you're saving.
  2. Decide how you'll track your progress, like reviewing your savings each month.
  3. Make sure the goal fits with your current money situation.
  4. Confirm it feels realistic based on your income and bills.
  5. Set a clear deadline so you know when to wrap up.

With these steps, you'll have a solid plan that makes saving clear and manageable. Try this now and watch your savings grow!

Automating Smart Savings Strategies to Capture Every Dollar

Automation takes the work off you and cuts down on the stress of managing your savings. When you set up systems to work in the background, your money can grow without constant checking. This smooth process helps you stick to your financial plan, even on your busiest days.

  • “You won't miss it if you don't have it” – Arrange for automatic transfers on payday to move a set amount directly into your savings.
  • “Fix the leak before you fill the bucket” – Spot small, recurring expenses and cut them to free up extra cash.
  • “Make hay while the sun shines” – Direct any bonus cash or windfalls straight into your savings account.
  • “Put your money to work for you” – Channel any idle funds into accounts that earn interest so your money grows over time.
  • “Never leave money sitting on the table” – Use cash-back offers, rewards, and round-up features to add small amounts that build up.

By setting up these automated steps, you remove the guesswork from saving. Over time, these regular contributions can really boost your savings and help you build a stronger financial future with less effort every day.

Evolving Smart Savings Strategies for Changing Needs

img-2.jpg

Your savings plan should grow along with you. When your income increases, your family expands, or your goals change, it's a good moment to rethink how you save. Try doing an annual review to make sure what you're saving fits your current needs.

First, look at what money comes in and what goes out each month. Ask yourself if your emergency fund can cover unexpected bills or if you should set aside more for long-term goals. For example, after getting a raise, you might boost your emergency fund or save extra for a future down payment. Shifting money from non-essential spending might help balance short-term needs and long-term plans.

Try this quick win:

  1. Set a day each year for a money check-up.
  2. Compare your current spending and income with your savings goals.
  3. Change your contributions if your income or bills have changed.
  4. Rebalance money between your emergency fund, short-term, and long-term savings.

By checking in on your finances regularly and adjusting as needed, you ensure your savings plan stays on track with your life. Your next step: schedule your first annual review and see where you can improve today.

Smart Savings Strategies for Higher Returns: High-Yield and Market Accounts

High-Yield Savings Accounts give you an easy way to earn more on your money. With rates above 3% APY and little to no minimum needed, these accounts keep your cash accessible for everyday use. Many banks also share details on high yield investments so you can compare your options.

Certificates of Deposit let you lock your funds at a fixed rate for a set period. Terms range from a few months to several years. This option works best if you have cash you won't need right away since taking money out early means you might face a penalty.

Money Market Accounts mix a better interest rate with the ability to write checks. They often limit the number of monthly transactions, so consider this option if you want to earn more while still having occasional access to your funds.

IRA Certificates of Deposit combine the benefits of CDs with a retirement savings account. You lock in a rate on your retirement money and enjoy tax-deferred growth. Just remember that annual contribution limits apply.

IRA Money Market Accounts offer a practical blend of tax advantages and access to funds. They may provide slightly lower rates than regular money market accounts but are a good choice if you want flexibility with your retirement savings.

Product Typical APY Minimum Balance Liquidity
High-Yield Savings Accounts Above 3% None to low High
Certificates of Deposit Competitive fixed rates $500 – $1,000 Low (penalties apply)
Money Market Accounts Moderate Varies Medium (limited transactions)
IRA Certificates of Deposit Fixed rates Varies Low (retirement rules)
IRA Money Market Accounts Slightly lower Varies Medium

Tracking and Refining Smart Savings Strategies with Digital Tools

img-3.jpg

Digital tools let you see your spending and savings in real time. They help you catch small budget leaks before they turn into bigger problems. Tools like savings goal calculators, mobile budgeting apps, bank info libraries, and expense trackers give you clear data on every transaction. When you link your checking, savings, and credit accounts, you can see where your money goes and spot overspending quickly.

Try these steps to get started:

  1. Compare features: Check out tools with clear charts and insights, like a money organizer or a budget planner template.
  2. Sync your accounts: Connect all your finances so one app shows you the complete picture.
  3. Set up alerts: Turn on notifications for low balances or unusual spending to catch leaks as soon as they happen.
  4. Schedule quarterly reviews: Use your digital dashboard to check progress, adjust goals, and fine-tune your spending habits.

Digital budgeting builds good money habits through constant feedback. Use calendar reminders for regular checkups to make sure your saving strategies stay on track with your changing goals and finances.

Final Words

In the action of building a healthier financial future, we broke down how basic savings, SMART goal-setting, and automation can capture every dollar. We explored adapting tactics as life changes, using high-yield accounts, and tracking progress with digital tools. These smart savings strategies offer practical steps to take control of your money. Small, consistent moves pave the way to lasting progress. Try these clear, step-by-step actions right now to build stronger financial habits and keep moving forward with confidence.

FAQ

Frequently Asked Questions

What are some clever and modern ways to save money?

Clever ways to save money include automating transfers, tracking expenses, cutting small recurring costs, and using digital budgeting tools that alert you when spending exceeds planned amounts.

What are the top benefits of saving money?

Saving money helps reduce stress, prepares you for emergencies, lets you reach goals like buying a home or vacation, improves credit scores, and builds financial independence over time.

What is a smart savings account?

A smart savings account usually offers higher interest rates with few fees and online features like mobile access and automated transfers, making it easier to build your savings consistently.

How can I save money from my salary?

Saving from your salary means paying yourself first. Set up automatic transfers based on a set percentage, track your spending, and adjust your budget to align with your financial goals.

What is the $27.39 rule?

The $27.39 rule suggests setting aside small, fixed amounts on a regular schedule to build savings gradually, turning modest contributions into a substantial fund over time.

What is the 3 6 9 rule of money?

The 3 6 9 rule of money divides funds into specific segments to manage expenses and savings better. It helps create clear spending limits and systematic savings goals, though exact amounts may vary by income.

What is the $1000 a month rule?

The $1000 a month rule encourages setting aside a fixed sum of $1,000 monthly for debt repayment, emergency funds, or investments, steadily enhancing financial stability through regular contributions.

What is the 70/20/10 rule in money?

The 70/20/10 rule recommends using 70% of your income for living expenses, 20% for savings or debt reduction, and 10% for investing in your future, providing a balanced approach to managing money.

Simple Budgeting Worksheet For Easy Expense Tracking

0

Confusing receipts and messy charts got you doubting your budgeting skills? You’re not alone. People often think that detailed records lead to stress, but a simple budgeting worksheet makes tracking spending clear and easy.

List your income and note every expense to see exactly where your money goes. Our guide walks you through each step, from balancing your budget to tweaking how you spend, so you can take control of your cash without feeling overwhelmed.

Ready to simplify your money tracking? Try our method now and start taking charge of your finances today.

Getting Started with Your Simple Budgeting Worksheet

Quick win: Download our free budgeting template to start tracking your money in minutes.

  1. Write down all your income. List each money source (for example, Job Salary: $3,000).

  2. Record your expenses. Include fixed costs like rent or loans and flexible costs such as groceries and utilities.

  3. Create a zero-based budget. Subtract your expenses from your income so everything balances. For example, if you earn $3,000 and spend $2,500, you have $500 extra. Check our guide on creating a zero-based budget for more details.

  4. Track every transaction during the month. Even small amounts help you see spending trends and maintain control.

  5. Set up a new budget each month. This lets you adjust for any changes in your spending or income.

Our worksheet also uses the 50/30/20 rule, splitting your money into needs, wants, and savings or debt. This clear layout shows where your cash goes and takes the stress out of budgeting. For a paper option, download the PDF; or work online for instant auto-calculations.

Ready for a fresh start? Download the "Budget Planner Template" now and begin taking control of your money today.

Gathering Your Income and Expense Details for a Simple Budgeting Worksheet

img-1.jpg

Begin by gathering your essential financial details. Collect your monthly take-home pay, fixed costs like rent or loan payments, and variable costs such as groceries, utilities, and transportation. Grab items like your pay stubs, bank statements, and recent bills. For example, you might list a $3,500 paycheck, $1,200 in rent, and about $300 for groceries.

Next, write down any savings contributions and debt repayments you plan to make. Recording every figure sets up a clear monthly financial plan. The accuracy of your numbers makes a free printable expense tracker or income-and-expense sheet work best.

Review your documents carefully to ensure nothing is missed. Note every source of income and every expense, even if some numbers change month to month. Doing this upfront builds a solid and reliable budget.

Your next step: With all your data collected, start setting up your simple budgeting worksheet. This clear foundation helps you track spending and adjust your plan as real numbers come in each month.

Breaking Down the Sections of Your Simple Budgeting Worksheet

Your simple budgeting worksheet breaks your finances into four handy parts. First is the Income panel. Here, you record every monthly earning, from your full-time job to part-time gigs. It gives you a clear start point by showing exactly how much money comes in. For example, you might note, "Job Salary: $3,000." Try using a tool like the Money Organizer to capture these numbers accurately.

Next is the Fixed Expenses panel, where you list bills that repeat every month. Think rent, loan payments, or utilities. Writing these down helps you know the non-negotiable parts of your spending so you can plan smartly.

The third section is the Variable Expenses panel. This is for costs that change monthly, like dining out, groceries, or entertainment. Keeping track of these flexible spendings lets you adjust and meet your financial goals.

Lastly, the Savings & Debt panel shows money saved for future needs or debt repayments. Even a small entry like "Emergency Fund: $150" points to progress toward financial stability.

Section Purpose Example Entry
Income Track all money you earn each month Job Salary: $3,000
Fixed Expenses Record regular monthly bills Rent: $1,200
Variable Expenses Log spending that can change each month Groceries: $250
Savings & Debt Note funds saved or used for debts Emergency Fund: $150

Your next step: Spend a few minutes filling in your worksheet with real numbers. This small task will help you better understand your finances and plan for future goals.

Tips for Using Your Simple Budgeting Worksheet Effectively

img-2.jpg

Start by tracking every expense as soon as it happens. Write down every cost, no matter how small, so you can quickly see any spending patterns. For example, note a morning cup of coffee right along with a larger grocery bill to get a full view of your spending.

Keep your expense tracker close by. You might jot costs down in a quick notebook or update your spreadsheet once a day. This simple habit helps you avoid overspending and keeps stress low because you always know where your money is going.

After each payday, take a few minutes to look over your entries. Spot any surprises, like an unexpected treat or a special holiday dinner, and adjust your plans for future spending accordingly. When you see a little extra cash left over, take a moment to celebrate that win. Little successes help build good money habits.

Your next step: Set a reminder on your phone to review your worksheet after every pay cycle. This small action keeps you on track and in control every month.

Customizing Your Simple Budgeting Worksheet for Different Lifestyles

For families, make your worksheet work for every income source by listing each paycheck separately. Write down bills like utilities and groceries under a shared section. You can set spending limits for individuals or put group expenses in one category. This helps everyone see exactly where the money goes.

Students have their own set of expenses. Use your worksheet to record tuition, meal plan payments, rent, and earnings from part-time jobs. Add a small section for extra spending on books or social outings. This clear layout lets you compare fixed costs with flexible funds so you can quickly adjust when your priorities change.

Freelancers and gig workers often face unpredictable income. A good tip is to average your earnings over three months. Create separate sections for any irregular income and use conservative estimates when plotting your expenses. This way, you plan extra for taxes or retirement savings and build a safety net when money is tight.

Your next step: Take a few minutes to set up your template with these sections so you can keep track of your money in a way that fits your lifestyle.

Printable vs Digital Versions of Your Simple Budgeting Worksheet

img-3.jpg

You have two clear choices for your budgeting worksheet. You can print a paper PDF that you fill in by hand. This option is perfect if you enjoy writing down every expense and then hanging your guide on the fridge or storing it in a binder. It offers a real, hands-on feel that makes checking your numbers quick and easy.

Alternatively, you can use a digital organizer. This is an online spreadsheet that automatically adds up your totals and syncs across your devices. With this tool, you can update your entries instantly and always have an up-to-date record in the cloud. Both options are great for tracking your spending as it changes. Pick the one that fits best into your daily routine.

Your next step: Try out the option that sounds easiest for you and see how it works for your budgeting needs.

Feature Printable Digital
Accessibility Works anywhere without a device Available on any connected device
Editing Ease Requires manual updates Auto-calculates totals
Portability Needs a physical copy Syncs across devices
Tracking Updates Handwritten entries Instant totals

Final Words

In the action, you’ve learned how to tackle your monthly finances using a simple budgeting worksheet. We covered steps from listing income and expenses to tracking payments and adjusting budgets. You learned how to gather your financial details, break down costs, and even tailor the worksheet for different lifestyles. With both printable and digital options available, you can choose what works best for you. Get started today and watch your financial control grow with your simple budgeting worksheet.

FAQ

What is a simple budgeting worksheet PDF?

The simple budgeting worksheet PDF offers a well-organized template to track monthly income, expenses, and savings. It follows a five-step plan to create a zero-based budget and supports the 50/30/20 rule.

What does a simple budgeting worksheet Excel offer?

The simple budgeting worksheet Excel is a digital file that auto-calculates totals as you input income, expenses, and savings. It provides flexibility for those who prefer online tracking over manual entry.

Is there a free version of the simple budgeting worksheet?

The free simple budgeting worksheet lets you track income, expenses, and savings without cost. It is available in both PDF and digital formats, making it easy to set up and follow a zero-based budget.

What does a simple budgeting worksheet for students include?

The simple budgeting worksheet for students includes sections for tuition, meal plans, and entertainment along with income, expenses, and savings, helping students create a clear plan to manage finances.

How are budget worksheets for students available in PDF format helpful?

Budget worksheets for students in PDF format offer a printable, easy-to-use tool to monitor income and costs like tuition or rent. They assist in planning monthly spending and tracking financial progress.

What is a monthly budget worksheet PDF?

The monthly budget worksheet PDF is a printable tool designed to record and analyze monthly income and spending. It helps you plan, track, and adjust your budget for better money management.

3 Finance Sheet Tips For Instant Clarity

0

Ever wonder why your budget never adds up? A simple finance sheet shows what you planned versus what really happened.

Here's a quick win: Start by recording your income and expenses accurately. This will help you spot any gaps in spending so you can fix them immediately.

Try these three easy tips now to take control of your money and see a clear picture of your finances.

What Is a Finance Sheet and How It Helps Track Income & Expenses

A finance sheet is a simple spreadsheet that helps you compare what you expect to earn and spend with what actually happens. It lets you see your income, expenses, and savings all in one place so you can quickly spot any differences or patterns. Many people use this tool for budgeting, basic bookkeeping, or to get a better look at their cash flow. Often, you’ll see rules like the 50/30/20 split, where income is divided into needs, wants, and savings or debt repayment.

Try this for clear financial tracking:

  • Write your numbers in two columns: one for planned amounts and one for what really happens. This side-by-side view makes it easy to catch overspending.
  • Set up clear sections for needs, wants, and debt or savings. This helps you see if you’re sticking to your priorities.
  • Use a ready-made template or online tool. For example, try a free budget planner that shows you totals and differences at a glance.

A finance sheet gives you a clear picture of your money, so you can adjust your budget as needed and feel more in control each month. Try setting it up today to take charge of your cash flow.

3 Finance Sheet Tips for Instant Clarity

img-1.jpg

  1. Track Income and Expenses Side-by-Side
    Start by listing your income and expenses next to each other. Write down all your income, such as your salary or freelance pay, in one column. In a separate column, record your costs and note whether they are fixed (like rent) or variable (like dining out). This side-by-side view makes it simple to spot when your spending strays from your plan.
  • List all income in one row.
  • Record regular and unexpected costs in clear, separate rows.
  • Compare your planned amounts with what you actually spent.
  1. Set Up an Asset and Liability Sheet
    Make a simple list of what you own versus what you owe. Under assets, note items such as cash, savings, or equipment. Under liabilities, enter any loans or credit card balances. This quick snapshot helps you see your net balance and plan for future goals.
  • Write down assets like cash and investments.
  • List liabilities such as loans or pending bills.
  • Calculate your net balance to check your overall progress.
  1. Create a Summary Section with Visual Cues
    Gather your needs, wants, and savings or debt amounts in one easy-to-read section. A summary area pulls all your details together and can even flag areas where you may be overspending. For example, you might use a simple chart or highlight cells that show when your basic needs take up more than 50% of your income.
  • Summarize key numbers in one area.
  • Use visuals like charts or color coding to spot overspending.
  • If needs exceed 50% of income, take a moment to review your budget.

Your next step: Update your finance sheet today using these tips for a clearer picture of your money.

Step-by-Step Guide to Building Your Finance Sheet and Advanced Tips

Start by listing all your income in one column. Write down each source along with the amount you expect to receive. Next, list your expenses right next to your income. Include both fixed costs and variable costs on separate rows so you see the full picture.

Make sure your numbers match up. When you subtract your expenses from your income, the result should be zero. Update your sheet daily or weekly to quickly catch any changes.

At the start of every month, review your transactions and adjust your sheet. Add any one-time costs and update your planned income. Always follow this order: first, enter all your income; then, list your expenses; finally, calculate your balance. For example, record "Income: $3,200," then "Rent: $1,000," and subtract these for a clear overview.

Your next step: Check your current ledger and update it with these monthly adjustments to keep your finance sheet accurate and current.

Choosing Excel or Google Sheets for Your Finance Sheet

img-2.jpg

Excel makes adding numbers a quick win with its built-in formulas like SUM and AVERAGE. For example, type =SUM(B2:B10) to add up your monthly expenses in just seconds. It also has features like conditional formatting and pivot tables that help break down spending trends, so if you love digging into details, Excel can be a solid choice.

Google Sheets is great for working with others in real time. If you often update your finance sheet with a partner or from different places, Sheets automatically saves your work in the Cloud. You can even create a budgeting document that several people update at the same time. Add-ons like Sheetgo can cut down on manual data entry by automating tasks.

Both tools let you download templates to share your work or keep it secure. If you need strong analytical tools and often work offline, Excel might be the best fit. But if you want a flexible, cloud-based solution that makes teamwork easy, Google Sheets is a smart choice.

Your next step: Try both platforms by using a free budget planner template. Spend 10 minutes on each to see which one fits your workflow best.

Tips for Customizing Finance Sheets for Personal & Small-Business Use

Start by adding extra columns to track your own financial goals. For example, create a section for debt repayment where you list each loan, its balance, and the monthly payment. You can also set up a savings goal tracker. Write something like "Emergency Fund: $1,000 target, $300 saved so far" so you always know where you stand.

Next, build charts that show your income versus your spending. A simple pie chart can break down your monthly income into parts, like 50% for basic needs, 30% for extra expenses, and 20% for savings or debt repayment. This quick view helps you see where changes might be needed.

Also, add data checks to avoid errors. Use rules that only allow numbers, which can save you from simple mistakes. Set a reminder in your sheet, say, "Review this section on the 1st of each month", to keep things up to date.

Other helpful ideas include adding a column for unusual expenses, using color coding for different spending categories, and creating a small dashboard for a quick snapshot of your finances. These tweaks work well for both personal and business needs.

Your next step: Update your finance sheet with these custom fields to gain immediate clarity on your personal and business finances.

Final Words

In the action, you now have clear steps to set up a finance sheet and track income, expenses, and savings. The post outlined how to build your sheet, choose between Excel or Google Sheets, and add personal touches for better tracking.

Break things down one step at a time. Grab a template and start filling in planned versus actual figures today. Enjoy the clarity and control as you watch your financial progress develop.

FAQ

What is a finance sheet template?

A finance sheet template is a structured spreadsheet that tracks income, expenses, and savings. It offers a side-by-side view of planned versus actual amounts, helping you easily monitor your budget.

How can I use a finance sheet in Excel?

A finance sheet in Excel uses built-in formulas and formatting to automatically total income and expenses. It simplifies setting up cash-flow analysis and helps you manage your budget with precision.

Is there a finance sheet template available in PDF format?

A finance sheet template in PDF is a printable worksheet that lets you manually record income, expenses, and savings. It’s a handy tool for quick budgeting without needing digital software.

Where can I find a free finance sheet template?

Free finance sheet templates are available online and come in various formats. They provide a ready-to-use setup for tracking your money, making it easier to stick to your budget.

What is a budget worksheet PDF and how does it work?

A budget worksheet PDF is a printable form for listing income and expenses by hand. It lets you compare planned financial figures with actual spending to help manage your money.

How do I access a free budget spreadsheet template?

Free budget spreadsheet templates are downloadable tools available for both Excel and Google Sheets. They offer built-in features for tracking income and expenses, giving you a clear snapshot of your finances.

How can I use a budget template in Google Sheets?

A budget template in Google Sheets leverages real-time collaboration and cloud storage. It lets you update income, expenditure, and savings on the go while sharing your progress easily.

How can I download a simple budget worksheet PDF for free?

A simple budget worksheet PDF available for free download provides a basic, printable format to record your financial data. It’s perfect for those who prefer a manual, paper-based budget review.

How To Boost Credit Score Fast: Feel Unstoppable

0

Wondering how to quickly boost your credit? You might think it takes years to see a change. But a few simple steps can lead to noticeable results in just 30 days. You can start by lowering your balances, checking your report for errors, or asking for a higher credit limit. This plan lays out each step clearly so you can take charge of your score. Try these steps today and see improvements fast.

Quick Action Plan to Boost Your Credit Score Fast

Time is money when it comes to your credit score. If you need quick wins, here’s a clear plan you can start today. In about 30 days, you might notice an improvement by cutting down balances and correcting mistakes on your report. This plan is simple and focuses on practical moves that work fast.

Your next step is to lower your credit card balances so your credit use falls below 30% – aim for under 10% if you can. Do this by paying down existing statements. Next, check your credit report and dispute any errors immediately, especially if you’re planning a big purchase like a home or car.

Another handy move is to ask for a higher credit limit. This can lower your overall use even if your balance stays the same. Making all your bill payments on time remains key because payment history is the single biggest factor affecting your score.

If possible, consider asking to become an authorized user on a long-standing account that reports to all three major credit agencies. This can add good history to your record. You can also report regular rent and utility payments to show consistent financial behavior. If any collections show up, work on disputes or pay-for-delete agreements to improve your credit record.

Together, these steps create a strong multi-step strategy that tackles various parts of your score. Even if you see changes in one cycle, keep at it for 1–3 months so your efforts add up. Try these moves now and watch your score improve!

Dispute Credit Report Errors for Instant Point Increases

img-1.jpg

Credit report mistakes can keep you from getting the score you deserve. Errors like outdated negatives, duplicate listings, or wrong account statuses can lower your score more than you expect, especially when you're about to apply for a loan. Check your free annual credit reports from Equifax, Experian, and TransUnion to catch these errors quickly. For a speedy review guide, try this Credit Report Analysis tool.

Before making any big financial moves, grab your credit reports and take a close look. One wrong entry can cost you points. Dispute any mistakes right away to ensure your report shows a true picture of your money habits.

Try this:

Step Action 1 Collect your free annual credit reports. 2 Spot errors like duplicate entries or incorrect statuses. 3 File disputes online or by certified mail. 4 Keep records and follow up with each credit bureau.

Credit bureaus are required to review any dispute within 30 days. When corrections are made, your score could jump by double digits, especially if you have a loan application pending. Keep an eye on your disputes until every error is cleared up.

Lower Credit Utilization for Rapid Improvement

Credit utilization makes up about 30% of your credit score. This number shows how much of your available credit you are using. The closer your balance gets to your limit, the more it can hurt your score. Keeping this number in the single digits is a quick way to boost your rating.

To work out your credit utilization, divide your balance by your credit limit and multiply by 100. For example, if you owe $300 on a card with a $1,000 limit, your utilization is 30%. Lowering your balance to $100 will drop that number to 10%. Tracking these numbers on each card and for your overall credit helps you see where you can take immediate action.

Try this: make multiple payments during your billing cycle instead of one big payment. You can also move balances between cards if one is nearing its limit or use a balance-transfer offer with 0% APR to give yourself a temporary break.

By managing your balances closely, you take control of your credit utilization. Adjusting payments on individual cards and using balance transfers smartly will lower your ratio faster. This approach can lift your credit score quickly and set you up for better lending terms in the future.

Pay Bills on Time to Accelerate Score Enhancement

img-2.jpg

Paying your bills on time is key. Payment history makes up about 35% of your FICO score. When you always pay on time, you build a record that shows you borrow responsibly. Keep in mind that a late payment can stick on your credit report for 7 years and drag your score down.

Try this: Set up autopay or calendar alerts a few days before each bill’s due date so you’re never rushed. Paying more than the minimum can also help you reduce your principal faster, which means you pay less interest over time.

When you stick to your payment schedule, it builds trust with lenders. This can make you more attractive for future credit opportunities, offering you better rates and higher credit limits.

Your next step: Download a free bill-tracking template, add your bill due dates, and start building a stronger credit history today.

Increase Credit Limits & Diversify for a Speedy Financial Rating Upgrade

When you get a raise or consistently pay on time, ask your issuer for a higher credit limit. This simple move can quickly lower your credit usage and boost your score.

Mixing different types of credit can also strengthen your financial record. Secured cards, authorized-user accounts, and installment loans each add a unique benefit. Lenders like to see that you manage various kinds of credit responsibly.

Here’s a step-by-step plan: First, request a credit limit increase from your current provider after a recent pay raise or several on-time payments. If you haven’t built much credit yet, try a secured card by putting up a cash deposit. Then, open an installment loan or retail account to add variety to your profile. Finally, consider becoming an authorized user on a long-established account to tap into someone else’s positive history.

Next steps: Review your current credit lines, ask for necessary increases, and explore new account types. This approach lowers your credit usage and sets you on track to raise your score.

Address Collections & Negative Items for Immediate Rating Revival

img-3.jpg

Negative items can drag your credit score down fast. But you can act now and set your score on the path to recovery. Start by pulling your credit report and note any collections or mistakes.

Take a close look at your report. If you see a collection, consider sending a pay-for-delete letter to the agency. This letter offers payment in exchange for removing the negative mark. Make sure you check the dates too, items older than 7 years should automatically drop off. If they don’t, follow up with the credit bureaus right away.

Keep a record of every dispute and communication. Save copies of letters and emails, as these documents can speed things up when clearing out errors.

Then, boost your report with fresh, positive info. Consistently paying rent and utility bills shows steady behavior, which can help counterbalance past mistakes.

Your next step: Get your credit report, note any outdated or incorrect items, and start those disputes today. With steady effort, you can see your credit score improve faster than you might think.

Monitor Progress & Follow a 30-Day Credit Rise Plan

Credit scores usually update every 30 days, so you might start to see progress after one reporting cycle. It can take up to 90 days for big changes, so a little patience goes a long way. Check your score weekly to see that paying down balances, disputing errors, and keeping your credit use low really makes a difference. Think of each week as a mini checkpoint adding up to noticeable gains.

To stay on track, sign up for a free credit monitoring service. This tool alerts you to any score changes or new inquiries, so you can tackle issues right away. Try using this plan to measure your progress in real time and adjust your tactics if needed. Your next step: sign up today and start watching those changes add up.

Final Words

In the action, you can start by fixing report errors, cutting credit utilization, paying bills on time, and boosting limits. These steps set a clear path for quick improvements. By following each tip and combining strategies, you work toward noticeable progress in just one billing cycle. Keep tracking your changes and take small, steady actions daily. This plan shows how to boost credit score fast and puts you on track for real financial progress.

FAQ

How can I boost my credit score fast for free?

Boosting your score quickly without cost means paying on time, lowering your credit utilization, disputing errors, and using free credit monitoring tools to track your progress.

How can I raise my credit score 100 points overnight?

Raising your score by 100 points overnight is very challenging. Quick actions like fixing report errors and paying down balances may help, but major increases typically take longer than one day.

How can I significantly raise my credit score in 30 days?

Increasing your score by 100 or even 200 points in 30 days is rare. Using fast tactics like disputing errors, reducing balances, and requesting limit increases can jump-start improvements.

How can I raise my credit score in 10 days?

Improving your credit in 10 days is tough. Quick moves such as lowering your balances and correcting errors may offer small gains, but lasting improvements usually require a longer time.

How can I get a 700 credit score fast?

Achieving a 700 score quickly relies on on-time bill payments, low credit utilization, and a good credit mix. Regularly reviewing your report and addressing issues speeds progress.

How can I increase my credit score to 800?

Reaching an 800 score means maintaining a long history of on-time payments, very low credit utilization, and a diverse mix of credit accounts, along with regularly checking for and disputing errors.

What are credit boost programs?

Credit boost programs add positive payment information from utilities or telecom bills to your credit report. These services can help improve your score when combined with strong credit habits.

How can I boost my credit score using Experian Boost?

Using Experian Boost adds your utility and telecom payment history to your report. This free tool can help raise your score by incorporating positive, previously unreported payments.

How To Separate Personal And Business Finances For Freelancers: Win

0

Ever feel like your money is hiding in your bank account? When you mix personal and business funds, tracking cash flow becomes a headache and bookkeeping slips behind. Try this: open a separate bank account for your freelance work. This small move makes it easy to see where your money comes from and where it goes.

By keeping your finances separate, you clear up your cash flow and make tax season less stressful. Plus, it shows lenders and clients that you mean business.

Your next step: Set up a dedicated business account today and start tracking every dollar coming in and out.

Why Separate Personal and Business Finances as a Freelancer

Mixing personal and business money can hide your true profit and create extra work when you do your bookkeeping. When your personal spending gets mixed in with business deposits, it becomes hard to figure out where your money came from and where it went. For example, if a business dinner cost is added to your personal bills, you might end up undercounting your business expenses. This can make tax time more confusing than it needs to be.

Keeping your business and personal funds in separate bank accounts clears things up. With each account handling its own transactions, you'll easily spot what you spent on client projects versus your personal expenses. This structured approach makes it faster to track deductible expenses and prepares you well for tax season.

Setting up distinct accounts not only sharpens your financial picture but also boosts your professional credibility. Lenders, auditors, and even clients notice when you manage your money carefully. This clear separation streamlines monthly reconciliations and shows that you’re serious about running a proper business.

Your next step: Open a separate bank account for your freelance business. It takes just a few minutes and can save you a lot of stress down the road.

Setting Up Dedicated Bank Accounts for Your Freelance Operations

img-1.jpg

For freelancers, keeping work and personal money separate is essential. Open a business checking account to manage day-to-day cash flow, like client payments and routine expenses. Use a business savings account as a reserve for unexpected costs or planned investments. This clear split makes managing money straightforward from the start.

When you set up these accounts, look for features such as:

  • No-fee transactions
  • Automated transfer rules
  • Mobile deposits
  • Integration with accounting apps
  • Multi-user access

Make it a habit to review your accounts every month. Compare deposits and withdrawals to ensure you aren’t mixing funds. This simple check improves your bookkeeping and makes it easier to spot errors. You’ll know immediately if any transaction doesn’t add up. Plus, having a dedicated savings account helps you focus on long-term goals like investments or building an emergency fund.

Try this: Set up a monthly reminder to reconcile your accounts. This step takes just a few minutes each month and pays off in clear, organized finances.

Implementing Online Bookkeeping and Expense Tracking Systems

Manual spreadsheets often lead to errors, wasted time, and needless frustration. They can hide small mistakes that add up, and updating them takes extra effort. Try a cloud-based solution instead. It uses automation and real-time updates to give you a clear view of your finances without the constant data entry hassle. Moving your records online also means your data is safe and easily accessible when you need to send invoices or keep legal records.

Today’s online bookkeeping tools are designed to simplify your work. They automatically sort your expenses and pull bank data in real time so you don’t have to check every transaction. Invoice templates help keep your billing smooth and professional. Some systems even integrate with a digital money organizer to link receipts and categorize expenses in one central hub. This setup cuts down on manual work, letting you focus on growing your business instead of fixing errors.

Tool Name Pricing Key Features
QuickBooks $25 /mo Auto bank sync, tax reporting
FreshBooks $15 /mo Time-tracking, invoicing
Wave Free Receipt scanning, basic reports

Using these tools helps you keep accurate records, saves hours every month, and minimizes mistakes. With updates in real time and expenses tracked automatically, you reduce the risk of oversight. Set up an automated system today to create a ready-to-go audit trail and build a solid foundation for smarter financial decisions.

Your next step: Try a free trial of a cloud-based bookkeeping system and see how much time you can save.

Applying the Proportional Paycheck Method for Freelance Money Management

img-2.jpg

Freelancers can use a modified version of the classic 50/30/20 rule to keep their finances in order. Traditionally, this rule splits each paycheck into three parts: 50% for taxes, 30% for business costs, and 20% for profit and savings. For freelancers, it means planning ahead so that money goes into separate funds for tax payments, business expenses, and your personal draw, no matter how monthly income changes.

First, decide on your money buckets. Create a tax reserve for quarterly tax payments. Then, set aside cash for business costs like software, tools, or meeting expenses. Next, define your owner’s draw (the money you pay yourself). Finally, build savings for an emergency fund or future investments. This clear setup helps you know which dollar is going where, and it gives you control over your cash flow.

Your next step: Arrange with your bank to set up automated transfers. Many online banking apps let you split deposits so that the right percentages immediately go to your tax fund, business expense account, and savings account. Try using a budget planner template to mark your percentage allocations. Review and adjust these percentages every few months as your income or expenses change.

Stick to your plan by treating funds marked for taxes or savings as untouchable. This means not using them for day-to-day spending. Keeping these accounts separate makes sure you have enough money when tax bills are due and builds a strong safety net even during lean months.

Avoiding Common Mistakes When Separating Freelance Finances

Mixing your personal and business money can cause a host of problems. A common mistake is putting all your transactions in one account, which makes it hard to track where your money comes from and where it’s spent. Skipping a tax reserve means you might not have enough set aside for quarterly tax payments. And if you don’t have an emergency cushion, unexpected bills can throw your whole budget off track.

These issues could have serious costs. When you blend your funds, you risk missing important tax deductions because expenses get lost in the mix. Poor recordkeeping can even prompt an audit, leading to fines and extra fees. In slow months, without proper planning, you might be forced to use personal funds or take out high-interest loans, putting extra strain on your finances.

Try this: Open a dedicated business account and use a separate card for all business-related expenses. Set up a recurring quarterly reminder to transfer funds for taxes. And start building an emergency fund that covers at least three months of expenses. These simple, disciplined steps can help you keep clear records, dodge costly mistakes, and secure your financial health.

Next Steps: Maintaining and Reviewing Your Separated Finances

img-3.jpg

Review your budget every month. Compare what you actually earned and spent to your plan. This quick check helps you catch any issues early. For example, if you spend more on supplies than you planned, update your forecast for next month. Do this right after monthly deposits to keep your spending in line and hit your financial targets.

Every three months, set aside time for a deeper financial review. Use this check-in to adjust your tax, expense, and savings percentages based on real cash flow. This step helps you understand your financial health better and reminds you to rebalance when needed. It’s a smart way to build a strong safety buffer and avoid surprises.

Make retirement contributions part of your routine by setting up a Roth IRA or a solo 401(k). Start with small amounts, around 2% to 5% of each paycheck, and increase them as your cash flow improves. A Roth IRA grows your savings tax-free, while a solo 401(k) offers extra saving choices if your business expands.

Finally, invest time in learning more about managing your money. Attend a workshop, consult a CPA, or use an annual financial planning checklist. These simple steps boost your skills and set you up for long-term success.

Final Words

In the action, you now have a step-by-step view on managing your money by keeping personal and business funds separate. The guide walked through setting up dedicated accounts, using online bookkeeping systems, and applying a proportional paycheck method. By following these steps, you'll simplify bookkeeping, ease tax time, and better control cash flow. Remember, mastering how to separate personal and business finances for freelancers is a process that builds both clarity and confidence. Take a moment to review, then get started on your next financial task.

FAQ

How to separate personal and business finances for freelancers online/free

The question about separating finances for freelancers online and for free suggests using dedicated bank accounts, like those offered by neo banks such as Novo, along with free digital bookkeeping tools to keep income and expenses distinct.

What is a proof of income letter for self-employed individuals?

The proof of income letter for the self-employed should list income details, supported by business records and bank statement excerpts, to provide clear evidence of earnings to banks or landlords.

What records should a self-employed person keep?

Self-employed records include invoices, receipts, contracts, bank statements, and tax documents. Organize these records digitally or physically so that you can quickly verify income and track expenses.

How do self-employed bank statements serve as proof of income?

Self-employed bank statements display incoming deposits and transactions associated with business income. They serve as proof of income when they clearly match numbers from your invoicing and bookkeeping records.

How do I show proof of income if I get paid under the table?

If you get paid under the table, compile alternative income evidence such as third-party payment documentation or notarized income letters, and, whenever possible, deposit funds into your business bank account for clearer records.

How do self-employed individuals create pay stubs and income statements?

Self-employed individuals can use invoicing tools or accounting software to generate pay stubs and income statements. These tools help summarize earnings, expenses, and net profit for a defined period.

California Tax Refund: Enjoy Speedy Processing

0

Ever noticed how some people get their California tax refunds so fast? You can speed up your refund by e-filing and choosing direct deposit. In fact, many taxpayers get their money in as little as 3 weeks.

Try this: Gather your tax year information and Social Security number, then check your refund status online. This guide walks you through each step so you can track your refund quickly.

Your next step: If you haven’t already, sign up for e-filing and opt for direct deposit to shorten your wait time. Stay with us to see exactly where your money is along the way.

Track Your California Tax Refund Status Online

If you’re ready to check your refund, start by gathering your tax information. You’ll need the tax year, your SSN or ITIN as it appears on your return, and the exact refund amount. Once you have these details, you’re set to go.

Your Next Step: Head over to the FTB refund portal and have your info handy so you can check in real-time.

Follow these steps:

  1. Visit the FTB Refund Status portal at FTB.ca.gov/refund.
  2. Select the tax year for the refund you want to track.
  3. Enter your SSN or ITIN exactly as it appears on your return.
  4. Type in your refund amount exactly to match your records.

If you e-file and opt for direct deposit, you could see your refund in about 3 weeks. Paper returns or small errors might extend processing to nearly 3 months. Direct deposit is the faster option because it skips mailing delays. And if you’re keeping an eye on a federal refund, you might try the IRS online tool for a similar update.

Your Next Step: Visit the site now and check your refund status, you’ll know exactly where things stand.

Understanding California Tax Refund Eligibility

img-1.jpg

To get a California tax refund, you need to file your state income tax return accurately and have qualifying income. Your refund comes by following the state’s rules and meeting its requirements.

Here’s what you need to do now: fill out one of the approved state tax forms (like Form 540, 540A, or 540EZ) for the tax year. For 2025, single filers or married couples filing separately get a standard deduction of $5,706. If you file jointly, as head-of-household, or as a qualifying surviving spouse, the deduction is $11,412. Make sure you report all credits and deductions correctly since this can boost your refund.

Remember that any outstanding state debts, such as child support or unpaid taxes, may lower or cancel your refund. Also, your residency affects the calculation, a full-year resident’s refund may differ from that of a part-year resident. Sorting these issues early can help speed up your refund.

Your next step: review your return carefully before filing. Double-check every detail to help prevent delays and to maximize the refund you receive.

Submitting Your California Tax Refund Application

When you're ready to file your California tax return, you have two clear choices: file online or file using paper forms. Filing online (e-file) through approved software or Free File for simple returns is quick and helps you avoid common mistakes that might slow down your refund. If you prefer paper, you'll use forms like 540, 540A, or 540EZ.

For straightforward returns, free e-file services often include added benefits such as audit defense and amended return insurance. These extras give you peace of mind by ensuring your forms are filled out correctly, which helps reduce delays and gets you your refund sooner. If you’re ever unsure, taking advantage of these features is a smart next step.

California’s tax filing period runs from January 1 through October 15. You can also file for an extension if you need more time. Just keep in mind that filing after the deadline may lead to penalties and slow down your refund. Filing electronically not only speeds up the process but also minimizes errors. Try e-filing today to simplify the process and receive your refund faster.

California Tax Refund Timeline and Payment Options

img-2.jpg

When you file your tax return, the method you choose can affect how fast you get your refund. Electronic filing with direct deposit is usually the quickest option. This is because banks clear payments every day and the state receives your information instantly.

Filing Method Expected Wait Time
E-file + direct deposit ~3 weeks
E-file + mailed check 3–5 weeks
Paper returns Up to 3 months

Direct deposit uses an electronic funds transfer that the state processes daily. One taxpayer said they double-checked their bank info and received their refund in 3 weeks instead of 5. E-filing also automatically checks your data with state records, which cuts down on the delays you might see with paper checks.

Your next step: Make sure your bank details are correct and consider filing electronically with direct deposit for a faster refund. For more details on processing times, visit how long does it take to get tax refund.

Troubleshooting Common Refund Delays and Corrections

Missing or Incorrect Information

Make sure your tax return has all the required details. If you leave out your Social Security number, forget your signature, or make a math mistake, the state must review your return manually. This check can add 4 to 6 weeks to your wait time. Before you submit, take a minute to review every detail so you can avoid these delays.

Address and Banking Mismatches

If your mailing address or bank routing number isn’t entered exactly as it appears on your records, your refund might not reach you. Even a small typo can stop your check from arriving on time. Double-check your address and bank information to keep your refund on track.

Amended Return Processing

Using Form 540X to fix errors on your return will make the refund take 8 to 12 weeks longer. Before you file an amended return, review your original submission carefully and make sure every correction is right. If the changes seem complicated, consider getting help to avoid extra delays.

Manual Review by FTB

Sometimes, a manual review by the Franchise Tax Board is necessary if your identity details don’t match or they need more documents. Send in any requested paperwork right away and follow up if you don’t hear back within the expected time. Keeping copies of all your correspondence can help you stay organized as you work through any issues.

Resources and Support for Your California Tax Refund

img-3.jpg

Need to check on your refund? Visit the FTB Refund Status portal at ftb.ca.gov/refund to view details for returns from 2000 onward. If you’d rather talk to someone, call the automated hotline at 800-852-5711 on weekdays between 8 a.m. and 5 p.m. PST.

Try this: Head over to the online Resource Center for tools like forms, schedules, FAQs, and tax calculators. These resources make it easy to complete your refund process step by step. If you need extra help, you can set up an appointment at one of the field offices located in over 20 spots. This is a great way to get answers to your questions or to double-check your documents before sending them in.

Your next step: For a federal feel, check out irs where's my refund and see how tracking works nationwide.

Final Words

In the action, we showed how to check your refund status, file accurately, and handle delays. We explained the FTB portal steps, eligibility tips, and filing options to help you steer clear of common mistakes. Keeping track of deadlines and choosing e-file plus direct deposit can speed things up.

Review your details and use these steps to stay in control of your finances. Use this guide to boost your california tax refund experience and move confidently toward better money management.

FAQ

What does California tax refund status mean?

The California tax refund status tells you where your refund is in the process. Use the FTB portal by entering your tax year, SSN/ITIN, and refund amount to check its progress.

How can I find my California tax refund schedule and expected processing times?

The refund schedule varies by filing method. E-file with direct deposit usually gives your refund in about 3 weeks, while paper returns can take up to 3 months. Check the FTB portal for current timelines.

What role does the Franchise Tax Board play in issuing California tax refunds?

The Franchise Tax Board reviews your tax return and issues refunds when you file correctly. Their online system lets you track refund status and review your refund schedule easily.

How do refund processes compare for tax years like 2022 and 2025?

Refund processes stay similar across tax years. For both 2022 and 2025, accurate filing, electronic submission, and direct deposit choices help speed up processing times, though specific details may vary.

How does the California tax refund calculator work?

The California tax refund calculator estimates your refund by using filing details you provide. Enter your tax figures and it compares expected refunds, offering a quick snapshot based on accurate data.

Can tourists claim a California tax refund?

Generally, tourists aren’t eligible for California tax refunds because refunds depend on filing a state tax return for income earned. Exceptions exist only for non-residents meeting specific filing criteria.

Who qualifies for the $1,200 golden state stimulus?

Qualifying for the $1,200 stimulus depends on factors like income, residency, and filing a proper state income return. Review official FTB guidelines to see if you meet the eligibility criteria.

Why might a California refund take longer than expected?

A refund can be delayed by errors in your return, missing information, or manual reviews. Filing accurately and choosing e-file with direct deposit helps speed up your refund.

Building An Emergency Fund As A Freelancer: Empowered

0

Ever worry about making ends meet when your freelance income is all over the place? You’re not the only one feeling this way. A buffer fund can help you manage those leaner months without having to lower your rates or scramble for cash.

Here’s a simple plan: Start by setting aside a little extra money every time you get paid. Even if it’s just a small sum, it adds up and gives you a safety net when work slows down. This steady saving habit means you won’t be caught off guard by unexpected bills.

Your next step: Open a separate savings account, and transfer a portion of each payment there. Over time, this fund will help you feel more secure and let you focus more on your craft instead of stressing about money.

Try this today, and watch as your financial safety net grows with every paycheck.

Essential Steps to Build an Emergency Fund as a Freelancer

Freelancers often face big swings in income. One month you might earn $4,000, and the next, $8,000. This ups and downs mean you can’t rely on a steady paycheck. When your earnings are high, set aside some extra cash. Then, during slow months, your buffer will help cover your basic bills.

Your emergency fund is your safety net. It stops you from borrowing money or cutting your rates just to pay for bills. With a fund in place, you can deal with surprise costs and focus on your work without money worries.

Start by listing your monthly expenses like rent, groceries, insurance, and freelance taxes. Next, aim to save enough to cover three to six months of these costs. Finally, automate your savings so a fixed amount moves to your emergency fund every payday. Try this today and build your reserve steadily.

Calculating Essential Expenses and Taxes for Your Freelancer Emergency Fund

img-1.jpg

Creating a solid emergency fund starts with knowing your monthly cash needs. Begin by listing every expense so you can plan for quieter periods.

Try this: Write down your fixed costs, such as rent or insurance. Next, note your variable expenses like groceries or utility bills. Also, estimate your tax bill by setting aside about 30% of your monthly profits. Finally, add a little extra for those unexpected costs.

Here’s what to do:

  1. List fixed monthly costs (rent, insurance, etc.).
  2. Calculate average variable costs (utilities, groceries).
  3. Estimate freelance tax liability by taking 30% of your profits.
  4. Add a buffer for unexpected expenses.
  5. Total these amounts to find your overall monthly requirement.

Fixed costs usually stay the same, while variable ones can change with usage or season. Recognizing these differences helps you fine-tune your budget.

Taxes play a big role in your planning. For example, if you earn $4,000 profit in a month, putting aside about $1,200 for taxes can save you from surprises during tax season.

Your next step: Set up a simple spreadsheet to track these numbers. Update it regularly to keep your budget on track and ensure you are ready for any slowdown in work.

Setting Realistic Emergency Fund Savings Targets for Freelancers

Saving enough for 3 to 6 months of your core expenses can really help when work is slow. This means setting aside money ahead of time so you won't have to scramble when cash is tight. A clear savings target builds a cushion that keeps you steady while you focus on your freelance work.

For example, if your monthly expenses are $2,500, your goal should be between $7,500 and $15,000. You might choose three months of expenses if work is steady, or six months for extra peace of mind. Having a set number helps you track your progress and make changes if needed.

Many freelancers work toward a six-month reserve by saving about 70% of any extra income. Try this: each time you earn a bit more, put most of it into your emergency fund. It’s a simple habit that protects you during lean times and builds a solid savings routine.

Your next step: Review your monthly expenses and choose a clear savings goal. Then, decide on an extra income strategy to boost your fund. Small steps now can make a big difference later.

Freelance Budgeting Techniques for Emergency Fund Planning

img-2.jpg

A solid budget is the key to building a strong emergency fund. When you plan your spending in advance, you know exactly where your money goes. This lets you save extra cash during busy months and make each dollar count when times are lean.

Many freelancers use different techniques to manage their money. For example, try zero-based budgeting, a method where you give every dollar a job before the month starts. You can also break your spending into essential costs and extras. This simple step shows you where you can cut back and boost your savings.

Here are some techniques you can try now:

  • Zero-based budgeting
  • Envelope method
  • Percentage-based allocation
  • Expense categorization (necessary versus optional)
  • Automated transfers
  • Monthly budget reviews

Keep a close eye on your spending by tracking your expenses every month. A regular review helps you spot areas of overspending and uncover hidden savings. Many freelancers find that using a DIY spreadsheet or a budgeting app makes it easy to stay on track. Start small: pick one tool and set aside time each month for a quick budget check. This habit builds confidence and keeps your emergency fund growing steadily.

Tool Type Cost Best For
Budget Planner Template Downloadable Free Self-employed budgeting
Spreadsheet DIY Free Customizable tracking
Budgeting App App Subscription Automated tracking

Tracking Income and Expenses for Your Freelance Emergency Fund

Start by tracking every payment you receive. Freelance work can pay unevenly, so jot down each amount and date. Try a money organizer like the one at https://thefreshfinance.com?p=1375. This step helps you spot trends and prepare for times when earnings are low.

Keep your business cash separate from your personal funds. Open a dedicated account for work money and expenses. This way, you clearly see what’s left for daily needs and building your emergency fund. It also stops business costs from eating into your personal savings.

Check your accounts often. If your emergency fund drops below your goal, add more money right away by upping your contributions or setting up automatic transfers. This keeps your budget on track and builds a strong financial buffer.

Your next step: Use the money organizer now to start tracking your earnings and secure your emergency fund.

Selecting the Best Accounts to Hold Your Emergency Fund

img-3.jpg

Freelancers have several options to store their emergency funds. You might choose a checking account, a savings account, or a money market account. Checking accounts give you instant access to your money, but they often pay little or no interest. Savings accounts earn interest, though you may face limits on the number of withdrawals each month. Money market accounts mix better returns with easy access, but they usually require a higher initial deposit.

For better growth and liquidity, try using a high-yield savings account. These accounts pay higher interest rates, so your emergency fund can earn more over time while remaining accessible when you need it.

Your next step: Compare a few banks or online providers to see which high-yield savings account fits your needs.

How to Replenish and Grow Your Emergency Fund Over Time

If you need to dip into your emergency fund, rebuild it as soon as possible. Try setting up automatic transfers right after your paycheck clears and add extra funds when you have spare cash. This approach gets your safety net back in shape fast and keeps you ready for the unexpected.

Once your emergency reserve is full, use any extra savings wisely. Divide any surplus into three parts: one-third for retirement savings, one-third for key home or business projects, and one-third for your personal spending. This simple plan helps you manage your money and stay prepared for future surprises.

Your next step: Set up an automatic transfer for a fixed amount as soon as your paycheck clears and plan a budget that includes extra deposits when you have additional funds.

Final Words

In the action, you examined income swings, set clear expense targets, and got step-by-step guidance on building an emergency fund as a freelancer. You learned how to track cash flow, pick accounts, and use budgeting techniques to manage irregular income. These steps help protect your finances during lean months. Take a moment now to review your plan and set up an automatic savings routine. Keep moving forward; every step makes you more financially secure.

FAQ

Building an emergency fund as a freelancer on Reddit

Discussions on Reddit show that freelancers benefit from setting aside 3–6 months of essential expenses. This reserve supports you during lean earning months and protects against stress during income swings.

How much emergency fund should I have according to Bogleheads?

Bogleheads advise having an emergency fund that covers 3–6 months of basic living costs. This amount ensures you can handle essential expenses and income unpredictability without worry.

Is $15k a good emergency fund?

A $15k emergency fund is strong if it equals 3–6 months of your necessary expenses. This amount can cover housing, food, and other essentials, especially if your earnings fluctuate frequently.

What does a 3-month emergency fund mean?

A 3-month emergency fund means saving enough to cover your essential living expenses for three months. It acts as a quick buffer when your freelance income dips unexpectedly.

Is $25k a good emergency fund?

For freelancers with higher monthly expenses, $25k can serve as a robust safety net. If it reflects 3–6 months of living costs, it offers solid protection during times of unpredictable earnings.

Can you have too much in an emergency fund?

Holding more than your necessary 3–6 months of expenses may limit growth opportunities, but extra savings still provide extra peace of mind. Balance immediate access with earning potential in your chosen account.

What is the 3-6-9 rule for an emergency fund?

The 3-6-9 rule suggests starting with a fund covering 3 months of expenses, then building up to 6 months, and eventually aiming for 9 months to better cushion financial ups and downs.

Is a $1,000 emergency fund enough?

A $1,000 emergency fund usually covers only a brief period and not all essential expenses. Freelancers are advised to aim for funds covering 3–6 months to better manage income gaps.

What does the 70/20/10 rule for money mean?

The 70/20/10 rule means using 70% of your income for necessities, 20% for saving or debt repayment, and 10% for discretionary spending. It helps keep your budget balanced while building resilience.

How can I save $10,000 in 3 months?

To save $10,000 in 3 months, consider tightening your budget, reducing nonessential expenses, increasing earnings, and automating your savings. Breaking the goal into weekly targets can make it more achievable.

Low Cost Index Investing: Ignite Your Financial Growth

Could high fees be eating away at your money? With low cost index investing, you pay less in fees and keep more of your money working for you. Instead of paying for expensive active management, you buy a broad portfolio that mirrors the market. Think of each dollar you save as extra fuel for your financial journey. In this post, we explain how cutting fees can help you build wealth over time. Your next step: Look into low cost index funds to see how they can boost your savings.

Why Low Cost Index Investing Delivers Cost-Effective Diversification

Low cost index investing gives you broad access to the market while keeping fees in check. Instead of paying a lot for active management, you get a ready-made, diversified portfolio by tracking groups of assets like the S&P 500.

This strategy works like a set-it-and-forget-it plan. You pick your approach and let market growth do the work. With very low fees, more of your money stays invested. For example, a fund with a 0.06% fee means you only pay about $6 a year for every $10,000 you invest.

Imagine watching your wealth grow because every fee dollar saved stays in the market. Think of it this way: investing $10,000 in a low fee fund can add up to a big advantage over decades.

Low cost index investing also spreads your risk across different assets. With a mix of stocks, bonds, and sometimes international investments, you aren’t overly dependent on a single sector. This means fewer portfolio tweaks and more focus on long-term growth.

If you’re busy but still want a smart, simple way to invest, this method is worth considering. Try this: research a low fee index fund and see how it fits into your long-term plan.

Understanding Expense Ratios in Low Cost Index Investing

img-1.jpg

Expense ratios are the yearly fees you pay on your investment, shown as a percentage. For example, if a fund has a 0.06% expense ratio, it costs you $6 per year on a $10,000 investment. When fees are lower, more of your money stays invested, which can really boost your compound growth over time. Even tiny differences in expense ratios can lead to big changes in your net returns if you hold the investment for years.

Think of it like this: keeping your money from getting slowed down by high fees is like making sure your truck has extra fuel to go farther. A fund with a slightly lower expense ratio might seem like a small saving now, but those savings add up over the years. For example, a $10,000 investment with a 0.06% fee might barely dent your wallet yearly, but over 30 years, lower fees can mean thousands more in your balance.

When deciding on funds, compare several options that track the same index. Look closely at their fee structures and choose the one that keeps costs to a minimum. This simple step is key in low cost index investing, it helps your money work harder for you, aligning perfectly with your long-term financial goals.

Comparing ETFs and Mutual Funds for Low Cost Index Exposure

Both ETFs and mutual funds follow popular benchmarks like the S&P 500, but they work in different ways that can affect your investment plan. ETFs are bought and sold throughout the day on stock tickers, so prices can change as you trade. Meanwhile, index mutual funds are priced once a day based on their net asset value. This setup makes mutual funds easier for beginners who don’t want to worry about perfect timing.

Expense ratios and trading fees are also important to weigh. ETFs usually have lower expense ratios, but you might face trading fees unless your platform offers commission-free trades. Mutual funds can have slightly higher fees, but they save you from potential extra costs if you trade often.

ETFs Mutual Funds
Trade all day using tickers Priced once daily at NAV
May incur trading fees Often work well with automatic contributions
Good for active trading and flex pricing Better for set-and-forget investing

Try this: Check your trading platform to see if the ETF you like is commission-free. Then, compare the expense ratios so you can choose a fund that helps grow your money while keeping costs low.

Step-by-Step Guide to Starting Low Cost Index Investing

img-2.jpg

Want a simple, hands-on plan to start investing with low-cost index funds? Here’s a three-step guide that shows you exactly what to do.

  1. Set Your Investment Goal
    Decide why you’re investing. Maybe it’s for retirement, saving for college, or that big future purchase. Write down a clear goal, like saving $10,000 or even "Save $5,000 in five years", to keep you on track. Knowing your goal helps you choose a fund that fits your risk level and timeline.

  2. Compare Funds with Free Tools
    Head over to a site like Morningstar and use their free screener to check out different funds. Look for funds that cover a broad part of the market and come with low fees. For example, a fee of 0.06% means you'll pay about $6 per year for every $10,000 you invest. Write down a few options and compare their fees and past performance to narrow down your choice.

  3. Invest and Set Up a Plan
    Open an account with an online brokerage if you haven’t already. Then enter the fund’s ticker symbol along with its current share price to make your trade. Keep the process simple by setting up a regular monthly investment. This way, you buy more shares when prices are low and build your portfolio over time.

Try this next: open your brokerage account today, set a clear goal, and use a free screening tool to pick a fund before making your first trade.

Building a Minimal Expense Portfolio with Low Cost Index Picks

A minimal expense portfolio helps you spend less on fees and keep your risk in check. Low cost index funds are a key part of this strategy because they keep fees low and let you spread your money among U.S. stocks, international stocks, and bonds. This way, you capture the overall market return without needing to adjust your investments all the time. For example, you might start with the Schwab Total Stock Market Index and the BNY Mellon US Large Cap Core Equity ETF. These funds give you strong U.S. stock exposure along with room to diversify further.

Mixing different fund types means including U.S. stocks, global stocks, and bonds. This mix helps protect you from big ups and downs and lets your wealth grow steadily over time. Try this: write down what you own today and see if you can add a few of these funds. Even a small change can help you build wealth more steadily.

Fund Name Vehicle Type Expense Ratio Benchmark
Schwab Total Stock Market Index Mutual Fund 0.03% Total Market
BNY Mellon US Large Cap Core Equity ETF ETF 0.04% S&P 500
Vanguard FTSE All-World ex-US Index Fund Mutual Fund 0.11% International Equity
iShares Core U.S. Aggregate Bond ETF ETF 0.05% U.S. Aggregate Bonds
Fidelity ZERO International Index Fund Mutual Fund 0.00% International Equity

Try this: take a look at your portfolio and see if adding these low cost index options can boost your long-term growth.

Risk Considerations and Performance Metrics in Low Cost Index Investing

img-3.jpg

When choosing a low-cost index fund, start by checking how well it follows its benchmark, like the S&P 500. A fund that closely mirrors the index shows you that its returns line up with the overall market.

Next, look at the tracking error. This is the average difference between the fund’s returns and the index’s returns over time. A small tracking error means the fund is doing a good job of matching the index.

Also, keep an eye on the expense ratio to understand fee drag, the cost of investing. For example, if a fund has a 0.06% expense ratio, it costs about $6 each year on every $10,000 you invest. Lower fees mean more money stays in your account to compound over the years.

Market swings are another factor. Since these funds follow an index, any market ups or downs will affect your investment. It’s a good idea to check historical data to see how a fund handled downturns and recoveries.

Finally, compare performance over various periods. Funds that track well and have low fees often lead to steady growth. Look at several funds based on these points to find one that balances risk with low investment costs.

Try this: Use a free online screening tool to check tracking errors and fee structures before you decide where to invest.

Long-Term Allocation Planning and Maintaining Low Cost Index Investing

To grow wealth with low cost index funds, you need to check in on your investments and stick to your plan. Start by setting aside time once a year to review your portfolio. Look at the fees you pay and make sure your current mix of investments still fits your goals. This yearly check helps you spot any differences in your target allocation without racking up extra trading fees.

Plan to rebalance your portfolio around the same time each year. Rebalancing means selling a bit of the investments that have grown too large and buying more of those that haven’t kept up. Write down the percentage of each asset class in your portfolio, then compare it to what you originally planned. If one part is too high or too low, adjust your future contributions to bring it back in line.

Regular contributions, even small ones, let your investments grow over time by taking advantage of compounding returns. Making these deposits a habit can help protect your money from market ups and downs and keep your portfolio balanced.

Try this next: mark a date on your calendar for an annual review, and check to see if your portfolio still matches your ideal mix. This simple step makes low cost index investing a steady way to reach your financial goals.

Final Words

In the action, you learned how to set up and maintain a smart, low cost index investing plan. You broke down the impact of expense ratios, compared ETFs and mutual funds, and walked through a clear three-step guide to start investing. We also looked at building a minimal expense portfolio and managing risks with practical checks. Use these steps to create a system that works for you and sets a solid foundation for your financial future with low cost index investing.

FAQ

FAQs

What is low cost index investing and what does it mean for beginners?

Low cost index investing means buying funds that mirror market indexes like the S&P 500 with very low fees. This strategy offers broad market exposure and simplifies investing, making it a smart choice for beginners.

What low-cost index investing options does Vanguard provide?

Vanguard offers a variety of low-cost index funds that track major market benchmarks, including the S&P 500 and total market indexes. Their low expense ratios help to reduce fees and maximize long-term growth.

What options does Fidelity offer for low cost index investing?

Fidelity provides low-cost index funds that track well-known benchmarks, delivering broad market exposure with minimal fees. Their offerings are designed for investors seeking a straightforward, cost-efficient passive strategy.

Which low-cost index funds track the S&P 500?

Several low-cost index funds track the S&P 500, including options from Vanguard and Fidelity. These funds provide exposure to large-cap U.S. stocks with low fees, making them a favorite among many investors.

Are there low cost index funds that pay dividends?

Yes, some low cost index funds pay dividends by investing in companies with regular payout histories. These funds can offer both market growth and a stream of income, appealing to investors interested in dividend returns.

What is considered the best low cost index fund to invest in?

The best low cost index fund depends on your financial goals and risk tolerance. Look for funds with very low expense ratios and broad market exposure, such as those tracking the S&P 500, which suit many long-term investors.

What might have happened if I had invested $1,000 in the S&P 500 10 years ago?

Investing $1,000 in a low cost S&P 500 fund 10 years ago would likely have resulted in significant growth due to compound returns. Keep in mind that past performance is an example, not a guarantee of future results.

What might be the result if I invest $1,000 a month for 5 years in low cost index funds?

Investing $1,000 a month over 5 years can build a diversified portfolio through dollar-cost averaging. Over time, consistent contributions and market growth may help you accumulate wealth and smooth out market fluctuations.

Simple Monthly Budgeting Template Simplifies Finances

0

Do you feel like your money vanishes each month? Keeping track of bills, groceries, and savings can be hard. Try a monthly budgeting template that shows your take-home pay, expenses, and what’s left, all in one spot. The template breaks your spending into clear sections, making it easy to handle your money. Try spending just a few minutes every month with this tool to gain better control and enjoy more peace of mind.

Access the Simple Monthly Budgeting Template

Need a quick and simple way to manage your monthly money? This tool helps you organize your take-home income, fixed bills like rent or mortgage and utilities, and everyday costs like groceries or gas. It's perfect whether you're just starting out or looking for a faster way to handle your budget.

The worksheet comes with common categories such as housing, groceries, utilities, and transportation. You can also add your own spending areas. The tool automatically figures out your month-end savings so you can see your balance without doing any math. For example, enter your $1,200 rent and $400 for groceries, and let the tool do the rest.

Try this: Download the budgeting template today and choose to work on it in Excel, Google Sheets, or print a PDF copy for quick access.

How to Use Your Simple Monthly Budgeting Template

img-1.jpg

Keeping your finances in check is easier than you think. This handy template lets you see your income, bills, and daily expenses, all in one place. It turns a basic expense log into a practical money plan you can trust.

Your next step: Set aside a few minutes each week to update your budget and avoid surprises.

  1. Figure out your net monthly income.
  2. Write down every recurring bill along with its due date.
  3. List variable expenses and group them by category.
  4. Plan your debt payments and set clear savings goals.
  5. Record each transaction as it happens.
  6. Review your spending every week (try doing it every Friday).
  7. Change your categories if you notice your spending is different from what you planned.

By following these steps regularly, you'll understand your spending trends and build more control over your money. Stick with this routine, and you'll gain the confidence to handle your finances every month. Give it a try and see how a few minutes now can lead to lasting clarity.

Customize the Simple Monthly Budgeting Template for Your Goals

This template lets you tailor a financial planning worksheet that fits your life exactly. You can change categories, add rows, and adjust columns so the tool reflects how you really spend. It’s a solid way to use every dollar to meet your financial goals.

Add or Remove Categories

Rename columns easily to match your spending style. For example, change "Utilities" to "Mobile & Internet" or add rows for new costs like subscriptions or pet care. Group similar expenses so you can track them more clearly.

Set Up Savings and Debt Sections

Add extra rows for your savings targets or planned debt payments. This makes sure you assign every dollar a clear purpose. Try it now: update your sheet so each dollar goes toward a goal.

Apply Conditional Formatting

Use the built-in rules to mark areas where you overspend by showing them in red. This quick visual alert helps you keep your budget on track. Make the look your own so you stay motivated every time you check your progress.

Tips for Effective Money Management with Your Monthly Template

img-2.jpg

Keep it simple. Start by setting one time each week, say every Friday, to go over your expenses against what you planned in your template. This weekly check helps you spot overspending early and keeps your financial plan on track.

Your next step: Track your progress on savings and debt payoff. A quick look at your numbers can show you small wins that build up over time. Also, set up automatic entries for bills you pay regularly to cut down on mistakes. And don't forget to save a little for surprises like car repairs so unexpected costs won't throw your budget off.

Next, add an emergency fund section to your template for events you can't plan for. Use the template's scenario tool to play out changes in your income. This helps you plan for leaner times without stress. If you notice a sudden jump in spending, update your expense categories right away.

Staying on top of your budget may seem like a small habit, but it makes a big difference in reducing stress and keeping your finances in check.

Frequently Asked Questions about the Simple Monthly Budgeting Template

How does the template manage variable income?
The template handles varying income by either averaging your monthly earnings or using your lowest month as a baseline. For clear, step-by-step instructions, check out our guide on handling irregular income.

Where can I find information on supported file formats?
You can use the template with Excel, Google Sheets, and PDF. For more details, take a look at the tool features section earlier in the article.

How do I adjust the template for my spending habits?
It’s easy to change spending categories and line items so the template fits how you actually spend. Visit the customization section for a step-by-step guide on making those tweaks.

When should I update my budget for the most accurate records?
We recommend updating your budget weekly or every two weeks to track your spending correctly. For more on this, see our guidelines on update timing.

What tips help manage a fluctuating income with this tool?
Try comparing your average monthly income with your leanest month to set a realistic spending limit. This method gives you a practical view of your funds and helps keep your budget balanced.

Final Words

In the action, this guide offered a simple monthly budgeting template that cuts down on guesswork. It walks you through setup, customization, and regular reviews to keep spending on track. We broke down how to add or remove categories, set savings goals, and even flagged overspending. Each tip supports clear, repeatable steps to manage cash flow. Enjoy the clarity and control this tool brings, and get started today with your simple monthly budgeting template for a brighter financial future.

FAQ

FAQ

Q: What file formats does the simple monthly budgeting template support?

A: The available file formats for the template include Excel, Google Sheets, and PDF. This allows you to choose the format that best fits your needs and work style.

Q: Is the simple monthly budgeting template free and easy to download?

A: The template is free and designed for quick-download, meaning you can access a ready-to-use tool without spending extra time setting up from scratch.

Q: How does the simple budget template Excel allow me to customize my plan?

A: The Excel version lets you adjust expense categories, input your net monthly income, and modify entries, making it a flexible tool for accurate financial tracking.

Q: Can the monthly expenses template Excel help me track all my household costs?

A: The Excel budgeting worksheet organizes your household expenses by grouping bills and variable expenses, giving you a clear monthly overview of your spending.

Q: Does the simple budget worksheet PDF include pre-built expense categories?

A: The PDF version comes with pre-built categories such as housing, utilities, and groceries, which simplifies your budgeting process and speeds up your financial planning.

Freelance Invoicing And Expense Tracking Guide: Profit Boost

0

Ever wonder if messy invoicing is eating into your freelance profit? Picture a simple system that tracks payments and shows your spending habits in just a few minutes.

We break down clear, step-by-step actions to help you set up tidy records and smart expense tracking. With solid organization, you can avoid surprise IRS issues and keep more control over your earnings.

This guide gives you a clear plan so you can spend less time on paperwork and more time doing the work you love. Your next step: try organizing your invoices today using our free template, and watch your bottom line improve.

Core Principles of Freelance Invoicing and Expense Tracking

Clear invoices and tracked expenses are vital for freelancers. Keeping good records helps you report all your income, especially payments of $600 or more that require a 1099. This practice helps you avoid IRS penalties and keeps your finances in order.

Keep your business money separate from your personal funds. Open a business bank account and use a dedicated business credit card for expenses like software fees and office supplies. This clear separation makes tracking spending and filing taxes much easier.

Try this: Each week, spend 15 minutes adding new expenses to a simple spreadsheet or digital tool. Note the date, amount, and category of each expense. At the end of the month, review your log and match each item with its receipt. For example, if you see an entry like “Office internet: $50,” you can spot trends that help with budgeting and planning potential deductions.

Well-organized records support smart budgeting and show you which costs are deductible, like travel or equipment expenses. This method not only keeps you tax compliant but also gives you a clear picture of your business finances.

Your next step: Set a weekly reminder to update your expense log and mark one day each month for a full review. These simple habits will boost your profit clarity and keep your financial records on track.

Setting Up a Freelance Invoicing Workflow

img-1.jpg

Begin by writing down the services you offer. Be clear about what each service includes so clients know exactly what they are paying for. For example, if you charge for consultation by the hour, state it like this: "Consultation – $75 per hour for strategy sessions."

Next, add a unique invoice number to each bill. This makes it easier to track your invoices and keeps your records in order. Also, set clear payment terms and due dates so clients know when to pay. For instance: "Invoice #102: Payment due within 15 days."

Decide whether you want to charge by the hour or use a flat-fee model. Pick the option that works best for you and meets your clients' needs.

  • Create or download digital templates that feature your logo and include important client details.
  • Clearly list accepted payment methods such as credit card, PayPal, or Venmo.
  • Save draft invoices in a digital ledger so you can review them before sending.

This simple system helps reduce mistakes and speeds up your billing process. Try this: Build a basic spreadsheet with columns for the date, service description, amount, and due date. Test it out with a sample invoice (for example, "Website design: 10 hours at $50 per hour") and adjust the process until it feels smooth.

Effective Expense Tracking Systems for Freelancers

Freelancers have two main ways to track expenses. One way is to use a manual spreadsheet where you note down the date, amount, category, and keep a scanned copy of the receipt. For example, you might write down “Internet bill: $45 on 06/08” and attach its digital copy. This method gives you complete control but requires time every week.

The other option is an automated mobile app. These apps link directly to your bank or credit accounts and pull transactions in real time. They also scan receipts with your phone and sort costs into groups like office supplies, travel, software, and home office items. The apps then generate simple dashboards that show your spending trends, which helps you make quick, informed decisions.

Try this: Use a manual system for one month and then switch to an automated app the next month. Compare both to see which one fits your workflow better. Regular expense tracking, whether done manually or with an app, leads to smarter budgeting and greater confidence in managing your freelance finances.

Comparing Freelance Invoicing and Expense Tracking Tools

img-2.jpg

When shopping for software, focus on key features, cost, and how easy it is to use. Lunafi is a handy all-in-one tool that lets you create invoices, track expenses, and monitor your time. For example, you can quickly write an invoice like "Logo design: $500 due in 30 days" and then record every expense in the same app.

QuickBooks Self-Employed is built to help you track tax deductions and mileage. Its mobile app means you can add expenses on the go, so you spend less time entering data by hand. FreshBooks makes it simple to keep in touch with clients by sending invoices automatically along with reminders, which makes following up feel almost effortless.

Wave offers a free option that’s perfect if you’re just getting started. It covers basic invoicing and expense tracking, and even syncs with your bank account to keep things up to date without mounting monthly fees.

Below is a side-by-side comparison of these tools:

Tool Key Features Pricing
Lunafi All-in-one invoicing, expense, and time tracking; real-time reports (PDF/CSV) $15–$25/month
QuickBooks Self-Employed Deductions tracking, mileage, mobile app sync $15–$25/month
FreshBooks Client portal, automatic reminders, time tracking $15–$25/month
Wave Free invoicing, bank sync, basic expense log Free

Pick the tool that fits your work style best. Look for strong cloud and mobile features so you can update invoices and record expenses wherever you are. Your next step: Try one of these tools today to see which one streamlines your workflow the most.

Automating Your Freelance Invoicing and Expense Logging

Cut late payments by setting up automatic invoice reminders. For example, use your invoicing app to send a message like, "Invoice #101: Payment due in 5 days" so your clients know when to pay. This keeps your cash flow steady and reduces delays.

Save time with recurring invoices for retainer clients. Create a simple template that repeats key details like the service description and payment terms. For instance, you could use, "Retainer Fee: $500 per month, Invoice recurs on the 1st." This makes billing predictable and easy for everyone involved.

Connect your invoicing tool to payment gateways like Stripe or PayPal to see funds arrive instantly. This setup means payments are tracked right away, cutting down on follow-up tasks. Then, link your bank account with your tool so expenses are imported and categorized automatically.

Set up auto-categorization rules to sort transactions without extra work. For example, automatically assign charges from a specific vendor to a "Software Expenses" category. These steps help you keep real-time, organized financial records and free up time to focus on your business.

Your next step: Update your invoicing settings today to take full advantage of these automation features.

Maintaining Organized Freelance Records for Tax and Budgeting

img-3.jpg

Set up a digital archive that fits your workflow. Create cloud folders labeled by year and client, like "2023 – Client ABC", to keep invoices and receipts all in one place. This simple system helps you grab documents quickly when tax time rolls around or if you're ever audited.

Next, track your deductible expenses by sorting them into clear groups such as equipment, subscriptions, travel, and home office costs. Use a spreadsheet or a user-friendly app to log each expense as it happens. Include columns for the date, a brief description, and the dollar amount so you always know what you can claim during tax season.

Follow IRS guidelines by keeping your records for at least 3 years. This gives you enough time to answer any questions from tax officials and keeps you covered if discrepancies arise. To make sure everything stays organized, set a reminder to review your records every three months. During these quarterly check-ins, generate expense and income reports, review your spending patterns, and confirm that all receipts and invoices are filed correctly.

Linking your expense data with your overall financial plan is a smart habit. Try using tools that sync with entrepreneur budgeting strategies (https://thefreshfinance.com?p=1357) to integrate your data seamlessly into your budget. This not only makes tax time less stressful but also gives you a clear look at your cash flow, helping you make smarter business choices.

Keep a printed checklist of your record-keeping best practices nearby. This simple reminder prompts you to update and review your files regularly, keeping your finances clear and reliable during tax season and beyond.

Your next step: Review your digital archive and set a quarterly reminder to check and update your records.

Troubleshooting Invoicing Errors and Expense Logging Glitches

Automation cuts down on mistakes, but sometimes glitches slip through and need a quick fix. When those issues happen, it’s best to take simple, clear steps to get things back on track.

If your invoice numbers start acting up, check your app settings. Software updates can change things unexpectedly. A quick review could fix repeated invoice numbers in just a few minutes.

When expenses don’t show up correctly in your ledger, look at the logs between your invoicing and expense tracking tools. This simple check often reveals delays or miscategorized entries.

For payments that come in late or don’t match up, double-check your reminder dates. A small typo can delay the notifications that let you know a payment is due.

Your next step: Use the checklist below on your next system check.

Step Action
1 Review tool settings after any update
2 Check logs for syncing issues
3 Verify digital reminder dates
4 Match ledger entries with system logs

Regular checks like these help you catch problems early and keep your automated invoicing running smoothly. Try scheduling a quick review this week to stay ahead of any issues.

Optimizing Freelance Cash Flow with Invoicing and Expense Data

img-4.jpg

Use a real-time dashboard to check your cash flow every day. When a client pays slowly, you spot it right away. If invoices routinely stay unpaid for over 30 days, consider shortening your payment terms to speed up payments.

Keep an eye on upcoming expenses by matching unpaid invoices with bills that need paying soon. When there’s a gap between what you earn and what you owe, plan your invoice dates and deadlines carefully. This helps keep your reserve funds strong and avoids surprises during slower times.

Set up alerts to warn you of big expenses. For example, get a notice when a costly bill, like a software renewal or travel booking, is due within the next 2 weeks. This gives you time to adjust your spending or ask your vendor to delay the payment.

Try using a zero-based budgeting method. This means giving every dollar a job, from fixed costs to daily expenses.

  • Watch for slow payments on your dashboard
  • Compare your income with upcoming bills
  • Set invoice dates that match your spending needs

Your next step: Use your current invoicing and expense data to add a dashboard alert for any invoice that is a week overdue. This simple move will help you tighten your cash flow and keep your finances steady.

Final Words

In the action, this guide laid out clear, step-by-step practices for managing invoices, tracking expenses, and automating your freelance work. We showed how to build repeatable systems to reduce errors and speed up processes. You now have strategies that cover everything from accurate record-keeping to smart budgeting. Follow these steps, use the provided templates, and refer back to this freelance invoicing and expense tracking guide to keep your finances on track. Keep pushing forward with confidence and steady progress.

FAQ

Q: What is a freelance invoicing and expense tracking guide (Reddit, template, free)?

A: The freelance invoicing and expense tracking guide offers ready-to-use free templates and community insights shared on Reddit. It outlines steps to record income and expenses accurately, making finance management easier.

Q: How do I keep track of expenses as a freelancer?

A: Keeping track of expenses as a freelancer means using digital ledgers or apps to log receipts and assign cost categories. This regular tracking helps with budgeting and tax preparation.

Q: Can I make $1,000 a month freelance writing?

A: Making $1,000 a month freelance writing is achievable by building a client base, setting competitive rates, and efficiently managing invoices and expenses to keep finances on track.

Q: What should a freelance invoice include?

A: A freelance invoice should include your business details, client information, a unique invoice number, service descriptions, amounts, payment terms, and clear payment instructions to speed up client payments.

Q: How do I record freelancer expenses?

A: Recording freelancer expenses involves entering each expense with the date, amount, and category. Use spreadsheets or mobile apps to scan receipts and review spending regularly.

Q: What invoicing and expense tracking tools are recommended for freelancers?

A: Tools like Expensify, Hiveage, Wave Accounting, QuickBooks, and Hive Invoicing offer features that simplify invoice creation and expense logging, helping freelancers manage finances effectively.

Cash Flow Management Tips For Freelancers: Flourish Now

0

Ever wonder how some freelancers always manage to keep a healthy bank balance while others struggle with money stress? The trick is in managing your cash flow smartly. When your income changes from week to week, taking simple steps can make a big difference.

Here's what you can do now:
• Track your spending every week. Write down your expenses so you know where your money goes.
• Set a clear budget. Plan how much you want to spend on essentials and savings.
• Prepare for lean weeks. Keep a small backup fund, like two months of groceries, to help when income drops.

Your next step: Download our free expense tracker template and get started today. This simple tool will help you see your cash flow clearly every month.

Cash flow management essentials for freelancers

Good cash flow management is about keeping a close eye on your money. It means tracking your income and expenses so you never run out, even during slower months. When you work as a freelancer, your income can be unpredictable. For example, one freelancer earned $60,000 in just two months by using smart money strategies that kept their bank account in the green.

One simple step is to set aside one day each week to review your bank transactions and update your budget. Skipping these check-ins even for two weeks can let overspending fly under the radar. Regular reviews help you catch every dollar and avoid surprises.

Try these steps to make your freelance income more steady and reliable:

  1. Set up a detailed budget that gives every dollar a clear purpose before the month starts.
  2. Reserve one day each week to check your transactions and revise your forecasts.
  3. Build a cash buffer that covers a week’s average spending.
  4. Use simple tools or spreadsheets to track both income and expenses.
  5. Cut back on non-essential spending during slower times.

Start treating your freelance earnings like a steady paycheck. By taking these steps, you can dodge overdrafts and keep your bank account positive, even when the work flow isn’t constant. Your next step is to review your current budget and pick one of these strategies to try today.

Freelance budgeting techniques to stabilize cash flow

img-1.jpg

Freelancers often face income ups and downs, so having a budget that adjusts to change is a must. A smart budget cuts down stress and lets you put money into growth, like trying a $500 ad challenge to better manage your promotions. Here are two easy methods to help balance your spending with what you earn.

Zero-Based Budgeting

With zero-based budgeting, you give every dollar you expect to earn a job before the month starts. You decide ahead of time where your money goes, so nothing is left behind. This plan helps you sort your spending by importance, especially when your income isn’t steady. If you need more details, check out our guide on creating a zero-based budget. This way, you ensure every bit of profit is used wisely, which is key when your ad spending might not always pay off.

Percentage-Based Budgeting

This method splits every payment into fixed chunks. For example, you might decide on 30% for taxes, 20% for savings, and 50% for operating costs. This clear-cut approach makes it simple to manage your cash flow, no matter how much you earn each month. It’s a good way to protect your finances on lean days while also making the most of extra income when it comes.

Make budgeting a regular habit. Set aside some time each week to review your spending. You can use a free budget planner or one of the many budgeting apps available to track your progress. Regular check-ups mean you’ll stick to your plan and can quickly adjust if your cash flow changes.

Your next step: Choose a method, try tracking your spending for a week, and see how well it helps you stay on top of your finances.

Efficient invoicing strategies for freelance cash flow

Late invoices hurt your cash flow fast. When money comes in late, you might miss crucial expenses and face unnecessary stress. As a freelancer, you know the timing of payments can be unpredictable. Streamlining your invoicing process can help keep your bank account healthy.

Automating Invoice Scheduling

Automating your invoicing means sending invoices automatically when you reach a project milestone. With the right tools, you can set your system to send an invoice as soon as you finish a task. This simple change cuts down on delays and frees you from repetitive follow-ups, so you can focus more on your work.

Reminder and Follow-Up Protocol

Set up a clear reminder schedule for unpaid invoices. Try this: send a first reminder 7 days after a payment is due, a second at 14 days, and a final notice at 21 days if needed. This step-by-step approach boosts your chances of getting paid faster. Track your invoice turnaround times and adjust your reminders if needed to speed up your payment cycle.

Expense tracking methods for better cash flow visibility

img-2.jpg

When you watch your spending in real time, you avoid surprises like overdrafts. Automated payments are convenient, but they can make you lose track of your money. Recording every expense as it happens keeps you connected to your cash flow and helps you spot unusual costs before they become a problem.

Break your spending into clear categories like software, marketing, and travel. Use a consistent labeling system and set a weekly time to review your expenses. This simple habit shows you which costs are necessary and which ones you can cut back on.

Every month, take a moment to review your expenses to find wasteful spending. Look for recurring subscriptions you hardly use and one-time charges that seem off. By eliminating these extra costs, you can strengthen your daily cash flow and keep your finances in check.

Income forecasting and financial planning for freelancers

Income forecasting is simply estimating how much money you’ll bring in over a set period and matching that with your planned spending. This step helps you avoid cash-flow gaps and keeps you on track with your finances.

Your next step: Gather all your past invoices, note any seasonal patterns, and list your recurring retainers. This data shows you the rhythm of your earnings so you can build a cash-flow forecast that fits your freelance cycle perfectly.

Try this: Run a small test budget, say, spend $500 on advertising, to see if your forecast holds up. This mini experiment lets you check if market shifts affect your income estimates and highlights areas that might need tweaking.

Finally, make it a habit to update your forecast every week or month. Comparing your estimates with the actual income lets you spot and adjust any differences quickly, keeping your financial plan reliable and steady.

Building a cash buffer and contingency planning

img-3.jpg

Freelancers sometimes face delays in receiving money. When payments are late, focus on a clear plan instead of rehashing basic buffer steps. Start with your cash flow plan and build a backup for irregular income. For example, mark calendar dates to review missed payments and list simple steps to cut expenses until cash flow is steady.

Try this: Automate your savings. Set up round-ups or split deposits to send money straight into a reserve account. When you get extra funds, like bonuses or windfalls, put a piece of it toward your savings. For instance, automatically move $100 from each payment into a separate savings account to steadily build your reserve over 6 to 12 months.

Your next step: Set up one automatic transfer today so you can start building your cash buffer immediately.

If you work with unpredictable income, keeping track of your money can feel overwhelming. Luckily, there are tools that combine invoicing, expense tracking, and forecasting into one simple platform. These tools give you real-time insights into your cash flow and help you know exactly where every dollar is going.

Try this: Pick a tool that matches your workflow and test it out for a month. It can save you time by reducing manual tasks and help you stay confident about your money management.

Tool Name Function Key Feature Pricing Summary
money organizer Handles invoicing, tracks expenses, and forecasts cash flow Real-time insights and automation Starts at $15/month
Budget Pro Manages expenses and forecasts income Custom alerts and scheduling Free basic; premium from $10/month
Invoice Master Automates invoicing and reminders Milestone-based triggers Starts at $20/month
Expense Tracker Categorizes and monitors expenses User-friendly dashboard with clear reports Free trial; plans vary

Your next step: Choose one or two tools from the list and try them for a month. This practical test will help you see which one fits your routine best and makes your freelance finances smoother.

Final Words

In the action of improving your freelance finances, we covered managing irregular income with clear strategies. We walked through setting up budgets, streamlining your invoicing, tracking expenses, forecasting income, and building a cash buffer. Each section offered practical steps and real-life examples to support your money planning. Remember, applying these cash flow management tips for freelancers can lead to steady progress. Try one new tactic this week and keep refining your system, it all adds up to a healthier cash flow. Enjoy the progress!

FAQ

What is cash flow management for freelancers and why does it matter?

Cash flow management for freelancers means tracking money coming in and going out. It helps prevent running out of money and keeps your bank balance positive despite irregular income.

How can freelancers balance expenses and income effectively?

Balancing expenses and income involves budgeting and planning. By mapping out fixed costs and setting aside funds for emergencies, you can stabilize your cash flow and avoid surprises.

What budgeting methods can help manage irregular earnings?

Using zero-based budgeting assigns every dollar to a job, while percentage-based budgeting allocates fixed slices of income to taxes, savings, and operating costs, making it easier to readjust each month.

How do automation tools improve invoicing and expense tracking?

Automation tools can send invoices promptly after milestones and categorize spending automatically, reducing manual work and helping you monitor cash flow in real time.

What steps should freelancers take to build a cash buffer?

Building a cash buffer involves setting aside one week’s average expenses and automating transfers. This practice creates a reserve that minimizes stress when cash flow is lower than expected.

Simple Budgeting Template: Your Way To Easy Savings

0

Do you ever feel like your money just slips away? Try this budgeting template to take control of your cash today. This free tool works in both Excel and Google Sheets, making it easy to track your income and expenses. In just a few minutes, you’ll see where your money goes and start building your savings.

Your next step: Download the template now and begin tracking your spending for a clearer picture of your finances.

Budgeting Template: Free Download & Quick Start Guide

Need a kickstart for your budget? Our free template works in both Excel and Google Sheets. It’s a simple, step-by-step guide to help you track money in and out.

Try this next step: Download the budget planner template and get started on organizing your monthly spending.

Here's how:

  1. Open the template in Google Sheets.
  2. Make a copy to work on your own file.
  3. Rename it to match your budget.
  4. Start logging your daily income and expenses.

We offer 11 free Google Sheets templates. These cover monthly, annual, savings, and 50/30/20 budget styles. For example, the Tiller Foundation Template automatically tracks your daily spending, income, and balances. This tool saves time and cuts down on mistakes, letting you manage your money and adjust your plans easily.

Budgeting Template Essentials: Excel vs Google Sheets Comparison

img-1.jpg

When choosing a budgeting template, match the tool to your style. Excel works offline and is perfect if you need detailed calculations. Google Sheets, on the other hand, offers free templates you can access online and share easily. Think about how you set up, update, and share your budget before deciding.

Excel shines if you like working with strong formulas and detailed reports like pivot tables. It’s great for deep data work and number crunching when you don’t always need to be online.

Google Sheets offers convenience with an online setup. It comes with free budgeting templates and add-ons like Tiller to keep your spending data updated. Both Excel and Google Sheets support useful formats like the 50/30/20 rule and a savings-first plan. Your choice should depend on whether you need real-time collaboration, automation, or a setup you feel comfortable with.

Feature Excel Template Google Sheets Template
Setup Quick offline start with strong formulas Instant online access with auto-save
Collaboration Limited sharing options Real-time teamwork
Automation Manual updates preferred Auto-updates via Tiller add-on
Customization Advanced pivot tables and charts Flexible, user-friendly design

Review these features carefully. If you prefer detailed analysis and full control over your data, Excel could be the best fit. But if you like real-time updates and easy sharing, Google Sheets may boost your productivity. Next step: Pick one template and start tracking your budget today!

Customizing Your Budgeting Template for Personal Goals

Start by sorting your income into clear sections that match your money goals. A simple plan is to set aside 20% of your income for savings (like a 401k, Roth IRA, or high-yield savings account) and reserve 50% for necessities such as rent (aim to keep it at or below 30% of your pre-tax income), groceries, and insurance. Think of this as your free financial planner that helps you manage everyday spending.

Your next step: Download a free budgeting worksheet and fill in your income and expenses from last month. It only takes about 10 minutes.

Next, reshape your budgeting template to fit what matters most to you. Create flexible sections for savings, needs, and extras. Build a home finance worksheet that lets you track each expense separately, for example, list meal planning costs, wedding expenses, net worth updates, or retirement contributions in different areas. This setup makes it easy to adjust as your goals change. Using clear labels, similar to a money organizer tool, helps you see exactly where your money is going and encourages regular reviews and updates of your budget.

Keep your template simple yet adaptable. Regular tweaks keep your budget accurate and current. By clearly separating essentials, savings, and discretionary spending, you can confidently work toward your financial goals and maintain a steady, healthy cash flow.

Tracking Expenses with Your Budgeting Template

img-2.jpg

Try this: Today, jot down every dollar coming in and going out using your budgeting template. Start by logging each purchase and income item daily. This simple habit gives you a clear, real-time snapshot of your cash flow. For example, right after your grocery trip, write down the amount you spent to keep surprises at bay.

Next, check out the interactive charts built into your template. These visuals help you quickly spot trends in your spending, such as overspending in certain areas. Set up recurring entries for subscriptions and utilities so you always have planned amounts for regular expenses. This step makes it easier to fine-tune your monthly spending plan and boost your savings.

Finally, set aside time each week to review your entries. A weekly check lets you catch any mistakes and adjust your budget categories as needed. Compare your logged amounts with upcoming bills and bank records to keep your data accurate. This regular review builds good habits and ensures you stay in control of your money. Your next step: grab your template and spend 10 minutes each week reviewing your transactions for a more secure financial future.

Budgeting Template in Action: Sample Scenarios & Reports

Students often kick off their budgeting journey with a simple template that helps track everyday costs. Think of a student writing down lunch prices, textbooks, and bus fares on a monthly plan. Couples, on the other hand, use an income and spending log to split rent and bills. A printable chart makes it easy to see every expense at a glance. This clear setup turns confusing money details into simple snapshots.

Try this: Imagine a student who sets aside cash for meals, school supplies, and travel. They use charts to spot spending patterns. Similarly, a couple might divide shared bills and personal costs to understand their cash flow better. An annual overview, featuring a pie chart, even gives a quick picture during tax time. Real-life examples on Practical Money Skills (https://thefreshfinance.com?p=1412) show how different groups tweak their budgets and hit their savings targets. Whether you’re a student or managing a household, these tools let you know where every dollar goes and help you plan ahead. Your next step: Download a budgeting template and jot down your expenses today.

Final Words

In the action, this guide breaks down a full budgeting workflow. We compared Excel and Google Sheets templates, shared a step-by-step setup, and explored real-life scenarios.

You now have a clear path to track spending, adjust categories, and build a repeatable system for managing irregular income. Use the downloadable simple budgeting template to start logging transactions today.

Enjoy the progress you make with these practical steps.

FAQ

What does a free simple budgeting template for Excel offer?

The free Excel budgeting template offers an easy-to-use tool for tracking spending and planning your monthly costs. It comes with pre-built sections that help you manage cash flow and automate calculations.

How does a free budgeting template for Google Sheets benefit me?

The free budgeting template for Google Sheets lets you track income and expenses online with ready-made models. It supports easy collaboration and automatic updates for smooth money management.

Where can I get a free downloadable budgeting template in PDF format?

The free PDF budgeting template is available for download and designed for print. It provides a simple layout to record monthly expenses and manage your budget without needing digital access.

Simple Budgeting: Enjoy Effortless Money Management

0

Ever notice how your money seems to vanish too quickly? A simple budget can give every dollar a clear role, which means you know exactly where your cash goes each month. This guide breaks it down into easy steps, so even on a tight budget you can see your spending and plan better. Ready to stop the confusion and take control? Try this: download our free budgeting worksheet and spend the next 10 minutes mapping out your expenses.

Simple Budgeting Guide: 5 Steps to Get Your Budget Under Control

Quick win: Make sure every dollar works for you today. Start by following these five steps.

  1. Calculate Your Total Income
    Add up all the money you receive each month. This includes your regular paycheck and any extra earnings. For example, if you earn $3,000 from your job and an extra $1,000 from a side gig, your monthly total is $4,000.

  2. Save First
    Decide how much you want to save before spending any money. Set up an automatic transfer to your savings account so that saving becomes a regular, fixed bill. For instance, put aside $500 each month just like paying your rent.

  3. List Your Regular Bills
    Write down all your monthly expenses such as rent or mortgage, utilities, and any regular loan payments. Also, note bills that occur less often, like a quarterly electricity bill.

    Expense Type Example
    Fixed Rent, Loan Payments
    Irregular Quarterly Electricity Bill
  4. Assign Every Dollar
    Use a zero-based budget by giving every dollar a job, whether it goes to bills, savings, or paying down debt. This means your income equals your total expenses exactly. If you have $4,000, plan exactly how much goes where for fixed costs, savings, and extra spending.

  5. Check and Adjust Every Month
    Take a few minutes at the end of each month to compare your planned budget with what you actually spent. Make small tweaks if your income changes or if unexpected expenses come up. This regular check helps keep your budget working for you.

Your next step: Grab a notepad or open your budgeting app and list your income and expenses. It only takes 10 minutes to start building a solid plan.

Setting Up Your Simple Budget Framework

img-1.jpg

First, gather all your key numbers. Write down your total monthly income. For example, if you earn $3,500 and have $1,200 in fixed bills, note these amounts for your plan.

Next, list your expenses and sort them into three groups:
• Fixed: Regular bills like rent and loan payments.
• Variable: Costs that change each month, such as groceries or fuel.
• Occasional: Expenses that come up less often, like car maintenance.

Then, make a detailed tracker using a spreadsheet. Create separate columns for each expense type. For instance, in one row, you might record: "Rent – $800, Groceries – $300, Car care – $50." This makes it easy to compare each category side by side.

Expense Category Examples
Fixed Rent, Loan Payments
Variable Groceries, Fuel
Occasional Car Maintenance, Annual Premiums

Start entering your numbers into your worksheet today. This clear setup will help you see where your money goes and keep your budget on track.

Zero-Based Budgeting in Simple Budget Setup

Every dollar gets a job. Start by splitting your income into needs, wants, savings, and debt payments. For example, if you earn $3,000, decide on definite amounts for essentials like rent and utilities, fun money, saving, and paying off debt.

Write down these amounts. At month’s end, compare your planned sums to what you actually spent. If you set aside $100 for fun but spend $120, adjust your plan for the next month.

Try this: make a list of each category with its dollar amount. Then, review it every month to spot changes and tweak your budget for better results.

Simple Budgeting: Prioritizing Savings and Debt Repayment

img-2.jpg

Set up your automatic transfers with a clear purpose. Instead of just moving money into savings, name the transfer so you know exactly what it's for. For example, when you get paid, send $300 straight into your "Rainy Day Fund" to build a cushion for unexpected repairs.

Do the same for debt payments. Label a $150 credit card payment as a step toward long-term financial freedom. This simple detail can help you stick to your plan and see each payment as a commitment, not just another bill.

Consider using separate accounts for bills, savings, and debt. When you see labels like "Essential Debt Payment" or "Future Investment," you'll be less tempted to dip into those funds. Each account has a clear job, so your money stays on track.

Write your goals next to your automatic settings. Jot down that your "Rainy Day Fund" is for sudden repairs. This personal touch reinforces the importance of these transfers.

Try this: Review your current automatic transfers and update each one with a clear, motivating label. Small tweaks today can lead to a stronger, more secure financial future.

Tracking Variable Costs in Your Simple Budget

Simplify your budgeting by using a digital envelope method. Set up a separate envelope for each expense category like groceries, fuel, and entertainment. For example, if you plan to spend $300 on groceries, create an envelope just for that. Each day, jot down what you spend using an app or a simple spreadsheet. This way, you always know how much remains in your envelope.

Use this checklist:

  • Create digital envelopes for every variable cost.
  • Log your spending daily to see your progress.
  • Every week, review categories like dining out or hobbies.

Make it a habit to review your discretionary spending each week. If you see entertainment expenses nearing your limit, adjust your spending right away. Try this: set a weekly reminder to review each envelope. This small step keeps your money management clear and your budget on track.

Building Flexibility in a Simple Budget Over Time

img-3.jpg

Every month, take a quick look at your spending and add a small extra percentage to your income as a cushion. Think of it as your backup fund to cover unexpected costs. For example, if you’ve budgeted $300 for groceries, setting aside an extra 5% (about $15) can help when costs run a bit higher than planned. One reader shared that adding this little buffer monthly kept their budget on track.

Spend a few minutes each month comparing what you planned to spend with what you actually spent. If you notice you’re consistently overspending or costs are rising, adjust both your main budget and the mini buffer.

Make it even easier by setting up automatic transfers for savings and bill payments. This automation saves time and keeps your money plan running smoothly.

Try this:

  • Add a small spending buffer during your monthly review.
  • Compare planned spending with actual spending and adjust the buffer if needed.
  • Use automation for bills and savings as part of your monthly routine.

Simple Budgeting Tools: Free Templates and Resources

Free budgeting tools make it easy to plan your money. These ready-to-use templates have spaces for your income, fixed bills (like rent or loan payments), grocery costs, savings, and debt. A single template might include columns for your monthly take-home pay, regular bills, and even a spot for extra expenses.

Some templates use the 50/30/20 rule (spending 50% on needs, 30% on wants, and 20% on savings or debt). Try this: list your income, put fixed bills under needs, record extra spending under wants, and assign the rest to savings or debt repayment. This layout helps you quickly see if your spending follows your goals.

Before you fill out your template, gather your pay stubs, monthly bills, and recent receipts. Having these numbers at hand makes sure your budget is accurate.

Try this: download a free budget template today, fill in your information, and take a clear look at where every dollar goes. Each step brings you closer to smarter money management.

Final Words

In action, this guide offered clear steps to plan your money. We covered calculating income, prioritizing savings, and listing expenses. We also detailed how to use the zero-based method to assign every dollar and track variable costs. A spending buffer and regular reviews help keep your plan flexible. Embrace a simple budgeting approach that cuts through clutter and helps you take control today. Enjoy putting these quick wins into practice for a more secure financial future.

FAQ

Q: What is a simple budgeting template?

A: The simple budgeting template serves as a ready-to-use worksheet where you list income, fixed and variable expenses, savings, and debt. It often comes as a PDF or interactive calculator for quick setup.

Q: Is there a simple budgeting app?

A: The simple budgeting app is a mobile tool that helps track income and expenses. It offers easy data entry and clear summaries, making everyday money management more straightforward.

Q: How can students create a simple budget?

A: The simple budgeting process for students involves listing income, tuition, rent, and essential expenses. This approach highlights necessary spending and minimizes extras, keeping finances manageable while in school.

Q: How do I budget money if I’m a beginner?

A: The beginner budgeting method starts by reviewing income and listing fixed versus variable expenses. Assign every dollar a role to cover needs, wants, and savings, ensuring complete money control.

Q: How do I prepare a budget for a company?

A: The company budgeting process involves detailing business income, fixed costs, and variable expenses in a structured format. This organized system tracks cash flow and guides resource allocation for stability.

Q: What is the easiest budgeting method?

A: The easiest budgeting method is zero-based budgeting because it assigns every dollar to expenses, savings, or debt. This clear system minimizes unallocated funds and helps keep spending in check.

Q: What does the 50/30/20 rule budget mean?

A: The 50/30/20 rule budget divides income into 50% for essentials, 30% for lifestyle choices, and 20% for savings and debt repayment. This simple split helps create a balanced spending plan.

Q: How can I save $10,000 in 3 months?

A: Saving $10,000 in 3 months requires boosting income, cutting discretionary spending, and following a strict budget. Set short-term targets and automate savings to consistently work toward your goal.

Q: What is the 70/20/10 rule for money?

A: The 70/20/10 rule divides income so that 70% covers regular expenses, 20% goes to savings or debt repayment, and 10% is allocated for discretionary spending, offering a clear guide for managing money.

Tax Planning Tips For Freelancers: Save Big Now

0

Ever stress about taxes before your project even starts? Freelancers can face extra fees or penalties if deadlines slip. This guide lays out clear, practical steps to lower your tax bill and keep more cash in your pocket. You’ll learn how to set up quarterly payments and track expenses the smart way. Try these steps today and start saving more on your taxes.

Essential Tax Planning Tips for Freelancers

Freelancers face extra tax duties. You cover both parts of self-employment tax: 12.4% for Social Security and 2.9% for Medicare, plus federal and state income taxes. Missing quarterly payments can lead to penalties and extra fees. Try this: mark your calendar for April 15, June 15, September 15, and January 15.

Watch your income and expenses throughout the year. If you expect more earnings later, you might delay income or speed up deductions now. For example, pushing a project invoice into next year could lower your tax bill this year.

Consider setting up a Health Savings Account (HSA). This account works like a medical IRA, letting you contribute pre-tax dollars to cover health costs while lowering your taxable income. It serves as both an emergency fund and a tax saver.

Keep track of your business expenses like office supplies, travel costs, and mileage. A simple trick is to snap photos of receipts using digital tools. This makes record-keeping easier and helps you claim every deduction.

Also, contribute to retirement accounts such as SEP IRAs, which let you deduct up to 25% of your net earnings. This move not only reduces your taxes but also builds your future savings. Make sure to keep detailed records to support your deductions should you ever face an audit.

Maximizing Freelancer Deductions with Contractor Expense Strategies

img-1.jpg

Freelancers can cut their tax bills by keeping track of everyday expenses. Deductible items include office costs such as rent and utilities, fees spent on advertising and marketing, and even business mileage. It’s important to hold on to receipts and mileage logs. For instance, note down the date, destination, and purpose of each business trip to back up travel deductions like airfare, lodging, or rideshare fares.

If you buy equipment or other long-term property, you might qualify for a full deduction right away using Section 179 or MACRS depreciation. You can also count professional fees, like those paid to accountants or attorneys, and insurance premiums related to your business as deductions.

Another useful tip is to take advantage of the home office deduction. If your workspace meets IRS standards, you can use the simplified method, which lets you deduct $5 per square foot, up to 300 square feet. Plus, making contributions to a Health Savings Account (HSA) not only covers health costs but also lowers your taxable income.

Try this: Use accounting software or a receipt-scanning app to log your expenses digitally. Doing so backs up every expense, cuts down the risk of an audit, and helps ensure you claim every deduction you deserve.

Quarterly Tax Planning for Freelancers and Estimated Payments

If you’re a freelancer, there are four important tax dates to know: April 15, June 15, September 15, and January 15. Mark these dates on your calendar so you avoid extra fees from late payments.

Here’s a simple next step: Use the Form 1040-ES worksheet to predict your income for the year. If your income is unpredictable, you can use a safe-harbor rule based on 100% to 110% of your last tax bill. For instance, if you earned $40,000 last year, you might calculate your current taxes using 110% of that amount. Then, compare these amounts to estimates based on your current earnings.

Keep track of every change you make. If you start earning more than expected, update your numbers in the middle of the year. Try these steps:

  • Write down your expected income and expenses for this year.
  • Complete the Form 1040-ES worksheet twice: once using your actual estimated income and again using the safe-harbor rule.
  • Make your quarterly tax payment on the exact due date to dodge extra fees.

A handy tip: Set a reminder to check and update your numbers every two months. This will help you balance your payments and keep surprises at bay when tax time rolls around.

Record-Keeping Practices and Digital Tools for Freelancer Tax Efficiency

img-2.jpg

Keep your records organized all year with smart methods that go beyond the basics. Try connecting your bookkeeping software (like QuickBooks or Xero) to your tax tools so things update automatically. This means fewer mistakes and less time spent on data entry. For example, Sarah reduced her weekly record updates by 20% after setting up an automated system.

Always back up your files in the cloud. Scan and save your receipts, invoices, and mileage logs on a secure cloud platform so you’re ready come tax time or if you need audit support.

Here are some simple steps for staying audit-ready:

  • Connect your accounting software with your tax tool for automatic updates.
  • Use cloud storage to keep all your expense records safe.
  • Maintain a checklist to note any manual tweaks or errors.

Plan a monthly routine to review your automated reports and check your cloud backups. This system not only saves you time but also boosts your confidence in your record-keeping.

Optimizing Freelancer Tax Savings with Coordinated Deductions

Freelancers can cut their tax bills by combining retirement contributions, health savings, and home office deductions into one clear plan. This approach simplifies your strategy so you don’t have to keep track of separate details over and over.

• SEP IRA: Contribute up to 25% of your net self-employment income. For example, in 2024 the limit is $69,000 (and $70,000 in 2025). Try this: If your net income is $50,000, you can deduct up to $12,500 by contributing 25% of it.

• Health Savings Account: You can add pre-tax money to your HSA, up to $3,850 for individual plans or $7,750 for family coverage in 2024. Try this: Use your HSA funds for all eligible medical costs and enjoy tax-free withdrawals when you spend your money.

• Simplified Home Office Deduction: Deduct $5 per square foot for your home office space, up to 300 square feet. Try this: Measure your workspace and review IRS guidelines to ensure you can claim the deduction.

Strategy Limit Benefit
SEP IRA 25% of net income; $69,000 (2024) Lowers taxable income and boosts retirement savings
HSA $3,850 (individual) / $7,750 (family) (2024) Offers tax-free money for eligible medical expenses
Simplified Home Office $5 per sq ft (max 300 sq ft) Reduces taxable income by subsidizing your home workspace

Review your net income and expense details to choose the right balance of contributions and deductions for you. Try this: Use a budget spreadsheet to lay out your monthly cash flow so you can optimize your retirement savings while lowering current taxes.

Advanced Tax Strategies for Freelancers: Pass-Through Deductions and Entity Structure

img-3.jpg

The 20% Qualified Business Income (QBI) deduction under Section 199A can cut your taxable income if you operate as a sole proprietor, an LLC, or an S corporation. This means more money in your pocket at tax time. First, check if your business meets the criteria so you can take advantage of this benefit.

Switching to an S corporation might really change the game for you. Start by registering your business as a corporation or LLC in your state. Then, file IRS Form 2553 by March 15 to elect S corporation status. For example, if your net income is $50,000, you could pay yourself a fair salary via W-2 wages and then distribute the rest of your earnings in a tax-smart way. This can help lower the self-employment tax you owe.

It’s essential to follow IRS self-employment rules. Keep clear records to show you’re paying yourself a reasonable salary. Organized payroll documents help ensure you claim deductions correctly. Compared to a sole proprietorship, with all income subject to self-employment tax, the S corporation strategy could save you a substantial amount.

  • Verify your eligibility for the 20% QBI deduction.
  • File IRS Form 2553 by March 15 if you decide to switch to S corporation status.
  • Keep detailed payroll and compensation records to back up your tax deductions.

Your next step: Review your business structure and tax records today to see if these strategies could work for you.

Proactive Tax Planning for Freelancers with Professional Advice and Audit Preparedness

Freelancers deal with tax issues that can be tricky. That’s why having advice from a trusted CPA or enrolled agent is key. They can point out tax credits, state perks, and safe options that you might miss. With their help, you can build a simple checklist that covers expense reviews, quarterly estimated payments, retirement plans, and HSA contributions. This makes it easier to keep your books in line with IRS deadlines.

Audit triggers include oversized home office claims, high mileage deductions, or mismatches between what’s reported on your 1099 and Schedule C. Keeping clear records for at least 6 years and knowing what IRS notices mean can lower your audit risk. Your tax expert can also find extra tax breaks through detailed research, which may help lower your tax bill.

Try this:

  • Set quarterly tax review appointments.
  • Regularly update and balance your bookkeeping.
  • Save digital copies of all your receipts and invoices.

Your next step: Book a meeting with a tax professional to check your current plan and boost your audit readiness.

Final Words

In the action, we covered tax planning tips for freelancers from tracking self-employment taxes and meeting quarterly deadlines to maximizing deductions and leveraging retirement contributions. We explored digital record-keeping and smart expense tracking, alongside effective methods for utilizing HSAs and SEP IRAs.

We finished with strategies for professional advice and audit readiness. Use these tax planning tips for freelancers as a practical guide to manage your money confidently and make progress with clear, actionable steps. Keep moving forward with a plan that works for you.

FAQ

What are the best tax planning tips for freelancers?

The best tax planning tips for freelancers include planning quarterly tax payments, keeping detailed records, timing income and expenses, and taking advantage of deductions like the home office and retirement contributions.

How do self-employed tax rules differ from freelance tax rules?

The self-employed tax rules and freelance tax rules are similar since most freelancers are self-employed. Both pay Social Security and Medicare taxes, but differences often stem from business structure and record-keeping practices.

How does a self-employment tax calculator work for freelancers?

The self-employment tax calculator estimates what you owe by applying 12.4% for Social Security and 2.9% for Medicare on your net income, helping you budget for quarterly payments.

What does a self-employed tax return example show?

A self-employed tax return example shows how to report total income on Schedule C, list business deductions, and calculate net profit to ensure proper computation of self-employment tax.

How can a self-employed tax deductions worksheet assist with deductions?

A self-employed tax deductions worksheet helps track expenses like office costs, travel, and supplies, ensuring you capture every deductible item and effectively reduce your taxable income.

Is there no tax on tips for self-employed individuals?

The idea that there is no tax on tips for self-employed individuals isn’t accurate; tips are considered income and must be reported unless a specific tax rule provides an exception.

Freelance Budgeting Strategies For Variable Income: Thrive

0

Do you ever feel like your paycheck is a rollercoaster instead of a steady stream? Freelancers often deal with income that comes in bursts, making it tough to plan ahead. A simple budget that assigns a job to every dollar can help turn chaos into order. By planning where each dollar goes, you can keep your expenses in check, save for lean months, and avoid overspending. Try this: Follow our clear set of steps and use our easy budgeting tools to take control of your money and thrive.

Establishing a Reliable Freelance Budget for Variable Income

Quick win: Give every dollar a clear job. Freelancers can use zero-based budgeting to plan where each dollar goes. For example, if you earn $3,000 in a month, you might set aside $1,500 for bills, $600 for savings, $300 for taxes, and $600 for personal spending. This method helps prevent overspending.

Try this: Check out the zero-based budgeting method (https://thefreshfinance.com?p=1388). Start by listing your fixed costs like rent and utilities. Then plan for variable bills and unexpected costs. Once your basic needs are sorted, move any extra money into savings. Use one account for emergencies and another for quarterly tax payments.

Another tip: Keep a cushion in your checking account equal to one month’s living expenses. For instance, if your essentials cost $2,000 per month, set aside that amount for quick access during lean times. When you have more than your cushion, transfer the extra funds to your savings.

This approach helps you avoid overspending and prepares you for tax deadlines and market ups and downs. It makes irregular income easier to manage by showing you exactly where each dollar is going.

Your next step: Download a budgeting worksheet, record your earnings from last month, and assign each dollar to a specific category.

Tracking Variable Income and Forecasting Cash Flow for Freelancers

img-1.jpg

Freelancers need to keep a close eye on payment dates and banking delays to manage cash flow well. Start by writing down when you expect money and when bills need to be paid. For example, note that a client’s invoice is due in 10 days, but a bank delay might mean the funds arrive 2 days later.

Try this: Use a simple digital tracker or template, like this budget worksheet (https://moneyrepo.com?p=3015), to record your invoices and forecast your expenses. This tool lets you list scheduled payments, guess monthly income, and track upcoming bills. Knowing what’s coming in and out helps you see if you’re covered during slow periods. For example, if you finish a two-week project worth $1,200, planning for possible delays can keep your cash flow steady.

Here’s your next step:

  • Write down all your invoice due dates.
  • Note how long it takes for payments to clear.
  • Compare your expected money with your monthly bills.

Updating your projections often helps you avoid surprises on lean months. By following these steps, you'll set up a clear plan that keeps your revenue forecast on track and boosts your confidence in handling variable income.

Building Emergency Reserves and Savings for Unsteady Earnings

When your income isn't steady, building a backup fund becomes essential. Many freelancers recommend saving enough to cover 6 to 12 months of your basic costs before you go full-time. This safety net helps manage income ups and downs and cuts the stress when unexpected bills hit.

Open separate savings accounts to earmark money for taxes, daily expenses, and emergencies. A simple method is to put 10-20% of each payment into your emergency fund until you hit your goal. For example, if you earn $1,000, save $100 to $200 right away. This system helps you grow a cushion without neglecting regular spending.

Set up a routine to move extra funds from your checking account to these designated accounts on a regular basis. Keeping track of your contributions makes it easier to see progress and stay motivated with your freelance work.

Try this: Reserve a portion of every payment into your emergency account. It’s a smart step toward steady financial security no matter how irregular your income might be.

Allocating Freelance Income with Percent‐Based Budgeting

img-2.jpg

When you work as a freelancer, it helps to set aside a fixed percentage from each paycheck. Many freelancers save about 30% for quarterly taxes so you’re always ready for payment deadlines, even when your income isn’t steady. For instance, if you earn $3,000 in a month, putting aside around $900 for taxes is a smart move.

Next, try splitting the rest of your income further. You might allocate 10% to 20% for your personal spending and another 5% to 10% for retirement or an emergency fund. This simple plan keeps your money matters balanced, whether you’re having a big month or a lean one.

Using this percentage-based system ensures you cover both your business costs and your personal needs. In higher revenue months, sticking to these percentages grows your savings automatically and even leaves extra for growth opportunities. When times are tight, the same percentages help prevent overspending, so your essential bills always come first.

Try this: Take your earnings from last month. Calculate 30% for taxes, set aside 10% to 20% for personal expenses, and reserve 5% to 10% for savings. Write these goals on your budget worksheet and adjust based on your spending habits. This disciplined yet flexible approach keeps your finances on track, no matter how your income changes.

Implementing Real‐Time Expense Tracking and Cost Control for Freelancers

Freelancers can beat overspending by recording every expense the moment it happens. Whether you use a smartphone app or a simple spreadsheet, log each receipt, subscription fee, or tool purchase right away. This real-time tracking shows you exactly where your money goes and helps you find ways to cut costs.

Try this: Every time you grab new office supplies or pay for a membership, write it down immediately. For example, if you buy printer ink, log the cost right away and put it under business supplies. This habit stops those small prices from adding up and lets you change course quickly if funds run low.

Check your spending on a weekly basis. Look over each spending area to spot costs you can trim, like duplicate subscriptions or software you no longer use. Adjust your budget on the spot if you see that your expenses are rising faster than your income.

Your next step: Track every expense in real time for one month. Spend a few extra minutes each day to review and reconcile your costs. This habit will help you spot extra cash that you can reinvest wisely.

Handling Taxes and Deductions in Freelance Budgeting

img-3.jpg

Freelancers should budget about 30% of your earnings for federal and state taxes. For example, if you earn $4,000 in a month, set aside roughly $1,200 in a separate tax account. This way, you'll be ready when it's time to pay taxes.

Keep track of all your work expenses. Write down costs for your home office, supplies, and memberships. A smart move is to save digital copies of all your receipts and invoices. This habit not only makes filing easier, it can also lower your taxable income.

Open a dedicated tax-savings account to keep your tax money separate from your regular cash. This helps prevent accidental spending. Also, review your expenses regularly; update your records each month to catch any deductible costs you might have missed.

Try this: Before filing your quarterly taxes, make a list of all your expenses. Then, check out common tax incentives to make sure you're taking full advantage of every deduction available.

Securing Steady Income Streams and Anchor Clients for Freelancers

Anchor clients keep your cash flow steady. For instance, a retainer that covers two projects per month can give you reliable income even when other projects come and go. This setup means you have dependable earnings while still taking on extra work that can boost your overall revenue.

Another smart move is to diversify your services. Try adding new products, bundled packages, or training sessions that match your main work. This strategy not only attracts more clients but also protects you if one source of income dips. Mixing regular contracts with one-time assignments helps even out your cash flow and supports steady business growth.

Here’s what you can do next:

  • Pick a few long-term clients who need ongoing work.
  • Write clear contracts that set out your deliverables, like a promise to complete at least two projects every month.
  • Use part of your marketing budget to focus on getting repeat business and exploring new market areas.

Try this: Look at one of your recent client contracts and see if you can add a recurring service. Update your portfolio to showcase work that came from long-term agreements. This way, even when work is slow, you have a consistent monthly income for your basic expenses.

Reviewing and Adapting Your Freelance Budget Periodically

img-4.jpg

Keeping an eye on your budget is key when your income changes. Many freelancers set aside time each quarter to look at what they expected versus what really happened. For example, if you planned to spend $800 on subscriptions but ended up paying $1,000, it's time to make some cuts. Try adjusting by shifting your savings rate or even discussing new fees with clients if needed.

A simple review routine helps you spot where you're over or under budget. Use a checklist to match your actual income against your forecast. For instance, if your tax savings last month were lower than planned, adjust your percentages for the next month to fit your current needs.

Try this:

  • Write down your scheduled review dates and actual expenses.
  • Look for subscriptions or services you can cut back on.
  • Change your savings amounts as needed.

One freelancer found that just a 10% cut in subscription costs added an extra $150 a month, which helped cover surprise expenses.

Your next step: Pick a date for your quarterly review and print a checklist so you can compare your forecasts to what really happened.

Final Words

In the action, this post outlined a clear framework for managing irregular freelance earnings. We covered setting up a zero‑sum budget, tracking cash flow, building an emergency reserve, and planning for taxes. Next, assign fixed percentages to each paycheck and work toward steady revenue with reliable clients. Review your plan regularly to adjust to changes. Adopt these freelance budgeting strategies for variable income to build stability and control. Simple, practical steps like these can lead to lasting financial progress.

FAQ

How do I establish a reliable freelance budget for variable income?

Establishing your freelance budget means assigning every dollar a job, similar to the zero based budgeting method (see https://thefreshfinance.com?p=1388). It creates a spending plan that covers bills, savings, and growth smoothly.

How can I track and forecast my variable income effectively?

Tracking and forecasting income involves logging invoices and payment deadlines with simple templates like a budget worksheet (visit https://moneyrepo.com?p=3015). This helps you plan monthly inflows and adjust for lean periods.

How do I build emergency reserves when my earnings are unsteady?

Building emergency reserves means setting aside funds—usually 10–20% of payments—until you have six to twelve months of essentials saved. This cushion helps you manage income swings without sweating unexpected expenses.

How can I allocate freelance income using a percent-based approach?

Allocating income with a percent-based plan means setting fixed percentages for expenses, savings, and taxes. This system creates balance by dedicating, for example, 30% for taxes and a portion for savings or personal pay.

How can real-time expense tracking help manage freelance spending?

Real-time tracking means recording every expense immediately using smartphone apps or spreadsheets. This practice makes it easier to spot overspending, adjust quickly in low-income months, and free up cash for business growth.

How should I handle taxes and deductions in my freelance budget?

Handling taxes means setting aside about 30% of earnings for quarterly payments and carefully tracking deductible expenses like home-office costs. This structure ensures your tax savings are ready when bills are due, using smart planning tools.

How do I secure steady income streams and reliable clients as a freelancer?

Securing steady income means creating contracts with anchor clients and mixing recurring work with one-off projects. This balance helps smooth out revenue fluctuations and creates a reliable baseline for your cash flow.

How often should I review and adjust my freelance budget?

Regular reviews, such as quarterly check-ins, help compare your forecasted income with actual earnings. Adjusting allocations, trimming costs, or renegotiating fees keeps your budget in tune with changing income levels.

How To Manage Irregular Income As A Freelancer

0

Ever feel like your paycheck vanishes way too fast? Freelancing can be a wild ride, making your budget feel off-balance. Here’s a simple way to take control:

Split your money into separate accounts and set up a fixed “pay-yourself” system. This small change gives you a clear plan for tough months.

Your next step: Follow our easy guide and download our free budgeting template to start tracking your income today. With clear, step-by-step tips, you'll build a solid financial foundation as a freelancer.

Core Strategies for Freelancers to Manage Irregular Income

Begin by setting clear boundaries with your money. Open separate accounts for personal and business funds to keep your spending, tax payments, and personal expenses organized. Deposit all your earnings into one main account, then split the money for its designated uses.

Set up a fixed pay-yourself system that works like a regular paycheck. Every week, transfer a set amount into your personal account, save 20%–30% for taxes, and put aside funds for holiday pay. As your income grows, gradually increase your weekly withdrawal by about $50–$100 to reflect your rising earnings.

Before you commit fully to freelancing, build a cash buffer. Save enough to cover at least two months of both income and expenses. Then, maintain an emergency fund that covers one to three months of essential costs. Budget by looking at your lowest-income month. For more guidance, check out entrepreneur budgeting strategies and use a budget worksheet to get started.

Monitor your income and expenses for at least three months to calculate an average and adjust your budget accordingly. Ensure you spend less than you earn, and consider investing any extra cash. Plan each dollar ahead so that every cost serves a clear purpose. This method will help you manage inconsistent earnings and lay a solid foundation for your financial future.

Your next step: Open your personal and business accounts if you haven’t already, and start channeling your earnings into a dedicated account today.

Establishing a Baseline Budget Using Your Lowest Freelance Income

img-1.jpg

Start by setting up a monthly spending plan based on your lowest-earning month. This simple budget helps you cover key costs when money is tight, using your actual expense numbers even when your income changes.

  1. Write down your essential costs like rent, groceries, utilities, transport, and minimum debt payments.
  2. Find your lowest income month to use as the base for your plan.
  3. Set a fixed dollar amount for each must-have category so you always cover your basics. (Need help with each dollar's job? Check out our guide on creating a zero-based budget.)
  4. Put aside a little extra each month for emergencies using your real figures.
  5. Review and update your budget every month with actual spending numbers to keep it spot on. (For more budgeting tips, see our detailed guide.)

Try this next step: Open your budgeting app or spreadsheet today and list out your essential expenses. With this approach, even on lean months, you'll always have a plan to cover your needs and maintain control over your money.

Building Cash Buffers and Emergency Reserves for Lean Periods

Before you jump into full-time freelancing, save enough money to cover two months of income and expenses. This cushion helps you manage slow client work and unexpected bills.

Next, build an emergency fund that covers one to three months of your basic costs, like rent, food, and utilities. For example, if you earn $1,000 a week, set aside $1,000 every week until your fund is ready.

Also, create a holiday fund by saving an amount equal to one month’s salary. If your weekly pay is $1,000, transfer $1,000 each week into this fund so you can take planned breaks without stressing about daily expenses.

Keep these savings strong, even during downtime at year-end, to help cover both personal and business costs in lean periods.

Setting Up a Regular Pay-Yourself System to Simulate a Paycheck

img-2.jpg

Keep all your freelance earnings in one main account. Then each week or every two weeks, transfer a set amount, like $1,000, into your personal account. This simple method creates a regular paycheck feel and makes your cash flow predictable.

Set aside 20%-30% of every deposit for taxes, holiday savings, and reinvestments. As your income grows, increase your transfer by $50-$100 to mirror a pay raise.

Your next step: Set up a recurring transfer between your accounts. This ensures you always have a steady, simulated paycheck.

Key actions:

  • Keep all freelance income in one main account.
  • Transfer a fixed sum (for example, $1,000 weekly or biweekly) to your personal account.
  • Save 20%-30% for taxes, holiday funds, and reinvestments.
  • Increase your transfer by $50-$100 as your cash flow improves.

Example: Create a recurring transfer so that every Friday, $1,000 moves from your main account to your personal account, with about 25% of it set aside for taxes, holidays, or reinvestment opportunities.

Separating Business and Personal Finances to Maintain Clear Records

Keep your business money apart from your personal funds. It’s a smart move that makes bookkeeping clearer and helps you nail your tax reports. Start by opening a business checking account and get a debit or credit card that’s only for business expenses. This way, payments for things like software, conference fees, and mileage stay separate.

Using different accounts makes it easier to track cash flow and find tax-deductible costs. Each month, take a few minutes to check your business and personal accounts with tools like QuickBooks, FreshBooks, Excel, or Wave. This simple review helps you see your income and expenses clearly and keeps business costs separate from personal spending.

Key steps to follow:

  • Open a business checking account and get a dedicated debit or credit card.
  • Keep work-related expenses like office supplies, tech purchases, and mileage fees in this account.
  • Review both accounts monthly with your chosen financial tool to stay on top of your records.

Your next step: Set aside 10 minutes each month to review your accounts. This quick check helps you maintain clear records and gives you better control over your money.

Tax Planning and Quarterly Estimated Payments for Freelance Income

img-3.jpg

When you freelance, your income might change from month to month. That’s why it’s smart to plan for taxes. Every time you get paid, put 20-30% into a separate tax account so you always have cash ready when tax time comes.

Keep a simple record of deductible expenses. Write down things like meals with clients, laptop or software costs, office supplies, and even your mileage when driving for work. Using a basic spreadsheet or budgeting tool makes this a quick job and can lower the amount of tax you owe.

Mark your calendar for quarterly tax payments on April 15, June 15, September 15, and January 15. A few weeks before each date, check your records and see if you need to adjust your savings based on any income changes.

If you’re feeling uncertain about any tax questions, talk to a tax professional who can give advice for your situation.

Your next step: When you receive your next client payment, transfer 20-30% into your dedicated tax account to keep your finances in check and avoid year-end stress.

Diversifying Income Streams to Smooth Revenue Fluctuations

Relying on just one type of project can leave you facing dry spells. The good news is that adding different revenue channels can steady your cash flow and lower your risk. One solid move is to set up retainer contracts for work lasting between 3 and 12 months. This approach locks in regular income and helps you build lasting client ties.

Another smart idea is to nurture a steady client pipeline. Try sending out regular email newsletters and checking in on LinkedIn. This keeps your services front and center, turning potential leads into consistent projects.

You might also look at adding complementary services or digital products that match your skills. For example, if you're a writer, consider offering editing, content planning, or even downloadable templates. Bundling these into a package, say, three blog posts plus social media distribution for $600, can give clients a clear and attractive offer.

Your next step:

  1. Start offering retainer contracts ranging from 3 to 12 months.
  2. Build and maintain a client pipeline using newsletters and LinkedIn check-ins.
  3. Think about launching additional services or digital products.
  4. Create bundled service packages to make selling easier.

Mixing these strategies creates a more balanced income mix and smooths out the ups and downs that come with freelance work.

Monitoring, Reviewing, and Adjusting Your Freelance Financial Plan

img-4.jpg

Monthly check-ins are a must. Track your income and spending for three months to spot trends. Use tools like Excel, Wave, or QuickBooks to pull your numbers. For example, after three months, you might see that your subscriptions cost more than you thought. At that point, review each one and decide if you really need it. This simple step can trim your spending and help you set a better budget.

Next, adjust how much you pay yourself based on what you see. If your monthly income goes up, try increasing your weekly savings a bit. Say you normally bring home $2,000 after taxes; consider raising your weekly savings by $25. If your income drops, lower your transfers until you regain balance.

  • Check each subscription for value
  • Update weekly transfers as your cash flow changes
  • Use Excel to compare monthly income and expenses

This approach gives you a clear, step-by-step method to keep your freelance finances on track.

Final Words

In the action, the post breaks down clear steps to handle inconsistent freelance earnings. We covered building cash buffers, setting up a fixed pay-yourself system, and crafting a budget based on your leanest month. It also explained the value of keeping business and personal accounts separate, planning for taxes, and diversifying your income streams.

Use these tactics to master how to manage irregular income as a freelancer. Every small step brings you closer to stability and financial control. Keep moving forward and celebrate your progress!

FAQ

What is the 70/20/10 rule money?

The 70/20/10 rule means you allocate 70% of earnings for fixed living expenses, 20% for building savings or investments, and 10% for extra spending. This method helps keep spending in check.

How to deal with inconsistent income?

Dealing with inconsistent income involves setting a baseline budget based on your lowest month, building cash buffers, and using a regular pay-yourself system. These steps help make your money work steadily for you.

How to make consistent income as a freelancer?

Making consistent income as a freelancer starts by diversifying your revenue streams, establishing clear payment routines, and setting up a consistent pay-yourself process alongside smart budgeting practices.

What is the 50 30 20 rule for self employed people?

The 50/30/20 rule for self-employed means dedicating 50% of your income to essentials, 30% to wants, and 20% to savings or debt repayment. This framework helps balance your spending and saving habits.

Notion Finance Tracker Brings Smart Money Management

0

Ever feel like your money disappears before you notice? Notion Finance Tracker gathers your income, expenses, and transfers in one simple spot. It turns a mix of numbers into a clear picture of your spending habits so you can see exactly where every dollar goes. With better tracking, you can make smarter choices with your money. Try this: sign up now to see your finances in a fresh, clear view.

Notion Finance Tracker Quick Start Guide

Notion Finance Tracker is your one-stop tool for managing your money in one place. It brings income, expenses, and transfers together so you can easily keep an eye on your cash flow. With simple add sections and clear labels, you can begin tracking your finances fast.

Here’s what to do next:

  1. Create a free Notion account.
  2. Set up a new workspace to serve as your finance hub.
  3. Build a database to log your transactions.
  4. Add key columns: Date (when the expense or income happened), Tag (the category), Type (mark it as Income or Spend), Amount (the dollars involved), and Organization (who the money is from or going to).
  5. Configure quick-add sections on each page for fast entries.
  6. Create links between sections like Income, Expenses, and Transfers to easily navigate your hub.

Try entering a sample transaction right away and see your dashboard update in real time. This hands-on step helps you get comfortable with the system. By following these steps, you set the stage for smarter money management. Get started with a few test entries and watch your workspace turn into a clear, organized view of your financial life.

Notion Finance Tracker Dashboard Walkthrough

img-1.jpg

The dashboard is your go-to hub for keeping an eye on your finances in real time. You’ll see clear bar and line charts showing your monthly income against your expenses. There’s also a live clock and handy summary cards that show how much you’ve spent in each category. Use the custom views to filter by date, tag, or budget status, so you can spot trends quickly and keep your spending in line.

On the left, the navigation bar gives you quick access to sections like Income, Expenses, Subscriptions, Investments, Debt, Savings, and Reports. This simple design makes it easy to switch from detailed transaction records to an overall snapshot of your budget. If you go over your set limits, color-coded alerts pop up automatically. Try the quick-add buttons for one-click transaction entries and see how you can tailor the view to match your financial style.

Component Purpose
Income Chart Shows your monthly earnings
Expense Chart Tracks your spending habits
Net Worth Card Displays assets versus liabilities in real time
Budget Alerts Sends notifications when you exceed budget limits
Quick-Add Buttons Makes it fast and easy to add new transactions

Notion Finance Tracker Expense and Income Tracking

Keep track of your money with just a few clicks using the Notion Finance Tracker. This handy tool makes it easy to record your income and expenses. A simple pop-up form asks for the date, type, tag, amount, and organization details so that nothing is missed. Plus, you can add budget tags to each entry, and if you spend more than planned, it sends you an alert.

Here’s how to get started:

  1. Use tags to mark each entry as either Income or Spend.
  2. Set a spending limit on each category to help control your expenses.
  3. Turn on alerts to get a quick heads-up when you go over budget.
  4. Check your transactions every week to catch any mistakes.
  5. Compare these records with your bank statements to make sure everything adds up.

The template also lets you connect multiple accounts. It brings data from different bank accounts into one clear view. This means you can easily see how money moves between income and expenses. For instance, you can log freelance income separately from personal spending, which helps you manage both without getting them mixed up.

Your next step: Try adding a new transaction or linking a bank account to see how smoothly your finances come together.

Notion Finance Tracker Subscription and Investment Management

img-2.jpg

The Subscription Tracker table puts all your services in one clear view, both active and inactive. It shows you which subscriptions are current, coming up, or no longer needed by listing clear status labels, billing cycles, and costs. This setup makes it easy to check for unnecessary charges and stick to your budget. Plus, updating your subscription details is quick and simple, helping you avoid extra spending.

The Investment Tracker keeps an eye on your portfolio with three views: Buy-In, Update, and Sell. It records key details like your purchase price, how many shares you own, and the market value. It even calculates your profit or loss based on up-to-date numbers. In addition, the Net Worth Tracker compares your assets and debts, offering a real-time snapshot of your financial health.

  • Clear status labels for quick insights
  • Automatic profit calculations to track performance
  • Billing cycle reminders to keep payments on schedule
  • A net worth chart that shows your overall financial picture

Your next step: Spend a few minutes reviewing your subscriptions and investments. Update any details or cancel services you no longer need to keep your finances on track.

Notion Finance Tracker Savings, Debt, and Reporting Tools

When you manage your money, clear goals and regular check-ins make all the difference. With the Savings Fund, you can set a savings target with a deadline. A live progress bar shows you exactly how close you are to reaching your goal.

Our Debt Management tool helps you keep track of important details like interest rates, due dates, and monthly payments. It creates an easy-to-follow repayment plan and sends reminders so you never miss a due date.

The Monthly Report Generator gathers your income, expenses, transfers, and debt payments into a neat PDF report. This report gives you a clear picture of your overall finances at a glance.

Tool Function Alert Type
Savings Fund Track goal progress Progress bar
Debt Management Schedule repayments Due-date alert
Monthly Reports Generate PDF export Custom report headers

Reviewing your reports is a quick win for better money management. The summaries let you spot trends and tweak your budget if needed. Look over your PDF reports regularly and update your savings and repayment plans based on real data. This simple, step-by-step review keeps your finances aligned with your goals and makes managing money easier.

Notion Finance Tracker Customization and Mobile Access

img-3.jpg

You can make your Notion Finance Tracker work exactly how you want. Start by duplicating and renaming your database views to build custom layouts that separate things like school expenses from business costs. Next, set up filter presets so you can quickly view specific types of transactions or a certain date range. Try using conditional formatting and rollup features to highlight spending warnings with color and instantly sum up your totals.

For those on the move, import pre-built mobile pages into a new workspace to keep your tracker running smoothly on your phone. Adjust these settings to match your personal money plan, making it simple and clear to manage your funds. Experiment with these tweaks until everything looks and works just the way you envisioned.

Your next steps:

  1. Duplicate and rename database views for custom layouts.
  2. Set up filter presets to quickly sift through your data.
  3. Apply conditional color alerts and rollups for clear spending signals.
  4. Import mobile pages into a new workspace for on-the-go access.

Final Words

Jump right in and set up your workspace using the notion finance tracker. This guide covered quick-start steps, a clear dashboard layout, tracking income and expenses, managing subscriptions and investments, and monitoring savings and debt. Each section gives you a hands-on approach to tailoring the tool and managing your finances on the go. Try one small change today to see instant benefits. Embrace these actionable steps and watch your financial clarity grow.

FAQ

FAQs

Q: What is a Notion finance tracker template?

A: The Notion finance tracker template provides an all-in-one tool to log income, expenses, and transfers. It offers quick-add sections and core columns for simple, effective financial tracking.

Q: How can I get a free Notion finance tracker?

A: The free Notion finance tracker is available when you set up a free Notion account. It lets you organize your money management without extra costs.

Q: What does community feedback on Reddit say about the Notion finance tracker?

A: The Reddit community highlights the template’s ease of use and versatility. Users share customization tips and practical tweaks to manage finances more efficiently.

Q: How does the Notion finance tracker tutorial work?

A: The Notion finance tracker tutorial explains essential steps like setting up your workspace, configuring columns, and using quick-add features for seamless income and expense tracking.

Q: Is there a Notion finance tracker available on Etsy?

A: The Notion finance tracker on Etsy offers seller-designed versions with extra customization options. These versions often include unique designs that can fit your personal style.

Q: How does the Notion Finance Tracker benefit students?

A: The Notion Finance Tracker for students features labels and categories tailored for educational expenses. It simplifies budgeting and expense monitoring, making it a handy tool for student finances.

Q: What makes a Notion finance tracker the best option?

A: The best Finance Tracker in Notion combines accessibility, customization, and simplicity. This makes it ideal for busy individuals looking to organize their finances with minimal setup.

Q: What features does the Notion Finance Dashboard offer?

A: The Notion Finance Dashboard displays income and expense charts, real-time summaries, and quick-add buttons. It offers a clear, visual overview that helps you quickly monitor your financial position.

2 Roadmap Planning Fuels Product Success

0

Have you ever wondered why some products succeed while others fall flat? The key is a solid roadmap. Start by setting big goals and mapping out clear steps. When everyone understands the plan, each person knows how their tasks fit into the bigger picture. A product roadmap isn’t a list of daily to-dos, it’s your guide to real milestones. This simple approach leads to smoother teamwork and faster results. Try this: outline your main goals today and break them into clear, actionable steps.

Why Roadmap Planning Is Essential for Strategic Success

Roadmap planning creates a long-term strategy that lays out your product’s vision, direction, goals, features, milestones, and deadlines. It isn’t meant for daily tasks but to paint a clear picture of where you’re headed. When you have a roadmap, you can see what’s most important and the steps you need to take next.

A strong roadmap acts as a single source of truth for your whole team. Everyone – from developers to executives – gets to see how their work fits into the bigger picture. For instance, one company moved from vague goals to a digital planning guide by setting a detailed timeline of key initiatives. This shift helped them align their team and speed up their delivery process.

Roadmaps also bring clarity by grouping priorities and showing progress updates. They help teams work together by spotlighting dependencies and tracking progress. Consider a financial roadmap that lists financial targets alongside project milestones; clear steps and timelines like these make decision-making more straightforward and effective.

Try this: Write down your next big project’s goal and list three milestones that will help you reach that goal.

Building a Strategic Framework for Roadmap Planning

img-1.jpg

Start by setting out your vision and big goals. Write down what success looks like for your project. For example, note, "Boost user engagement by 20% this quarter."

Next, ask for input from your stakeholders and do some market research. Chat with your team, customers, and partners to get their ideas. Their feedback makes sure your plan meets real needs, such as making the interface simpler.

After that, break your work into themes and milestones. Group similar tasks together to make your plan easier to manage. List key themes like usability fixes or new feature launches, and set clear milestones. For example, "Q2 milestone: Beta test new user dashboard."

Then, pick your top initiatives. Decide which actions best match your goals by using a checklist or scoring method to rank your tasks. One sample goal might be, "Launch pilot program in 30 days."

Create a visual roadmap with tools like Gantt charts or calendars. A clear layout helps your team see the plan at a glance. Be sure to include timelines that show dependencies and key dates.

Set up a plan to communicate, get regular feedback, and manage risks. Schedule periodic check-ins to review progress and make adjustments as needed. Try this: set weekly meetings to discuss roadblocks and wins.

Finally, choose measurable KPIs and metrics to track your progress. Pick simple measures such as task completion rates or customer satisfaction. Whether you use Agile or Waterfall, select the approach that works best for your team.

Your next step: Write down your vision and list your top three insights from stakeholders using a whiteboard or spreadsheet.

Exploring Roadmap Planning Approaches and Types

When you're setting up a roadmap, use a method that fits your team and goals. Different types help you focus on key plans and actions.

• Company Roadmaps
These plans show your overall business strategy. They break things into categories like now, next, and later. This simple setup is great for large organizations to align teams and focus on big-picture goals.

• Product Delivery Roadmaps
These roadmaps focus on release dates and sprint cycles. Using tools like Kanban boards or simple timelines, they help you track project milestones and deadlines. This approach makes it easier for technical teams to manage their work.

• Customer-Focused Roadmaps
Aimed at keeping customers in the loop, these plans use clear formats, again, often now, next, later or release plans, to show upcoming features. They work well for companies that want to build trust by sharing clear updates with users.

Each roadmap type has its role. Company roadmaps guide overall strategy. Delivery roadmaps keep daily tasks on track. Customer roadmaps improve communication with users.

Try this: Grab a whiteboard and draw a timeline. Write down key tasks under each category to quickly see which roadmap fits your current project needs.

Tools and Templates for Effective Roadmap Planning

img-2.jpg

Roadmap tools give you a clear view of your projects without needing any coding skills. These platforms use drag-and-drop features so you can easily build your plan with calendars, Gantt charts, or Kanban boards. Imagine an interactive planner where you can move tasks around as simply as shifting sticky notes on your desk.

Online scheduling toolkits help your team keep track of tasks by showing key dates and deadlines in a calendar format. This makes it easy to see what must be done each day or week. Try this: set up your schedule and assign deadlines to each milestone so your plan comes to life.

There are many planning templates available too. You can choose from now-next-later boards, quarterly routines, or portfolio overviews. These templates offer a starting point that you can adjust to fit your style. For example, you might use a template that ranks tasks by urgency and then note, "Release feature update in 60 days." Tweak the plan later as you get feedback.

Collaborative planning systems make teamwork simple. They allow everyone to edit in real-time, leave comments, and update progress instantly. With built-in scenario planning, your team can quickly try out different ideas before picking the best one. Many of these systems work well with platforms like Jira or Trello, ensuring your work stays on track.

Feature Description
No-code Visualization Drag-and-drop interface for building roadmaps fast
Online Scheduling Calendar views and timelines to track deadlines
Collaboration Real-time editing and feedback to keep everyone aligned

Your next step: Explore a few of these tools with a free trial to see which one makes your roadmap planning easier and more effective.

Best Practices for Executing and Iterating Your Roadmap Plan

Start by naming a product manager who will own the plan and guide it. Set up regular update times and check-in meetings, like a short team review every Monday, so everyone knows what’s happening and can fix issues quickly.

Use clear numbers to track progress. For example, measure task completion rates or check off key milestones. Build a simple chart or dashboard to show how each part of the project is doing. This way, any problem area will stand out fast.

Set up a feedback loop with your team and stakeholders. Try scheduling a feedback session every two weeks to look over what’s been achieved and decide on next steps. This helps keep your plan fresh and working as your needs change.

Be ready to change priorities when the market shifts or your team needs more time. When unexpected problems come up or new chances appear, adjust your resources or timelines as needed. Spot dependencies early and plan for risks so disruptions are minimal. Make sure your roadmap fits into your sprint cycles, so each update builds on the previous one.

Your next step: Choose one part of your project, set clear milestones for the next sprint, and plan a review meeting to gather feedback and fine-tune your plan.

Roadmap Planning in Action: Case Studies and Examples

img-3.jpg

A SaaS company once used a now-next-later roadmap to bring their product, marketing, and sales teams together. They split tasks into clear groups so everyone knew what to focus on next. For example, they wrote, "Now: Roll out feature update; Next: Improve user interface." This clear system cut out confusion and helped each team see how their work fit into the project.

A hardware startup chose a release-plan roadmap for both hardware and firmware updates. They listed changes by release dates, which made it easy to match production schedules with tech updates. The team tracked progress on a visual timeline and adjusted dates when needed. One team member mentioned that seeing challenges early helped them shift resources to keep production on track.

A consulting firm used a portfolio overview to sort multiple client projects. They grouped work into key themes and set up tasks by priority using simple templates. High-impact projects came first. They noted, "Client A: High priority, due in 45 days; Client B: Medium priority, due in 60 days."

Try this: Grab a piece of paper and sketch a timeline. List your tasks using the now-next-later method and see if this approach works for your next project.

Final Words

In the action, we explored how roadmap planning sets a clear path to success. We covered the process of defining goals, gathering input, and prioritizing key initiatives. We also looked at different planning approaches, useful tools and templates, and real-world examples that bring the strategy to life.

Try applying these steps to form your own strategic roadmap planning system. With clear guidelines and actionable steps, you can align your team, track progress, and see measurable results. Keep building on your success and enjoy the progress ahead.

FAQ

What is a roadmap planning template?

A roadmap planning template is a ready-made guide that helps you organize vision, goals, milestones, and deadlines. It offers a clear structure so teams can quickly map out strategic priorities.

What are some roadmap planning examples?

Roadmap planning examples include using a now-next-later format for product features and a release-plan for coordinating cross-team initiatives in a SaaS firm. They illustrate how clear milestones keep projects on track.

What are roadmap planning tools?

Roadmap planning tools are software platforms that provide drag-and-drop features, online calendars, Gantt charts, and collaborative dashboards. These tools enable teams to visualize strategies and update plans in real time.

What is product roadmap planning?

Product roadmap planning is a process that outlines a product’s evolution over time by setting vision, planned features, release schedules, and customer-focused updates to drive development and achieve business goals.

What is a roadmap in project planning?

A roadmap in project planning is a high-level strategic plan that highlights vision, key milestones, and deadlines. It aligns team efforts and guides decision-making by showing the bigger picture.

How does roadmap planning work on Miro?

Roadmap planning on Miro involves using an online, collaborative whiteboard with templates. Teams can easily visualize strategies, arrange milestones, and adjust plans together in real time.

What is a roadmap (in planning)?

A roadmap is a long-term strategic plan that outlines your vision, goals, and major milestones. It serves as a single source of truth to align teams and drive progress in your projects or products.

How do you create a roadmap plan?

To create a roadmap plan, define your vision and goals, gather inputs, group work into themes and milestones, prioritize initiatives, visualize the plan with a template or tool, and establish review routines.

What are the key elements of a roadmap?

Key elements include vision, goals, major milestones, deadlines, and grouped initiatives. These elements provide a clear visual layout and set measurable targets to guide team efforts and track progress.

Is a roadmap the same as a Gantt chart?

A roadmap and a Gantt chart are different. A roadmap focuses on high-level strategic priorities and long-term goals, while a Gantt chart details individual tasks, schedules, and dependencies to manage day-to-day work.

Irs Tax Refund Amounts 2025: Bright Future

0

Think your big refund is a bonus? It might not be. In 2025, a large refund can mean you gave the government an interest-free loan all year.

New tax rules and recent budget cuts have changed the numbers. If you file your taxes between May 1 and May 31, you could see an average refund of about $3,000.

Plan your cash flow today. Read on for clear, step-by-step tips on what to expect and how to use your refund wisely.

Projected IRS Tax Refund Amounts 2025

In 2025, your tax refund will reflect new tax rules, inflation, and how much tax you paid throughout the year. The One Big Beautiful Bill Act cut taxes by about $129 billion. However, the IRS did not update its withholding tables. This means many people pay too much during the year. Remember, a large refund is not extra cash, it’s money you lent the government without interest.

E-filed returns with direct deposit usually get processed fast. Most refunds are sent out within 21 calendar days after the IRS accepts your return starting in mid-January.

If you file your taxes between May 1 and May 31, you can expect an average refund of around $3,000, likely to start arriving in June. In July, many taxpayers will see a direct deposit of about $2,939. These numbers can help you plan your finances for the tax season.

Your next step: Track your refund status online once your return is processed so you know exactly when to expect your money.

Timeframe Estimated Average Refund
Mid-January
(Return Processing Begins)
Within 21 days for e-filed returns
June 2025
(For May 1–31 Filings)
Approximately $3,000
July 2025
(Direct Deposit Wave)
About $2,939

Timeline and Deposit Patterns for 2025 Tax Refunds

img-1.jpg

Plan your cash flow by tracking key IRS refund dates and understanding how your refund is processed.

The IRS starts handling e-filed returns around mid to late January. When you opt for direct deposit, you usually see your refund within 21 days. However, paper filings or mailed checks often take a bit longer.

If you file between May 1 and May 31, you can generally expect a refund close to $3,000 in early June. For example, one filer submitted on May 15 and received about $3,000 in early June, helping to cover monthly bills.

Come July, many direct deposits roll out at once, averaging about $2,939.

Most online tax filing tools include an estimate feature that updates as your return is processed, so you can keep adjusting your budget in real time.

Your next step: Mark these dates on your calendar to match incoming funds with upcoming bills or savings goals.

Key Factors Affecting Your 2025 Tax Refund Amounts

Your earnings and the amount withheld from your paycheck shape the tax refund you get. If your employer withholds more than needed, you'll end up with a bigger refund, but that extra money is really an interest-free loan to the government. Many people choose this as a safety cushion, even though it isn’t the best way to keep your cash flowing.

Take one example: one taxpayer discovered that lowering the withholding on their W-4 a bit meant more money in every paycheck without risking a big bill when taxes are due. Bigger standard deductions also help because they let you keep more of your income tax-free, which can lower the taxed amount and change your refund.

Since tax brackets work on a progressive scale, even small changes in your income or deductions might shift the rate applied to what you earn. Refundable credits, like the Child Tax Credit or Earned Income Tax Credit, can also boost your refund considerably. One filer shared that using these credits added hundreds of dollars to their tax return, making a real difference in available cash.

If you’re self-employed, your tax situation works differently because you make estimated tax payments every quarter. If your estimates aren’t spot on, you might receive a refund or owe money at the end of the year. By handling these payments carefully, you can avoid overpaying and adjust your quarterly contributions to better match your income.

Your next step: Review your pay stubs and tax documents now. Use a tax withholding calculator to see if you’re overpaying and consider updating your W-4 to free up extra cash for your day-to-day needs.

Strategies to Maximize Your 2025 IRS Tax Refund Amounts

img-2.jpg

Adjust Your Withholding for Accurate Refunds

Start by taking a few minutes to use the IRS Withholding Estimator. This free tool helps you quickly see how your current withholding matches your actual income and deductions. The current tables haven’t caught up with the One Big Beautiful Bill Act tax cuts, so many people pay too much tax during the year.

Try this: Enter your monthly income, deductions, and credits into the estimator. Then update your Form W-4 with your employer to free up extra cash in each paycheck. Here’s what to do next:

  • Gather your most recent pay stubs and last year’s tax return.
  • Input your monthly earnings, anticipated deductions, and credits into the estimator.
  • Follow the tool’s advice to adjust your W-4 allowances.
  • Keep an eye on your paychecks to see the extra funds in action.

Filing your taxes early in January can also help speed up your refund. If you e-file and choose direct deposit, you might get your refund in about 21 days. Be sure to use filing-date alerts from your tax software to stay updated on any changes or delays.

Maximize Credits and Deductions

Getting the best refund is not only about adjusting your withholding, it’s also about claiming every credit and deduction you’re eligible for. Look into credits like the Earned Income Tax Credit, Child Tax Credit, or education and retirement-savings credits.

Try this: Make a list of any expenses or contributions from the past year that might qualify you for credits. Then review your situation with these steps:

  • Write down any education expenses or retirement contributions you made.
  • Check if you qualify for energy-related credits if you bought energy-efficient appliances.
  • Use your tax software’s error-check feature to confirm that no forms or expenses are missed.
  • Use a refund calculator on your e-file platform to see how these credits adjust your tax liability in real time.

By following these steps, you reduce the risk of missing important forms and improve your chances of a bigger refund in 2025.

Tracking Your 2025 Tax Refund Status with IRS Tools

You can easily see where your refund stands by using the IRS "Where's My Refund?" tool or the IRS2Go app. Just enter your SSN or ITIN, your filing status, and the refund amount to follow its progress through three clear stages: Return Received, Approved, and Sent.

If you file electronically, most refunds shift from Approved to Sent in about 21 days. And if you opt for direct deposit, you'll get a notification when the funds are on their way to your bank account.

For extra peace of mind, sign up for email or text alerts that update you each time your refund moves to the next stage. Many tax software programs can do this for you, too.

Your next step: Check your refund status today using one of these official IRS tools and plan your monthly cash flow around your expected refund.

Anticipated Policy Updates Shaping 2025 Tax Refund Amounts

img-3.jpg

Legislators are now considering changes to marginal tax rates to better match your tax bill with your earnings. This means you might see your refund shrink if too much is withheld now. Try this: use a tax estimator with a slightly lower rate. For example, if you currently get a $600 refund, a small rate cut might lower it to about $550.

There are also plans to tweak tax brackets and credits next year. Early signs suggest that these tweaks could narrow the gap between what you pay and what you owe, resulting in a smaller refund. Your next step is to watch IRS and Congressional policy changes so you can adjust your withholdings as soon as new guidelines are released.

Tools and Resources for Estimating 2025 Tax Refund Amounts

The IRS Withholding Estimator gives you a starting point for understanding your tax position. You can add extra insight by using third-party calculators that let you play with your numbers. Some of these tools even let you compare different scenarios side by side, update your data in real time, and show credits that the IRS tool might miss. For example, you can enter your figures and see how a $5,000 change in income alters your refund as you adjust your deductions and credits.

  • Compare multiple scenarios using advanced tools.
  • Pick calculators that update instantly and break down credits and deductions.
  • Use resources that alert you to new tax rules for a more precise forecast.

Your next step: Try entering different income and deduction numbers into a tool like "financial calculator online" (https://thefreshfinance.com?p=1384) and check out how your refund estimate changes.

Final Words

Jump right into applying the tips from this post. We covered key refund dates, factors that affect your refund, and practical steps like updating your W-4 and using IRS tracking tools. Breaking down refund timing, the impact of tax law changes, and direct deposit advantages can help you get the most out of your filing. Use our insights to plan ahead for irs tax refund amounts 2025 and take control of your financial outcome. Keep moving forward, each step makes a real difference.

FAQ

What is the average tax refund for 2025, and will tax refunds be more in 2025?

The average tax refund for 2025 is projected at around $3,000. This figure reflects changes in withholding practices and tax law adjustments, which may lead to higher refunds compared to previous years.

What is the IRS tax refund average amount for 2025?

The IRS tax refund average amount for 2025 is estimated at approximately $3,000, as adjustments in withholding tables contribute to larger over-withholdings and, in turn, bigger refunds.

What do tax refund statistics for 2025 show?

Tax refund statistics for 2025 indicate that most e-filed returns receive their refunds within 21 days. Bulk direct-deposit payments are expected to peak around $2,939 in July.

How does an income of $40,000 affect the average tax return?

For many filing with a $40,000 income, the refund can range from about $2,500 to $3,000, depending on eligible deductions and credits that reduce taxable income.

What do IRS filing statistics indicate for 2025?

IRS filing statistics for 2025 show a strong preference for electronic filing and direct deposit, which speed up refund processing and reduce delays compared to paper submissions.

Why did I get $2,800 from the IRS today?

Receiving a $2,800 refund means that your withholdings exceeded your tax liability by that amount. This difference is determined by your income, deductions, and credits reported on your return.

When should I expect my 2025 tax refund?

Taxpayers filing electronically generally see refunds within 21 days of IRS acceptance, with many refunds starting in June and peaking in early July.

Ai Personal Finance: Elevate Your Fiscal Health

0

Ever thought a machine might handle your money better than you? AI finance tools can help you budget, invest, and track expenses step by step. They learn from your spending habits and guess upcoming costs with real-world accuracy. Think of them as a personal coach watching your money around the clock, flagging odd expenses and fine-tuning your plan as needed.

Here's your next step: Explore how AI can free up your time and ease your stress, so you can focus on what matters most. Let your money work smarter for you today.

AI Personal Finance Solutions for Budgeting, Investing, and Expense Tracking

AI personal finance systems give you real help with everyday money management. They act like a smart helper that learns your spending habits and predicts your cash needs. In fact, these tools forecast upcoming expenses up to 50% more accurately than manual spreadsheets. Imagine a digital money manager that reviews your past trends and automatically tweaks your budget for the coming month.

These systems also work as smart expense trackers. They sort your transactions and send alerts if your spending veers off course. Think of a tool that not only categorizes your purchases but also flags unusual activity. By automating these routine tasks, you can save more than 5 hours each month, freeing up time for planning your next financial move.

Moreover, AI tools can serve as robo-advisors for your investments. They adjust your portfolio in real time, balancing risk and return while keeping an eye out for fraud. Picture a financial coach that monitors your assets 24/7, making smart changes as market conditions shift. This streamlined approach gives you insights that traditionally required a human advisor.

Together, these smart tools replace old-fashioned methods with a complete money management solution. You get a clear view of your budget, spending, and investments, all while automating daily tasks. Your next step: try a trusted AI budgeting app today to see how much time and stress it can save you.

Budget Smarter with AI-Driven Budgeting Systems

img-1.jpg

AI budgeting systems use machine learning to check your past spending and predict future cash flow. They work like a digital money manager, giving you alerts when bills are coming or if your spending suddenly rises.

These tools include a forecasting module and cash flow analyzer that quickly spot spending trends. This lets you spend less time doing calculations and more time making money choices. For example, you might see an alert that says, "Your spending for next week is 20% higher than usual. Please review your budget."

Try this next step: Take a look at this Budget Spreadsheet for a clear side-by-side comparison: https://moneyrepo.com?p=3000

Tracking Expenses with Intelligent Expense Trackers

Smart expense trackers go beyond just sorting transactions. They use machine learning to spot unusual spending patterns and send you helpful alerts. For example, you might get a message like, "Your dining spending jumped by 30% this month – take a look at your restaurant bills."

These tools boost your current AI finance system by digging deeper into your spending habits. This saves you time and helps you pinpoint where you might need to adjust your budget.

Your next step: Check your expense alerts today and see where you can trim your spending.

Optimizing Investments with Robo Financial Advisors and AI Wealth Management

img-2.jpg

AI-powered robo advisors act like a savvy helper for your investments. They set your portfolio on the right path while charging lower fees than traditional advisors. These digital money managers use data to balance risk and reward so you can build a plan that fits your needs without draining your cash.

They offer more than the basics. Advanced features like tax-saving planning and automatic rebalancing keep your investments in line with your goals. When market conditions change, smart tools adjust your portfolio quickly to maintain a good balance. This means you benefit from a data-driven approach that can save you money over time.

With robo advisors, you gain access to sophisticated investment strategies at a fraction of the cost of specialized human advisors. Try using an AI wealth management tool today to see how automatic rebalancing and live portfolio tracking can simplify your planning and secure your financial future.

Integrating AI with Your Personal Finance Ecosystem

Connect your favorite finance apps with smart AI tools to make money management a breeze. These digital guides work like friendly money coaches, giving you clear steps for budgeting and tracking your spending.

ChatGPT, for example, chats with you to offer budget tips and answer your questions in plain language. Gemini teams up with Google Sheets to update your data automatically, cutting down on tedious manual entries.

Microsoft Copilot works inside Excel to spot spending trends and suggest ways to trim costs. Meanwhile, Claude turns long financial documents into easy-to-read summaries so you can quickly catch the key points. Plus, many banking apps now feature chatbots that set up alerts and answer everyday money questions in real time.

Putting these AI tools together builds a simple, all-in-one platform for managing your money. They sharpen your spending strategy, boost savings efforts, and even help with investment planning.

Try this: Link your finance apps with these AI helpers today. A few simple tweaks can boost your financial health and guide you to a stronger future.

Addressing AI Personal Finance Challenges: Data Quality, Bias, and Privacy

img-3.jpg

AI personal finance tools need clear, correct data to work well. If the information you feed in is wrong, your budget forecasts might also be off. Bad data can confuse expense management and even skew credit score insights.

Sometimes, the tool may use biased data. For example, an automated planner might wrongly sort recurring charges if it doesn’t fully capture your spending habits. This mistake can lead to poor advice. It helps to understand how the tool makes its recommendations and to keep learning about personal finance basics.

Privacy is another key issue. Chat sessions with these tools might accidentally share your sensitive details, which can put you at risk from scams like deepfake phishing. Make it a habit to review your settings and ensure your data is managed transparently. A reliable finance tool pairs strong privacy protection with clear methods for handling your information. Check your data inputs and privacy settings today to keep your finances safe.

The future of AI in personal finance is transforming how you handle money. Instead of just tracking expenses, new tools help you act quickly. On-device AI keeps your data safe and gives you real-time, personalized saving advice. Better model compression and faster mobile hardware mean that smart saving tools are becoming more practical every day.

Imagine a digital savings coach that reviews your spending instantly and gives clear tips. These tools use a savings module to automate tasks and update their advice based on up-to-date information. This makes it easier to connect your daily spending with your long-term goals, so you spend less time adjusting your plan manually.

Soon, an AI assistant will work with a smart spending manager to cover every part of your savings plan. Look out for new savings mentorship programs that guide your choices and help every dollar work harder for you. These emerging trends not only improve budgeting but also boost your overall financial health with built-in wealth tracking tools.

Final Words

In the action, we've seen how AI personal finance tools streamline budgeting, expense tracking, and investing. You learned how automated systems cut routine tasks and boost forecasting accuracy. We discussed built-in safeguards and steps to integrate these tools with your existing apps. Plus, you saw how future trends could make saving and investing even simpler. Take the next step by exploring one of these AI solutions and experience smarter money management firsthand with ai personal finance. Enjoy exploring a clearer financial future.

FAQ

What are the best AI personal finance apps?

AI personal finance apps deliver smart budgeting, expense tracking, and investment insights. They use machine learning to predict spending and cash flow and simplify money management, giving you ready-to-use advice for financial wins.

What does AI personal finance Reddit discuss?

AI personal finance Reddit threads share user experiences, tips, and real reviews. They highlight the strengths and limitations of various tools, helping you understand which apps best meet practical budgeting and planning needs.

What is a free AI financial advisor?

A free AI financial advisor is an automated tool that offers budgeting, expense tracking, and investment guidance without cost. It uses smart analytics to provide step-by-step recommendations for better money management.

How does an AI financial planner differ from a traditional planner?

An AI financial planner uses data analysis for real-time budgeting and spending adjustments, unlike traditional planners that rely on manual updates. This results in quicker, more precise financial advice.

What is an AI financial advisor prompt?

An AI financial advisor prompt is a preset instruction that guides the tool to offer specific financial advice. It ensures that responses are focused, actionable, and aligned with your personal money management goals.

How reliable are financial advice AI chatbots and advisor tools?

Financial advice AI chatbots and advisor tools use advanced algorithms to offer personalized insights quickly. While they streamline budgeting and planning, cross-checking their recommendations with expert advice is a smart step.

Growth Plan Boosts Strategic Success

0

Have you ever thought one simple plan could change your business? A growth plan is more than just another item on your checklist. It lays out a clear roadmap that turns your goals into real, measurable progress.

Think of it like a step-by-step guide that helped an entrepreneur build his business from scratch. Each step is easy to follow and adds up to big wins over time. Your next step: write down one clear goal and list the small actions you can take to reach it.

What Is a Growth Plan and Why It Matters

A growth plan is a simple roadmap that helps boost your achievements and business income. It spells out clear goals and measurable steps. For a business, it goes beyond typical marketing or sales ideas. First, you write a short summary explaining your purpose. Then, you list specific growth targets and set milestones. For example, a company might plan to launch 2 new products next year while growing its market base. This clear plan shows the practical steps you need to take.

A personal growth plan works the same way for you. It starts by identifying what you really want in your career, relationships, or health. You then break that big goal into small, actionable steps. Consider this: before starting his first company, an entrepreneur made a simple to-do list that later helped him build a multimillion-dollar business. His focused plan turned clear ideas into real progress.

Both types of plans help you take charge. They encourage you to review what worked before, set new goals, and track your progress. This kind of planning is key to steady improvement over time.

Your next step: Write down one key goal for the next month, and list three concrete actions you can take to reach it.

Core Elements of an Effective Growth Plan

img-1.jpg

A good growth plan is your clear map for steady business growth. It shows what you want to achieve and how you can get there. Think of it as a simple guide with step-by-step actions like setting clear goals or planning to offer new products and enter new markets. Every part of the plan works together to keep your team, budget, and schedule on track.

Here are 7 key parts to include:

  • Executive summary: A short overview that explains why you’re making the plan and what you hope to achieve.
  • Growth objectives: Clear, measurable goals that help you track your progress.
  • Strategic tactics: Practical steps such as launching new products or tapping into new markets.
  • Resource planning: A list of the team members, tools, and equipment you need.
  • Financial projections: Realistic money estimates based on current data to predict future revenue.
  • Timeline and milestones: A schedule with dates and checkpoints that tie day-to-day actions to long-term goals.
  • Risk management: A look at possible challenges and simple ways to handle them.

When you put these parts together, you create a strong plan that guides your business forward. The executive summary sets the stage, and clear growth objectives point you in the right direction. By planning your actions and resources, you give your team the tools they need. Realistic financial figures and a detailed timeline help you stay on track, while risk management prepares you for any bumps along the way.

Try this: Grab a notepad and jot down one clear goal for your business. Next, list one resource you have that can help you reach that goal. This simple step can kickstart your growth plan in just a few minutes.

A Step-by-Step Process for Creating Your Growth Plan

Step 1: Gather Your Data
Start by collecting your financial records, customer profiles, and market research. This clear base helps you see trends, understand your strengths, and find areas to improve. Your next move? Pull together all that data to set a strong foundation for your plan.

Step 2: Define What Makes You Unique
Think about what sets your product or service apart. Look at customer feedback and even check out your competitors. Write down a short statement that explains why your offering fills a need and how it stands out. This simple step guides your strategy and helps keep on track.

Step 3: Pick Your Key Metrics
Choose several easy-to-track numbers that show if you're progressing toward your goals. These metrics, or KPIs, will help you see what's working and what needs a change. It’s a smart way to keep your plan flexible and focused.

Step 4: Create a Revenue Forecast
Use the data you have to build a realistic picture of your future income. Modeling your revenue helps set goals and plan your resources. It’s not about guessing; it’s about having a clear target for your business growth.

Step 5: Go After Quick Wins
Find simple actions that can instantly boost your success, like improving a process or tapping into a new customer segment. These quick wins build momentum and confidence, setting you up to tackle bigger projects later.

Step 6: Choose Smart Tech Investments
Look for affordable tools or software that can streamline your work without straining your budget. Compare options based on how well they simplify your tasks and help you adapt to changes. This way, every tech spend supports your overall growth.

Step 7: Set Up Regular Reviews
Plan a regular check, like a monthly audit, to look over your progress, finances, and market trends. These reviews let you adjust quickly if something isn’t working and help you keep your plan aligned with your business needs.

Step 8: Assign Tasks and Deadlines
Clearly decide who handles each part of the plan and when it needs to be done. This step builds accountability and keeps everyone moving forward. When tasks are assigned and deadlines set, you’re more likely to see real progress.

Personal Growth Plans: Applying the Growth Plan Framework to Yourself

img-2.jpg

Start your personal growth plan by getting clear about what you really want in life. Ask yourself what you’re aiming for. Dig deep into why these goals matter. This plan guides your personal journey and even helps your career when your personal goals match your work.

Your next step: Write down your top ambitions. Then, follow these simple steps:

  • List what matters most to you.
  • Spot any obstacles that might hold you back.
  • Gather the tools, resources, or coaching you need.
  • Put together a short, clear plan as your road map.
  • Celebrate small wins to keep your energy high.
  • Set regular check-ins to hold yourself accountable.

You can also boost your progress by attending key events. For example, the Time To Rise Summit (Jan 29-31, 2026), a session in Germany (Sep 2026), and a Miami session (Nov 2026) offer top coaching and networking. Think of these events as pit stops on your journey to success.

Mixing personal clarity with practical steps builds a strong plan that supports both a healthy mindset and a leader’s approach, an essential recipe for steady, proactive growth.

Monitoring, Evaluating, and Iterating Your Growth Plan

Keep track of your key numbers. Set up a live dashboard that shows your monthly revenue and customer count. When your revenue drops to $8,000 instead of $10,000, you can adjust your plan right away.

Review your figures on a regular schedule. Compare your actual results with your targets. Check your timeline and update your milestones if things change. For example, if a competitor enters your market and shifts your sales, update your goals.

Plan for the unexpected. Use the insights from your audits and dashboards to tweak your plan and stay on track.

Here’s what you can do next:

  • Set up a live dashboard to show clear KPIs.
  • Schedule regular reviews to compare real numbers with your goals.
  • Adjust your timeline based on your latest data.
  • Create backup plans for unexpected challenges.
Action Example
Live Dashboard “Watch your monthly revenue drop from $10,000 to $8,000 and respond immediately.”
Regular Reviews “Check quarterly sales and update goals if needed.”
Timeline Adjustment “Revise key milestones based on current performance.”

Growth Plan Templates and Case Study Insights

img-3.jpg

Our growth plan templates are designed for real results you can use right away. For example, one company in the Commerce & Payments space used one of our project-based service models to improve its payment system. They set clear goals and worked through risks step by step, which led to a 20% boost in revenue over 12 months. This shows that a solid, practical plan can drive big gains even in tough markets.

In another case, a Real Estate firm switched to a retainer plan from our templates to make its operations smoother while growing its market reach. They created a timeline with clear milestones and practical financial targets. As a result, they improved client engagement and increased property sales by 15%. This example proves that careful planning and clear resource management can build steady market progress.

A SaaS and PLG startup also reaped benefits by following a strategy-focused plan to refine its subscription model. By regularly collecting data, performing audits, and tracking key performance numbers, they sped up how quickly they improved their service. Drawing on our insights from financing and growth studies, they saw a 25% jump in active users. This case underlines that a flexible, detailed blueprint can help your business grow fast and run more smoothly.

Your next step: Pick one of these growth strategies that fits your business and try it out today.

Final Words

In the action, you built a clear picture of how a growth plan drives both business and personal progress. You saw the value of a solid strategy, from outlining core elements and following a step-by-step process to tracking results and using proven templates. Each section offered simple actions to start improving your financial results right away. Use a growth plan today to boost revenue or reach personal milestones. Take the next step, update your plan, and watch your financial future brighten.

FAQ

Q: What is a growth plan?

A: A growth plan is a written strategy outlining clear objectives, steps, and milestones to expand revenue or personal success. It details tactics, required resources, and timelines to help guide smart, targeted progress.

Q: How do I write a growth plan?

A: Writing a growth plan involves starting with an executive summary, setting measurable goals, detailing strategies and resources, forecasting revenue, and assigning timelines. It requires data analysis, clear steps, and regular reviews for best results.

Q: What growth plan templates and examples are available?

A: Various templates and examples exist, including business growth plans like DECA versions, personal growth plan templates, PDFs, and employee-focused plans. These tools provide frameworks to jumpstart planning and track progress.

Q: What are the 4 growth strategies?

A: The 4 growth strategies typically include market penetration, product expansion, market expansion, and diversification. Each strategy helps target different avenues for increasing revenue and market share in practical terms.

Q: What are the 7 pillars of growth?

A: The 7 pillars of growth include a clear executive summary, measurable objectives, detailed strategies, required resources, financial projections, a defined timeline, and risk management planning. These pillars ensure a solid foundation for successful growth.

Irs Amended Return Status: Steady Progress Ahead

0

Ever wonder why your IRS amended return status sometimes seems stuck? Checking your progress on IRS.gov can feel as slow as watching paint dry. But don't worry, we've got clear steps ahead.

In this guide, we break down three stages of processing your Form 1040-X: received, adjusted, and completed. We'll explain what each stage means and show you how to track your return quickly.

Your next step: Head over to IRS.gov, check your return status, and use our guide to understand where your amendment stands.

IRS Amended Return Status: Steady Progress Ahead

Use the IRS online amendment tracker on IRS.gov to quickly check your Form 1040-X status. This tool shows three clear stages:

  • Received: The IRS has accepted your amended return, but it is still under review. If you see this status, plan on waiting several weeks before any updates.
  • Adjusted: The IRS has finished reviewing your changes and updated your account. In this stage, you might notice a refund change, a balance due, or no change at all.
  • Completed: The IRS has fully processed your amended return. You will receive the final details and any next steps by mail.

If you mailed your amended return, you can usually see updates about three weeks after mailing. Electronic filings for tax years 2019 and later often update faster.

For a personal review, try calling the amended return hotline at 866-464-2050. Support is available in both English and Spanish. Have your Social Security number (or ITIN), filing date, and original AGI ready to speed up the process.

Try this: Log in now and use the online amendment tracker to get a clear picture of your return’s progress.

Timeline and Review Period for IRS Amended Returns

img-1.jpg

Paper-filed amended returns usually take about 8 weeks or more to process. You might see updates as early as 3 weeks after mailing your return. Keep in mind that if your return includes multiple corrections or extra documents, processing could take longer. We suggest checking your return status using the IRS tool.

Electronic amended returns for tax years 2019 and later often move faster when the changes are simple. However, if your adjustments involve many schedules or detailed verifications, they may need extra time for review.

Try this: Gather your documents and note your mailing dates so you can follow up if the review period stretches beyond the usual time.

Common Causes of Delays in Amended Return Processing

Filing an amended return can take longer when mistakes or missing documents slow things down. For example, if your 1040-X is incomplete or if you forget to include supporting forms for wages, interest, or business income, the IRS will need extra time to follow up. Be sure to attach every required schedule, like A, B, C, D, SE, or Form 8949, as leaving any out can delay the process.

Sometimes, the IRS is handling a large queue of returns. When many forms are in line, even a tiny error can hold up your amendment. Limited resources and a heavy backlog mean that each incorrect or incomplete submission can create further delays.

Minor math or clerical mistakes usually get fixed automatically, but if numbers don’t match or details conflict with third-party info, a manual check might be necessary. This extra step can slow the review process even further.

Try this: Before submitting your amendment, double-check that your calculations match your supporting documents and that you’ve included every necessary schedule.

Step Action
1 Review your figures against your documents.
2 Attach all required schedules.
3 Spend a few extra minutes on a final review before sending.

Taking these extra steps can help prevent delays and keep your amended return on track.

Monitoring Amended Refund Progress and Payment Methods

img-2.jpg

Once your amended return is under review, you can start tracking your refund. The IRS sends refunds in one of two ways: either a direct deposit into your bank account or a paper check in the mail. If you choose direct deposit, take a moment to verify that your bank and routing numbers are correct so your deposit isn’t delayed.

If you prefer a paper check, expect it 7-10 days after your return has been fully reviewed. If you don’t get your check within that period, give the IRS a call for an update on your refund.

The IRS offers an online amendment tracker that lets you see both your refund status and the progress of your amendment. When you log in, you can quickly check whether your refund will be deposited or mailed.

Try this: Open the “Where’s My Amended Return?” page, compare your amendment submission date with the expected refund timeline, and see if everything is on track.

Step Action
Direct Deposit Confirm your bank and routing numbers
Paper Check Expect your check within 7-10 days; call if it’s delayed
Tracking Refund Use the IRS online amendment tracker for updates

How to Contact the IRS for Amended Return Inquiries

If the automated system feels confusing or just repeats itself, ask for a live person. You can say something like, "I need help with my amended return," and then ask:

  • What should I do if my details don’t match the IRS records?
  • How long will it take to process my amended return?
  • When is the best time to speak with an agent?

Before you call, have your Social Security number (or ITIN), your filing date, and your original AGI ready. For example, you might explain, "I filed my return on April 15, 2022." This can speed things up.

If the system gives you repeated instructions or leads you in circles, try saying "operator" or repeat your request slowly.

Make your call early in the day so you have time to answer any extra security questions or follow-up steps.

Preparing Documentation for Follow-Up on Your Amended Return

img-3.jpg

Gather all your paperwork before calling the IRS about your amended return. Start with your filled-out Form 1040-X and your original tax return. Add any supporting papers like W-2 forms, 1099 forms, and schedules (A, B, C, D, or SE). Also, include any receipts or statements that back up changes like updated deductions or credits.

Use a checklist to confirm you have everything. For example, note that you compared your current figures with last year’s return to make sure everything matches up. If you’re expecting a deposit, double-check your bank routing and account numbers to help your refund reach you quickly.

Keep copies of all correspondence you mail along with any tracking receipts. This record helps when you speak with a tax professional or an IRS rep, especially if there are delays or additional reviews required.

Try this: Print out your checklist, organize your documents in one folder, and review them before contacting the IRS. Taking these steps now can save you time and reduce future frustrations.

Final Words

In the action, we explored how to check your IRS amended return status online. You learned about each update stage, from receipt to completion, and got clear tips on avoiding errors. We also discussed how to track refunds by confirming bank details or waiting for a paper check. Plus, we outlined how to contact the IRS and what documents to have on hand. Use this guide to take immediate steps toward using the online amendment tracker and keeping your financial process moving forward. Stay focused and keep making progress.

FAQ

What is the IRS amended return processing time?

The IRS amended return processing time usually spans eight to 16 weeks from receipt. Paper submissions take longer, while electronic filings for recent tax years tend to update faster.

What should I do if I have not received my amended tax refund?

Not receiving your amended tax refund indicates the check may still be in the process phase. Use the “Where’s My Amended Return?” tool online or call 866-464-2050 for a status update.

What is the IRS amended return phone number?

The IRS amended return support hotline is 866-464-2050, offering assistance in English and Spanish. Keep your SSN, filing date, and original AGI handy for verification.

Is the IRS processing amended returns?

The IRS is actively processing amended returns. The “Where’s My Amended Return?” tool online displays stages like received, adjusted, and completed to show progress.

My amended return says completed. When will I receive my check?

Once your amended return is completed, expect your paper check within 7–10 days if issued by mail. Direct deposits follow a similar quick timeline after final processing.

How can I check my Maryland amended tax return status?

To check Maryland’s amended tax return status, use the state tax agency’s online tracking tool or call their customer service for guidance on your corrected return’s progress.

How do I track my state amended tax return status?

Most states offer online tools for tracking amended returns. Visit your state tax agency’s website or contact their support center to get updated status information on your filing.

How do I check my California amended tax return status?

In California, track your amended tax return status by using the state’s online system through the Franchise Tax Board website, or call their customer service for details.

How far behind is the IRS processing amended returns?

The IRS might be processing amended returns behind schedule due to complex reviews or errors. Paper-filed returns tend to take longer than electronic submissions during busy periods.

How do I know if my amended tax return was approved?

Approval is indicated when the IRS status for your Form 1040-X changes to completed. The “Where’s My Amended Return?” tool online will clearly show if your return has been approved.

Why did I receive $2800 from the IRS today?

Receiving $2800 may reflect an adjustment or correction on your tax return, which resulted in a refund change. Contact the IRS or check your amended return status for specific details.

What is the due date for a revised return?

The due date for a revised return varies by situation and state rules. Generally, file your revised return as soon as you identify an error to ensure timely corrections.